|
|
In this tutorial we are going to look at the process of rendering in a more in depth way.
Rendering involves far more than just hitting a button and letting the computer do it's thing. As with everything else in Maya, you have a million settings to make it do what you want. Some are more apparent then others and some are more costly in terms of render time than others. This tutorial, rather than being solely a step-by-step how to, is going to be a balance between introduction and instruction. I am going to introduce you to some concepts, some settings and some tools and then leave the work to you. For those of you who are sweating right now, don't worry. I will still give you some step by steps and screen shots for setups etc. I just won't hold your hand the whole time. You are big kids now after all aren't you? So, our models are textured and our animation are done. Now we need to render it... Ok... Can't we just hit the button? The short answer is, um...well...yeah. The long answer is NO, ARE YOU KIDDING ME?!?!?!?
You just spent all that time working meticulous detail into your model and animation and you just want to let Maya have it and spit something out. Don't you think you owe it to yourself to at least spend a little time trying to make the render look good. After all, that is what you will be showing everyone upon completion. Possibly for your mom's fridge, your boss at work or, oh I don't know, your TEACHER? Alright, so now you are thinking, geez... this guy just won't let up...Fine... I will just crank all of the settings to the max and THEN hit the render button. Uber Max Quality couldn't possibly be a bad thing right? Again, you can do that if you want, but then again, you will probably still be waiting for it to finish while everyone else is retiring. Are you frustrated yet? Don't worry, we are going to look at the important base level settings that you will need to worry about to get your renders to look nice and still have a decent render time. As a bonus for your hard work I will also show you some cool stuff that will make your renders look even better. It's okay. You can say it .I am happy that I am your teacher too. :-) By the way, for continuity we will be using Mental Ray for the rendering in this entire tutorial.
For the first part of the tutorial we are going to look at render quality vs. efficiency. Below is a checklist of those items.
Here they are:
Lets get started shall we!
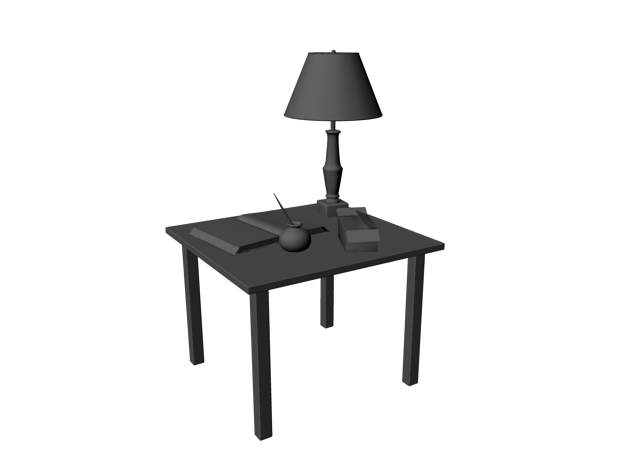
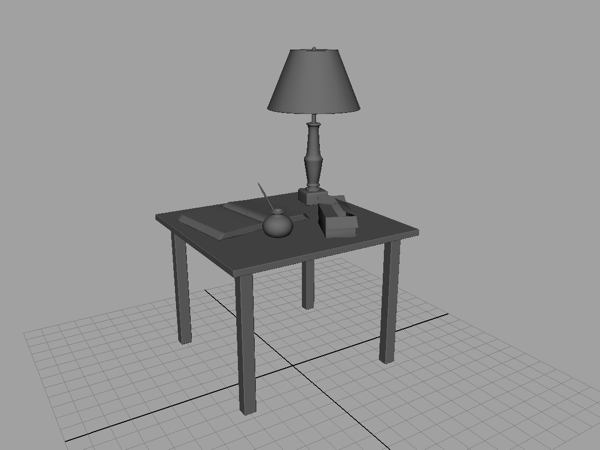
First we need to Acquire a model to work on.
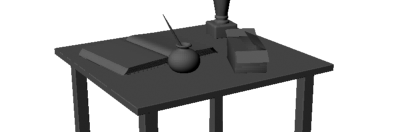
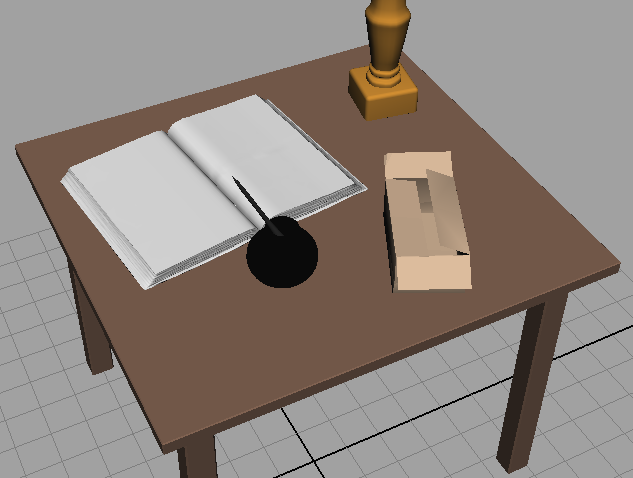
 Next, lets do a quick render to see what we get by doing nothing to our settings. To make sure we are rendering in Mental Ray:
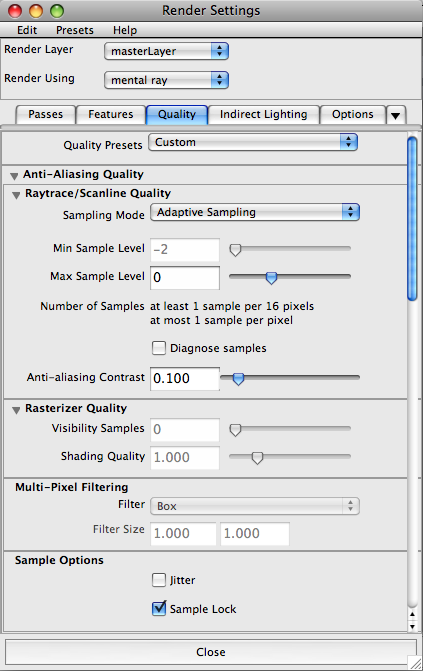
1. Open your Render Settings window. 2. Click and hold on the drop down menu at the top. 3. Choose mental ray from the list.
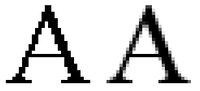
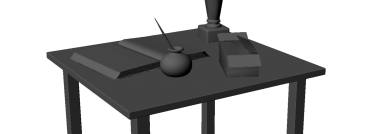
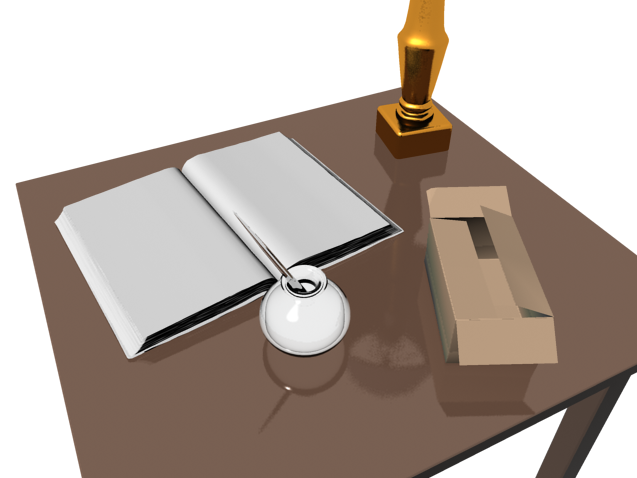
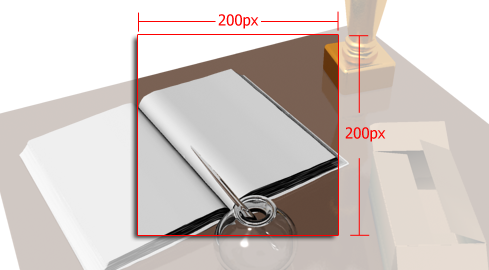
Yuuuuuuuuuuucccccckkkkkkk!!!!! 1. The Max Sample Level 2. Filter Changing the Max Sample Level to 1 will now set the sampling to 4 samples per pixel, which is better, but still pretty aliased. (see image below) Changing the Max Sample Level to 2 will now set the sampling to 16 samples per pixel. This time it is pretty darn good, but in circumstances like this we need just a bit more. (see image below) Finally changing the Max Sample Level to 3 will now set the sampling to 64 samples per pixel. This is about as clean as we really need to get for a rendering like this. (see image below) I hope you noticed that your render times got longer as you increased the Max Sample Level. You need to be aware of how this number effects both your final render "look" and your final render "time."
If your render times are getting really long but you are not seeing a significant change in the quality. Do not worry about bumping your levels higher. Treat it on a case-by-case basis. As I mentioned above the other section to look at here is the "filter." Box tends to be a bit sharp but a bit low quality. Triangle is a little softer then box and a medium quality. Gauss is the most soft of all of them and has a fairly high quality. Mitchell is the sharpest of them all and has a high quality. Lanczos is a balance between Gauss and Mitchell in terms of sharpness and has a high quality.
Milestone 'A' has been covered! We now know what anti-aliasing is and how to control it. Let's recap and see what we need to do next.
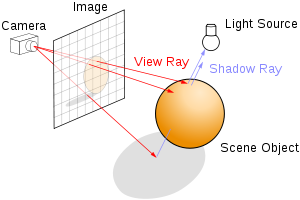
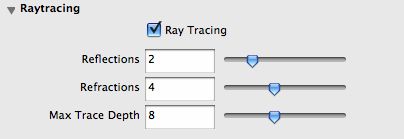
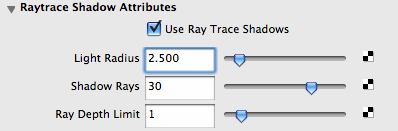
Milestone 'B' has been covered! We now know what raytracing is and how to control it. Let's recap and see what we need to do next.
The last thing we are going to look at are some resolutions and settings within maya that do increase quality, but to a point become pointless. This is going to be a quick sampling of these settings to watch out for.
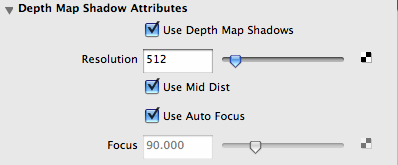
The first thing we are going to look at is shadows.
Milestone 'C' has been covered! We now know what main things should be checked to optimize our rendering quality and times.
Above all I want to see good renders here. You must include the following settings/elements in your render
|