Module 2 - Modeling
Modeling Introduction
For those of you who thoroughly enjoyed modeling projects in the past this should be a really fun thing. For those of you that didn't, well, it should still be enjoyable overall. Probably the best thing about this assignment and frankly most of the rest of the assignments throughout the semester is that I am providing you a lot of creative license. Rather than giving you specific step-by-step instructions on exactly how to produce something I will be giving you overall guidance on different ways you can utilize tools to create different types of projects.
What is modeling?
Modeling is the process of creating shapes inside of the 3D environment. This could be as simple as a flat plane or a simple cube or a complex face of a character or piece of architecture. Modeling in physical life could be compared to the process of sculpting where an artist takes a lump of clay and builds up a sculpture from it. Some programs offer similar sculpting like processes and tools to create 3D models such as ZBrush or Mudbox. Another analogy for modeling could be construction where one takes a collection of disperate materials and combines them in different ways to construct something different such as a house, a table or even a spacecraft.
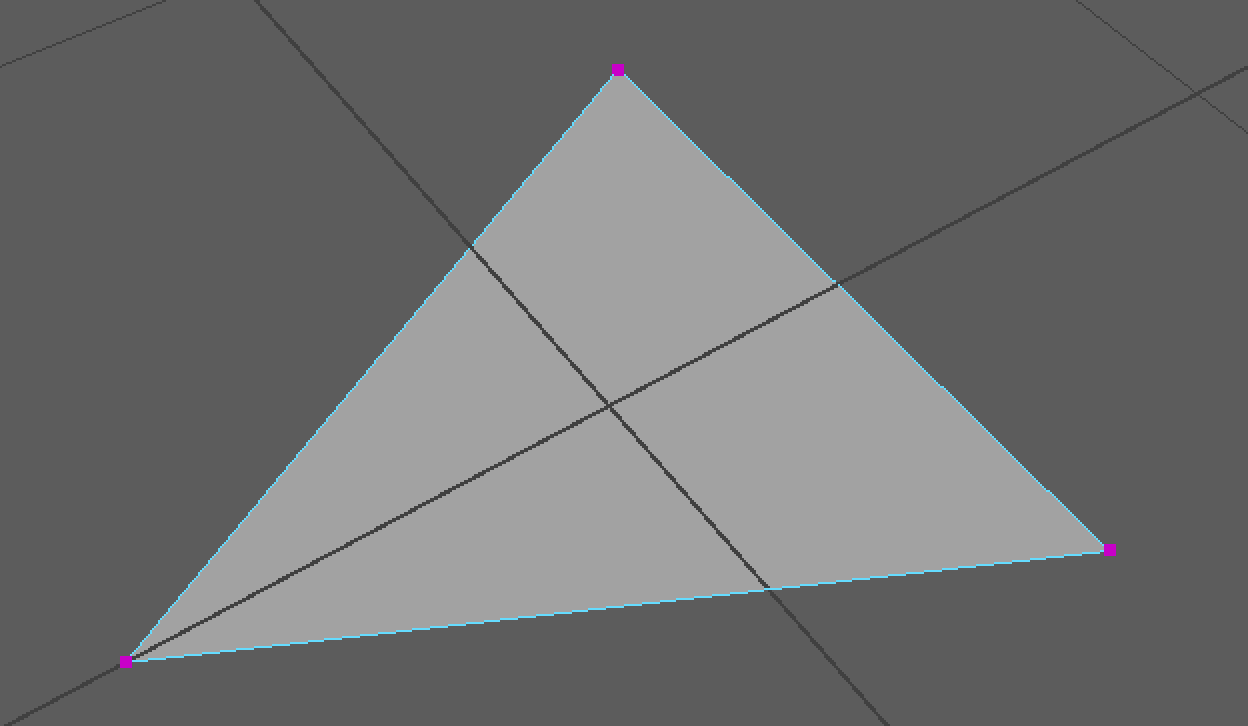
While objects in 3D can often look exactly like their physical counter parts their construction in and of themselves are very different. Objects in 3D (including Maya) are represented mathematically using Polygon Surfaces or NURBS Surfaces. Polygons are simple shapes that consist of at least 3 vertices, edges that connect those vertices to one another and the face that is created between them. Typically you want to utilize only 4 sided faces also known as quads while modeling. Doing so can aid in your model having a clean topology.
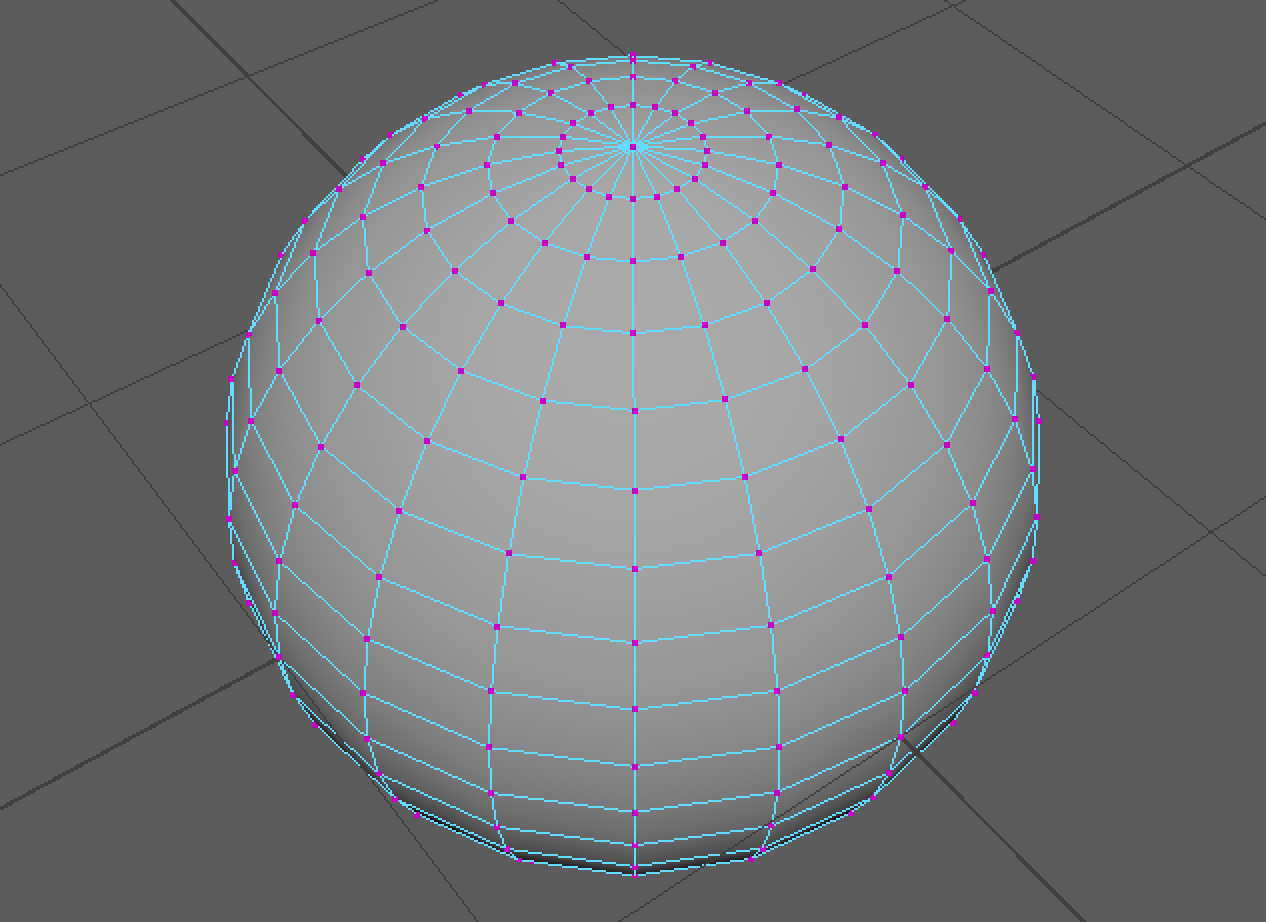
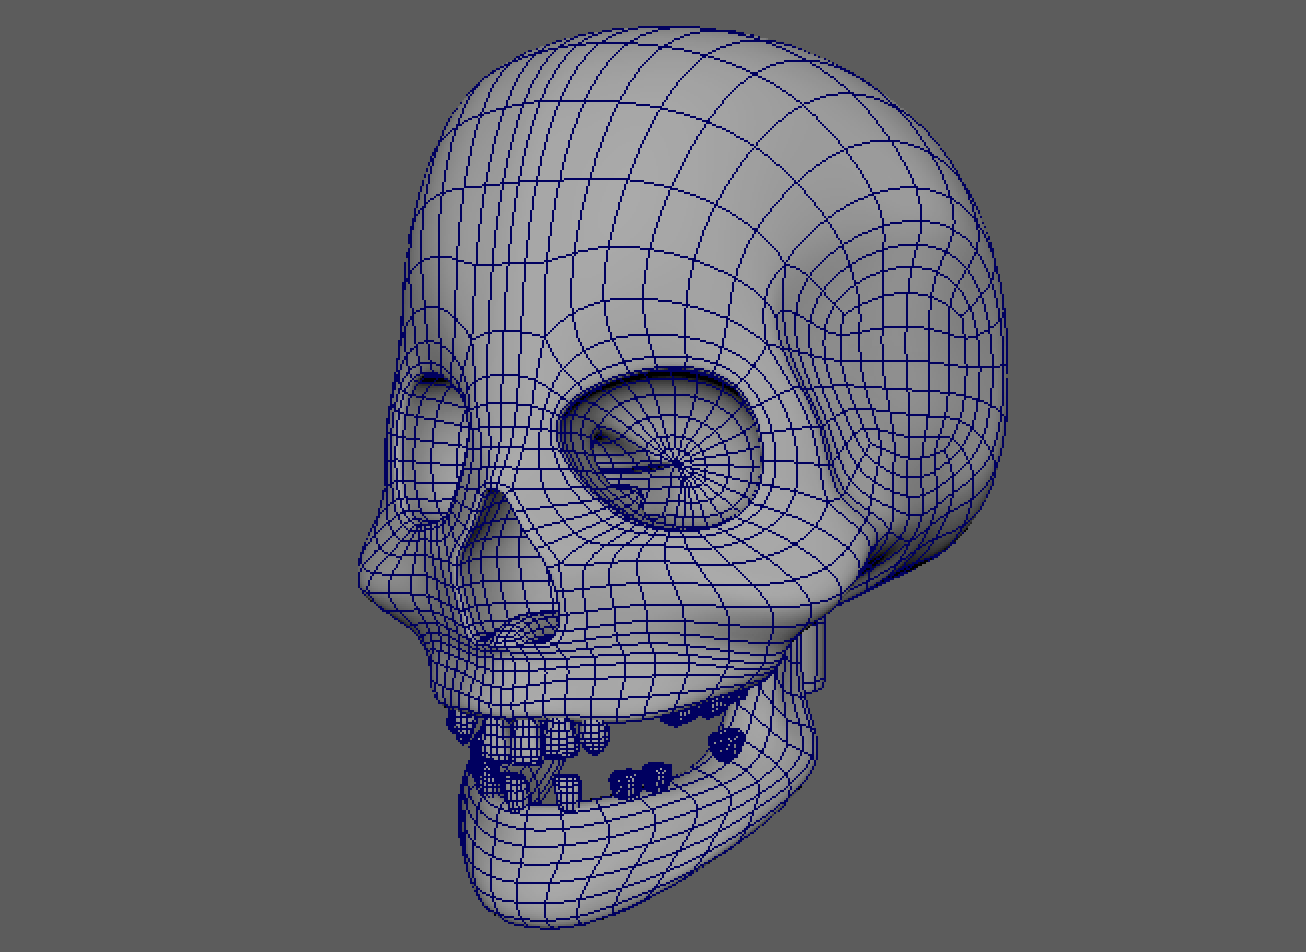
However, good topology is more than just having quads. The topology of the model literally describes the flow of the surface including curves, indentations, extrusions and more. When your polygon edges flow along with the models topology your model and has enough details (number of polygon faces) required to successfully describe the surface you will achieve a successful result. How those edges flow along your model can be a difficult skill to learn, but is essential for the aspiring 3D modeler. The images on the right describe some examples of good topology.
Take a look at these other resources for good overviews of polygon topology.
Assignment
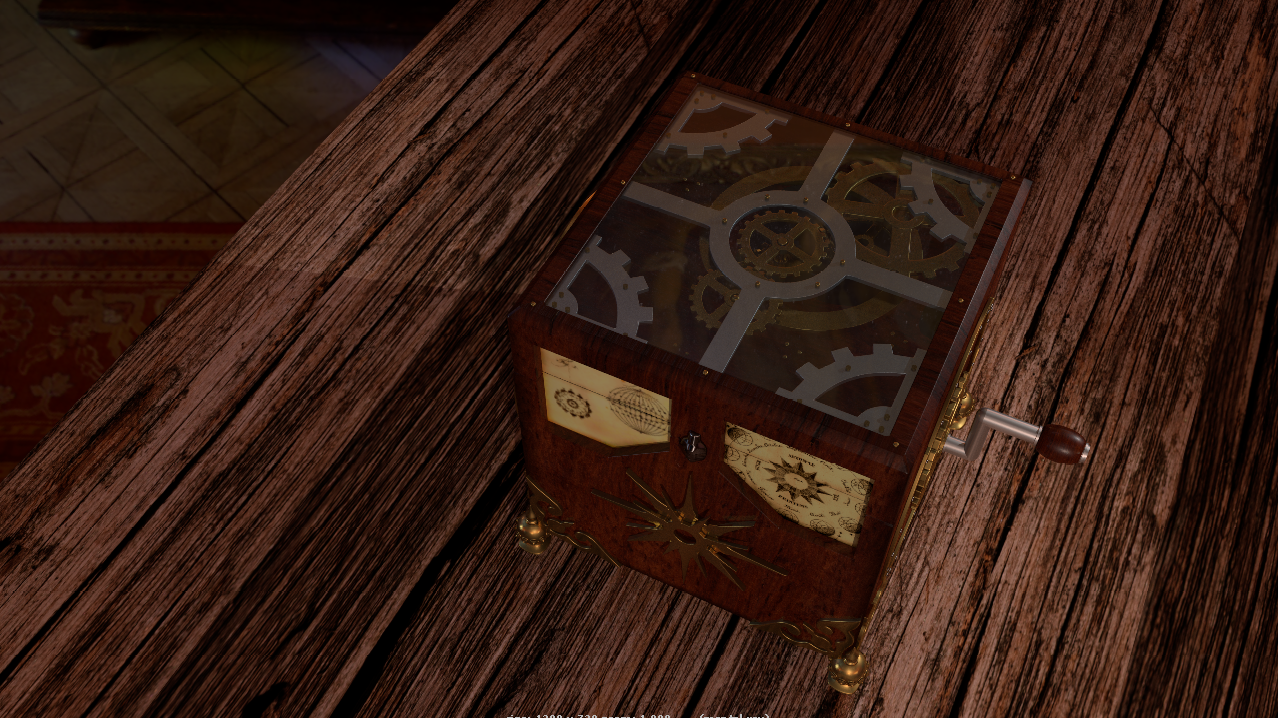
Now that we have had a chance to talk about our modeling portion let me introduce you to the overarching topic and project we will be working on all semester. Let me introduce you to Jack!
 Click on the image to view full screen
 Click on the image to view full screen
This semester you will be modeling, texturing, animating, rendering and compositing your very own jack in the box that can have the look and design of your choosing! In my case I elected to create a steampunk style jack in the box. You can choose whatever you want your jack in the box to look like. Cartoony? Robotic? Futuristic? Gothic? Antique? Funny? It is up to you.
So if we aren't making this specific jack in the box how are we supposed to know what to do?
I am glad you asked! One important aspect to remember is I will be providing overall guidance as to how to make different kinds of models to show you technique. It is your job to watch those videos and to learn the techniques then figure out how to apply them to the modeling challenges you will be facing in your project. This might seem like a bit of a bad way to go, but in reality this is EXACTLY how things work in the real world. Every single project/job comes with its own unique challenges and the way you succeed is to learn how to take your previous experiences and learning and apply them to your present challenges rather than always having or knowing where to find a step-by-step instruction booklet to solve it.
That being said, here is the introduction to how you should approach your project including gathering references.
Once you have a good plan it is time to start modeling. Here are some videos to illustrate the use of different modeling techniques to create different parts of the jack model.
As you build your model it is a good idea to think about why you are building what you are building. Just because you aren't part of the story department doesn't mean you shouldn't care about it. The 'Why' matters so include that in your model. Also we will look at another modeling tool.
Now for a few more tutorials covering different modeling techniques:
Finally you MUST pay attention to the processes outlined in this video. Final clean up of your models parts is absolutely essential. If you skip this step you will be setting yourself up for failure in the future. DO NOT MISS THIS STEP!
Deadlines
The modeling module runs for 3 weeks. At the end of each week (Sunday night) you must post some work in progress images to the discussion board on UNM Canvas This will allow for your classmates to see how you are progressing and provide you with meaningful feedback and assistance. I recommend you do this more often than just at the end, but this is the minimum. At the end of our modeling module you must hand in your final submission of your model.
| End of first week | WIP images to Discussion boards. |
| End of second week | WIP images to Discussion boards. |
| End of third week | WIP images to Discussion boards and final submission for assignment. |
Final Submission Guidelines
Produce at least 5 rendered images of your model to showcase what it looks like from different angles and details.
For a refresher on still frame rendering with Arnold please see the Rendering series videos on the Tutorials Page on this website.
These images should be rendered at least 1280x720 resolution and saved as (.png, or .jpg)
Finally submit the images to Assignment 1 on UNM Canvas
In a production environment you would be using this stage to show off your model for approval before it moves down the pipeline so make sure you put some effort into making these images really look nice.
-
Class Materials
Review Modeling tutorials, overview and assignment guidelines -
Discussions
Post work in progress images throughout 3 week module. Specifically at the end of each week.
UNM Canvas -
Quiz
Quiz 1 due at the end on UNM Canvas