Module 1 - Principles
Introduction
Back when the animators at Walt Disney Studios were developing the craft of animation, they identified 12 principals that helped to create convincing movement in their animated movies.
In their book, "The Illusion of Life," Frank Thomas and Ollie Johnston wrote in depth about these principals. I HIGHLY recommend getting your own copy of The Illusion of Life" and reading at least pages 47-69. It is a MUST have for every aspiring animator, and a great addition to the library of any animation fan/enthusiast.
I have provided a good overview of all of the principles on this site. While this is good material it doesn't at all compare to reading it from its originators. None-the-less the videos are a fantastic overview to each principle and should be reviewed.
I would also recommend reading the notes on the following pages (although, they don't directly relate to our upcoming bouncing ball assignment):
Introduction
So to get started we are going to learn a workflow that breaks the process of animation down into nice manageable chunks. This helps to make the process as clear as possible and easier to troubleshoot. It is also a way to describe to yourself or others what part of the process you are in.
Planning
Planning is essential to animation. For every frame you see on the screen, an animator will have gone through tons of ideas on paper and on video to hone the performance down to the most communicable and entertaining idea possible.
If I could give one very strong point of advice, it would be to NEVER! underestimate how important your planning process is. At first you may feel antsy to begin using the computer, but don't do it. Plan your shot meticulously. You will find that in the polishing stage rushed planning will almost always negatively affect your shot.
Video Reference
When planning out a shot, the quickest way to experiment with different ideas is to do video reference. When working with characters, you can try tons of acting choices very quickly in front of the camera, and when you find something you like, you have the video of the action ready to digitize on your computer for invaluable reference you can come back to again and again while working on your shot.
For our bouncing ball assignment, find a camera, a ball, and a nice clean backdrop. Set up the camera so that you can drop the ball and let it bounce to a complete stop without moving the camera. Don't worry about a bunch of fancy equipment. A webcam or a smart phone is sufficient to record this kind of video reference. Just make sure to set it to record to as close to 24 frames per second as possible if you can.
Once you have shot and identified which ball bounce you will use for your video reference, edit the video down to just the ball bouncing to a complete stop. You can use a number of free editing software packages. I prefer Apple Quicktime 7 Pro. It is very cheap to buy, and very simple to set up and use for basic trimming and export. It is also really nice because you can pause and step through the video frame by frame, which is essential for analyzing your video while working on your shot.
BallBounce ref01 from Brad Swardson on Vimeo.
In my sample reference above you will see I have overlayed the frame number on the video. This was not done with quicktime, but with Final Cut Pro. This can also easily be done with After Effects and other compositors, but is not necessary for you. I simply wanted to provide an 'in your face' and obnoxious presentation to make sure you see your reference video in terms of 'frames' rather than 'timecode'.
Thumbnails
Once you have your Video Reference, you will use it to draw out thumbnails for the action in your shot. Now is where using something like quicktime that allows for use of left and right arrow keys to step frame by frame through your video while having the actual frame number visible instead of timecode comes in really handy! The thumbnails you draw shouldn't be detailed in terms of style. For your bouncing ball they should probably be no more than circles with arcs. However, the complexity of how many thumbnails you draw can be as in depth as you would like them to be. I recommend that you at least draw the keys and main breakdowns as you can see in the example image below.
You can use pencil and paper or your computer for this. Whatever is quick/comfortable for you.
 Click on the image to view full screen
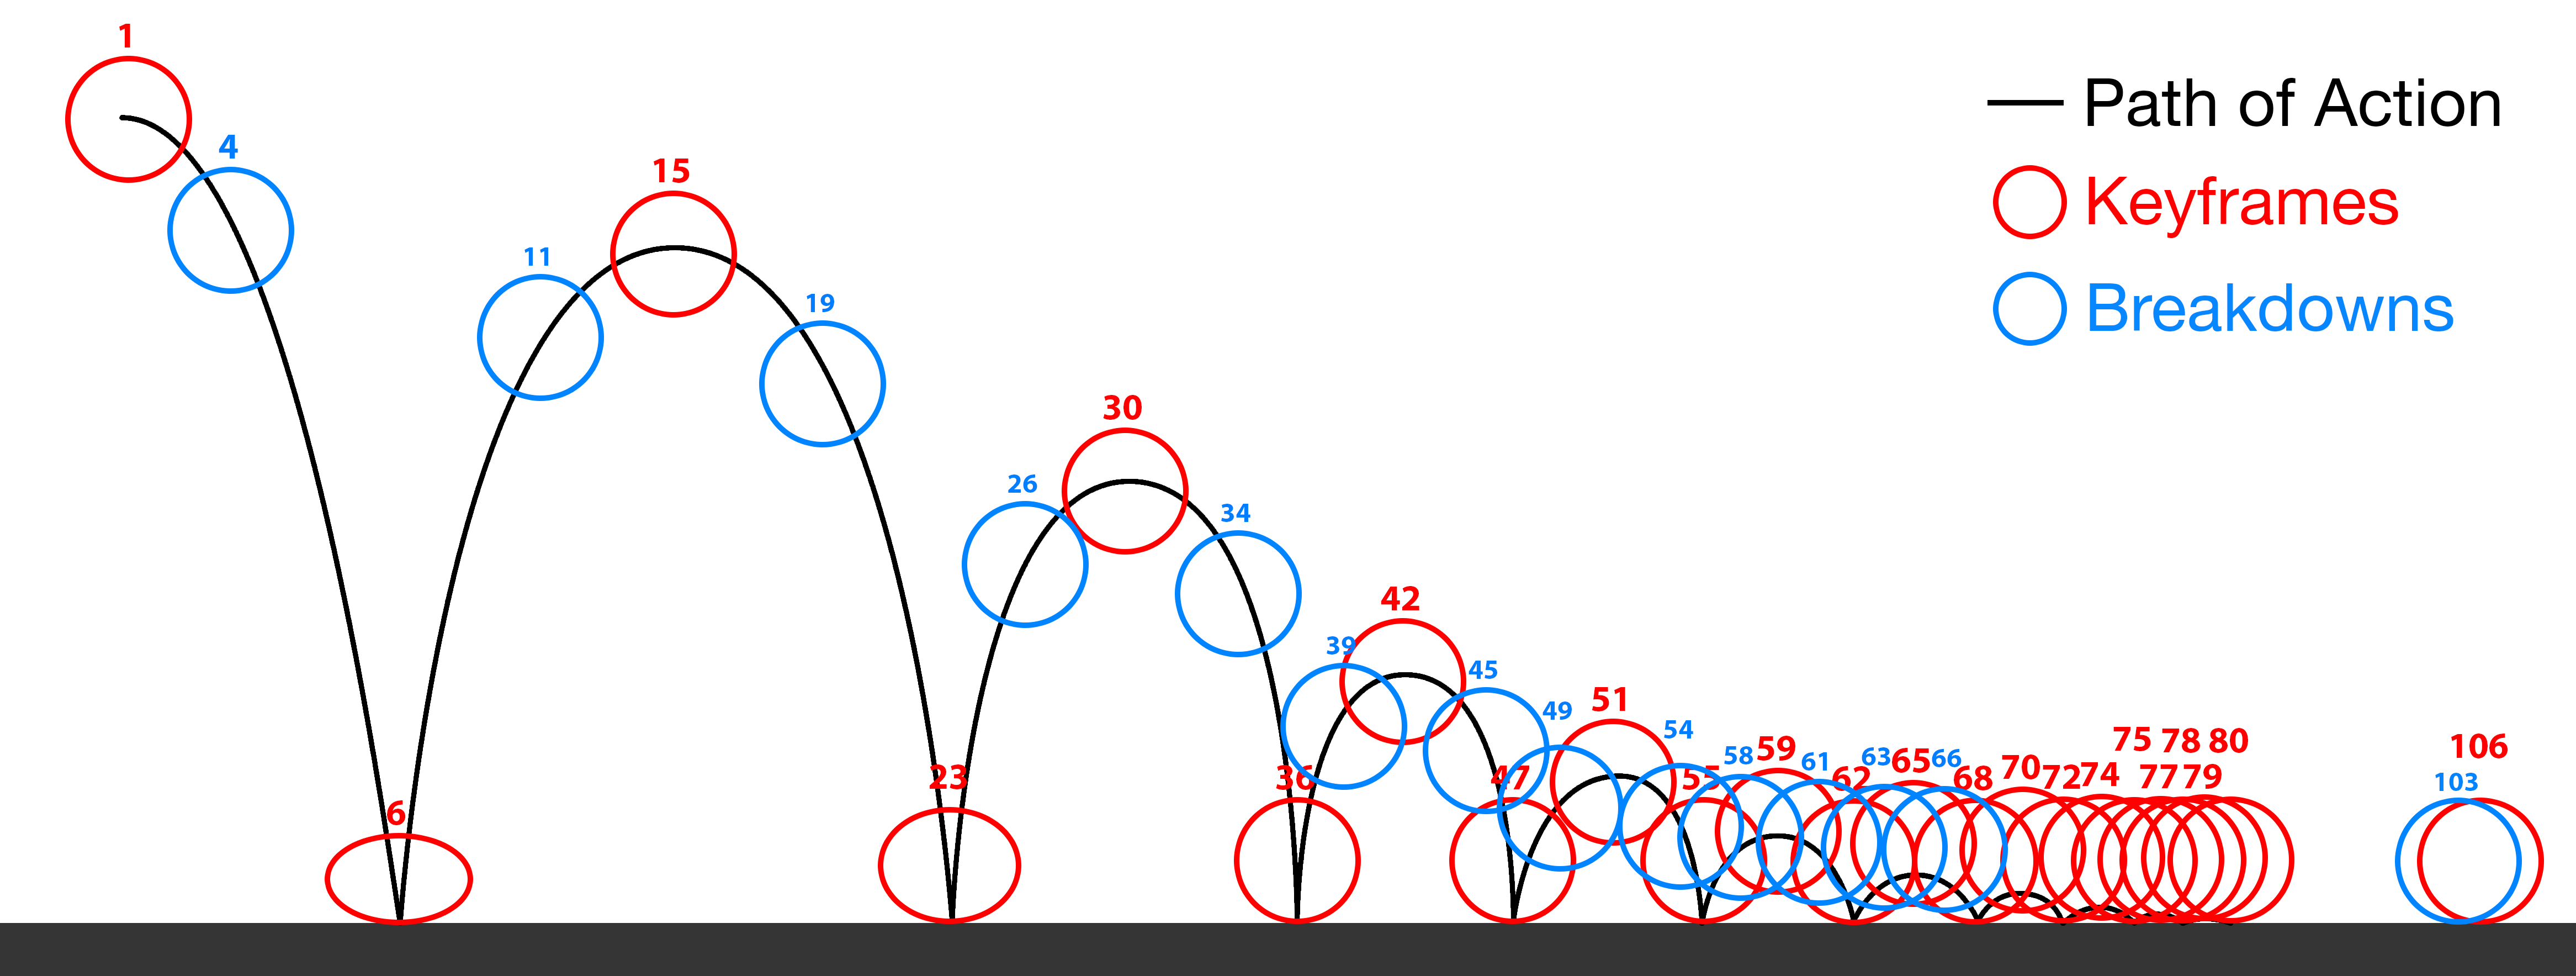
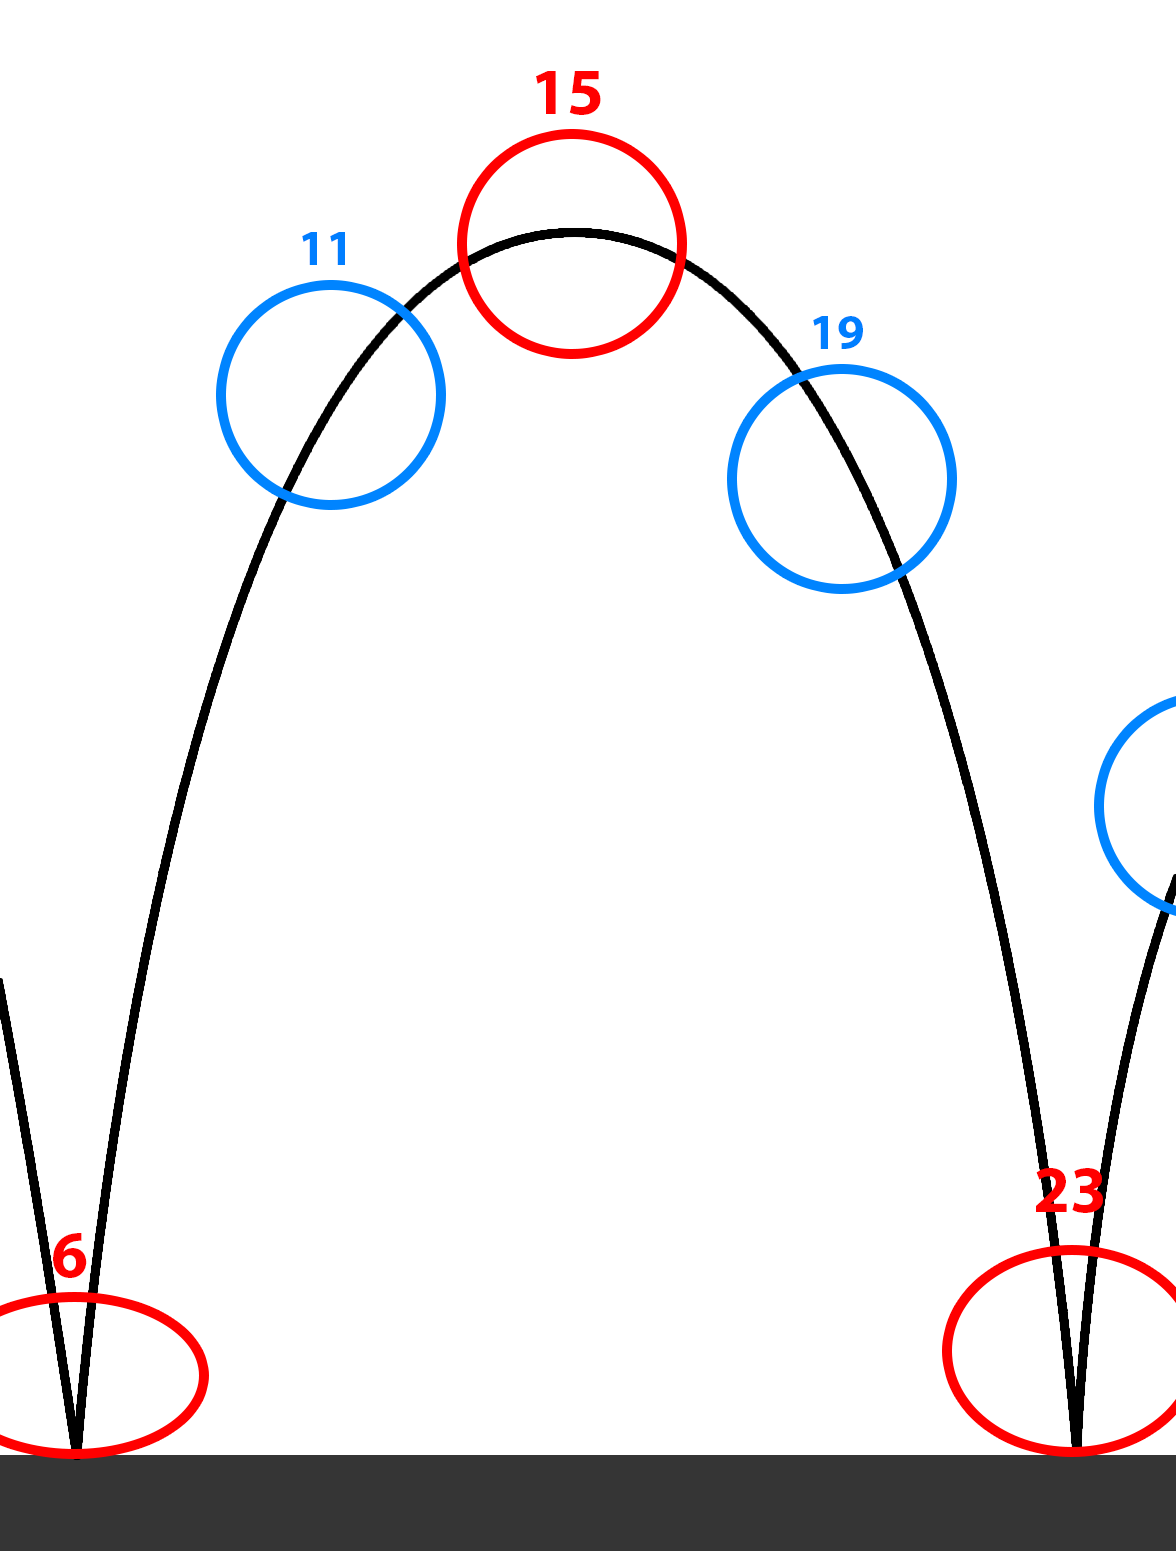
You can see the key frames (red) differentiated from the breakdowns (blue) and the path of action guiding the circle thumbs throughout the animation. All of this together might be a bit confusing so lets break this down a bit into more manageable chunks.
When you set a keyframe, you are telling the computer that you want the character (or ball) to be in that exact posed position on the frame you set the key. There might be hundreds of keyframes in a shot, so we will be classifying keyframes so that we can more properly refer to each keyframe by what it is intending to do for the animation.
Path of Action
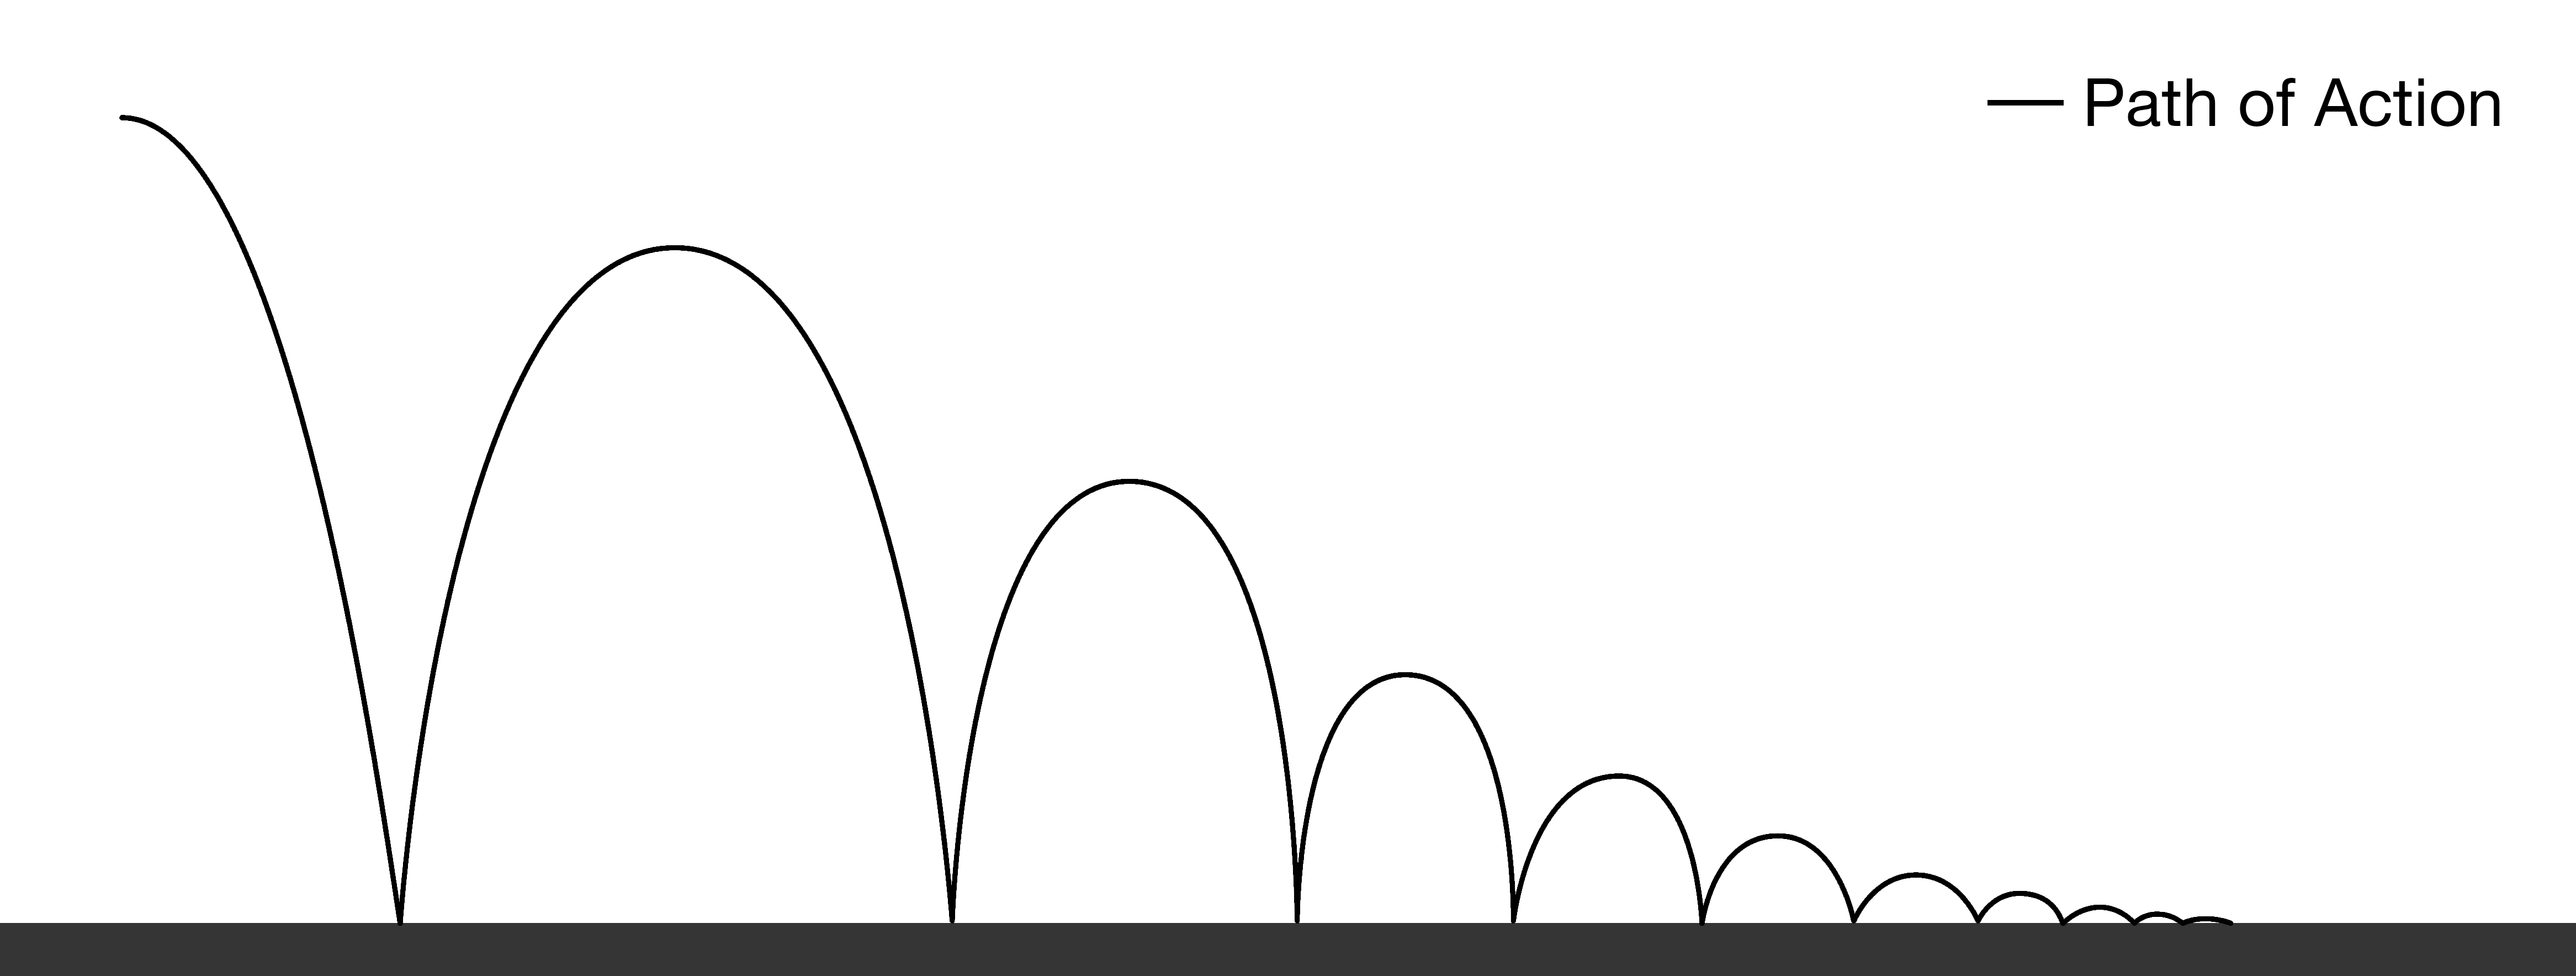
To start you should draw out the 'Path of Action' on which the ball will be traveling. Try to make this as accurate as possible in your thumbnails as it will make referencing later much easier.
 Click on the image to view full screen
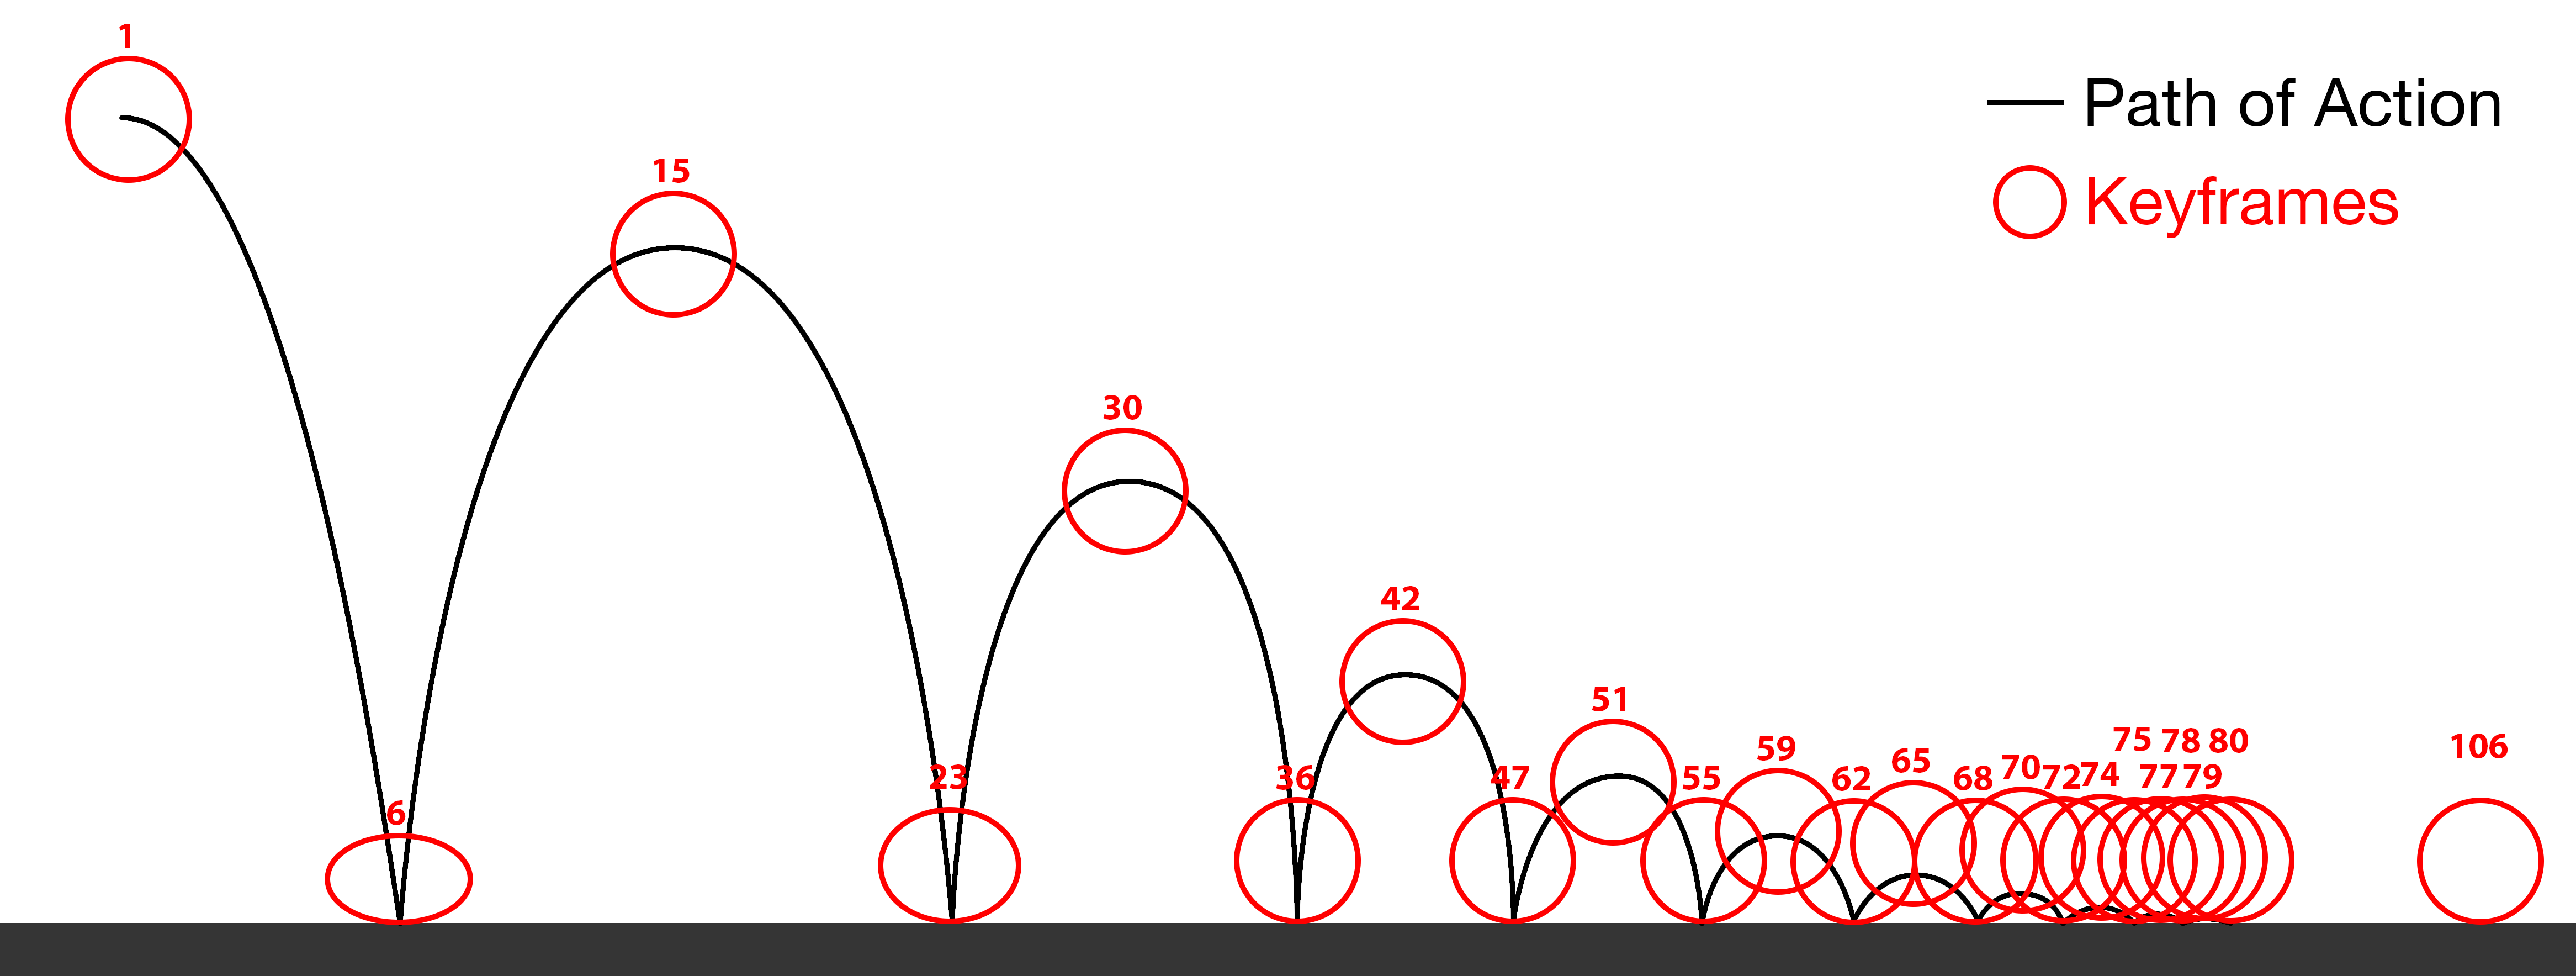
Keys
Usually when speaking of your 'Keys' you are referring to your 'Key Drawings' or 'Key Poses'. Another way to identify a keyframe is when a main event, action, change takes place. These are your storytelling poses, simply referred to as 'Keys.'
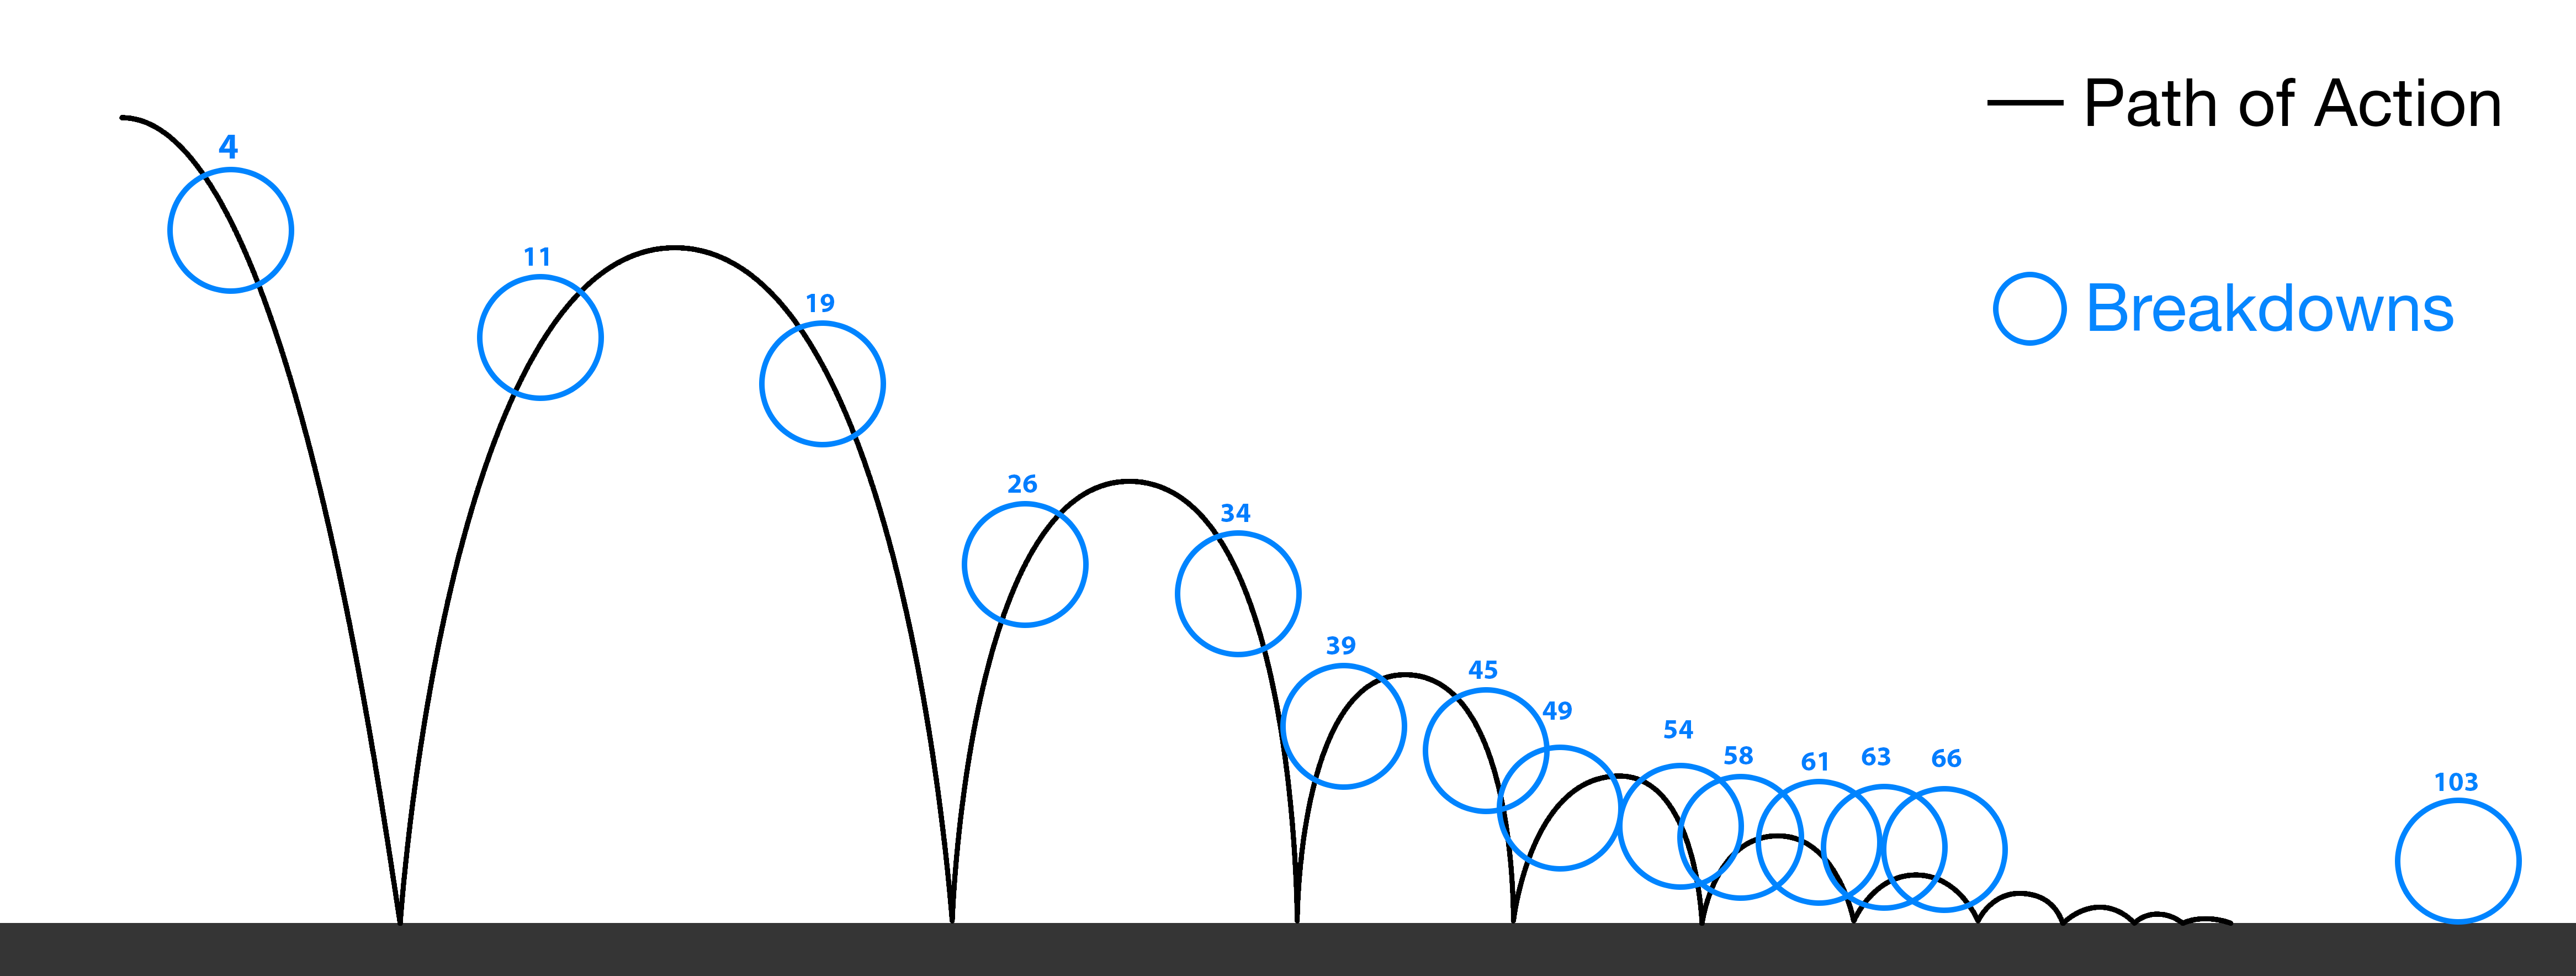
Keyframes may be the most important frames, but you will also want and need to control how the character (or ball) moves from one key to another. To do this, you will be modifying your breakdowns. You may have also heard them called in-betweens or tweens because they fall 'in-between' your keys. These breakdowns describe arcs, spacing, and other important movement information in-between your storytelling keys.
 Click on the image to view full screen
Breakdowns
Your Breakdowns (or you may have heard them called in-betweens) describe arcs, spacing, and other important movement information in-between your storytelling keys.
 Click on the image to view full screen
I have separated these Keys and Breakdowns so that you can easily see the difference. While you could do this in your thumbnails it is not necessary as long as you can read/understand whats going on.
To give you a better view of what is happening lets zoom in on a single bounce of the ball.
 Click on the image to view full screen
Please take note that I have drawn in the Path of Action, I have started by defining my Key poses at the top of the arc at frame 15 and where the ball will contact the ground at the bottom of the arcs on frames 6 and 23, I have placed the Breakdowns to describe an arc so that the ball won't be traveling on a straight line between frame 6 and frame 15, and I have put in frame numbers for each of the Keys and Breakdowns so that I am able to define the timing of the full bounce and describe how the ball will be spaced in any given bounce.
Many pros might tell you that they use their thumbnail process to only flush out key poses (storytelling poses). But while you are learning animation, it is important to draw out your Keys and Breakdowns. This is done to help you really develop your idea before you begin working on the computer, and as I mentioned above, rushing to get on to the computer is a very bad thing.
Once you have drawn out all your thumbnails, your own Thumbnails should look similar to this:
Click on the image to view full screen
One final note: Do your thumbnails so that they will work as a tool for YOU. Please don't just copy the examples I have done here, this isn't a workbook assignment or a quiz. This is a guideline for YOU to use when you start your bouncing ball animation. Make it clear, make the information relevant, and USE YOUR THUMBNAILS!
Assignment
Video Reference
Produce your video reference based on the guidelines above.
- Your Video Reference should be a .mp4 or .q file compressed.
Thumbnails
Create your thumbnails based on the guidelines above.
- You may draw your Thumbnails on paper and scan them in, or you can do them digitally.
Submission
- Upload your single video reference file and final storyboard images to Assignment 1 on Canvas
-
Instruction Material
Review Module Written & Video Material