Module 2 - Squash and Stretch
Overview
Probably the most impactful principle in animation is "squash and stretch", the purpose of which is to give a sense of weight and flexibility to drawn objects. It can be applied to simple objects, like a bouncing ball, or more complex constructions, like the musculature of a human face. Taken to an extreme point, a figure stretched or squashed to an exaggerated degree can have a comical effect. In realistic animation, however, the most important aspect of this principle is the fact that an object's volume does not change when squashed or stretched. If the length of a ball is stretched vertically, its width (in three dimensions, also its depth) needs to contract correspondingly horizontally.
How and when you should use squash and stretch techniques depends on each shot you are producing and the style you are going for. Sometimes you will be squashing a lot of things really dramatically while other times you may choose to be more deliberate and rigid. There is no right answer for every shot. However, you should ALWAYS consider squash and stretch in your shots and make a choice do add it or not to add it rather than just leaving it out for time or interest sake.
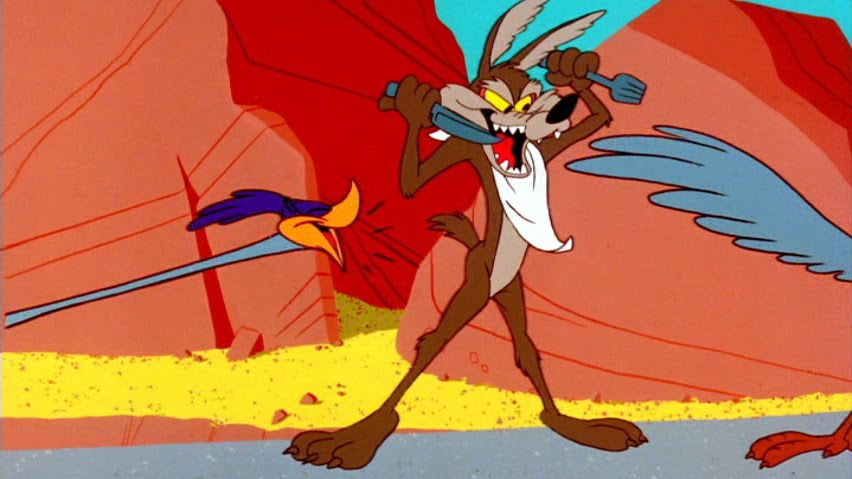
Below are some video samples with some great backgrounds of the use of squash and stretch. These should help you see the real world use and should help you keep this principle as a constant consideration as you do every animation.
Here is a classic that you can download and go frame by frame through to analyze the extensive use of squash and stretch in animation for comedy, emphasis, momentum, grounding.
Blocking
You were introduced to the first in a 4-step process for producing animation when you completed the planning stage last module. We are now going to move through the final 3 steps as outlined here:
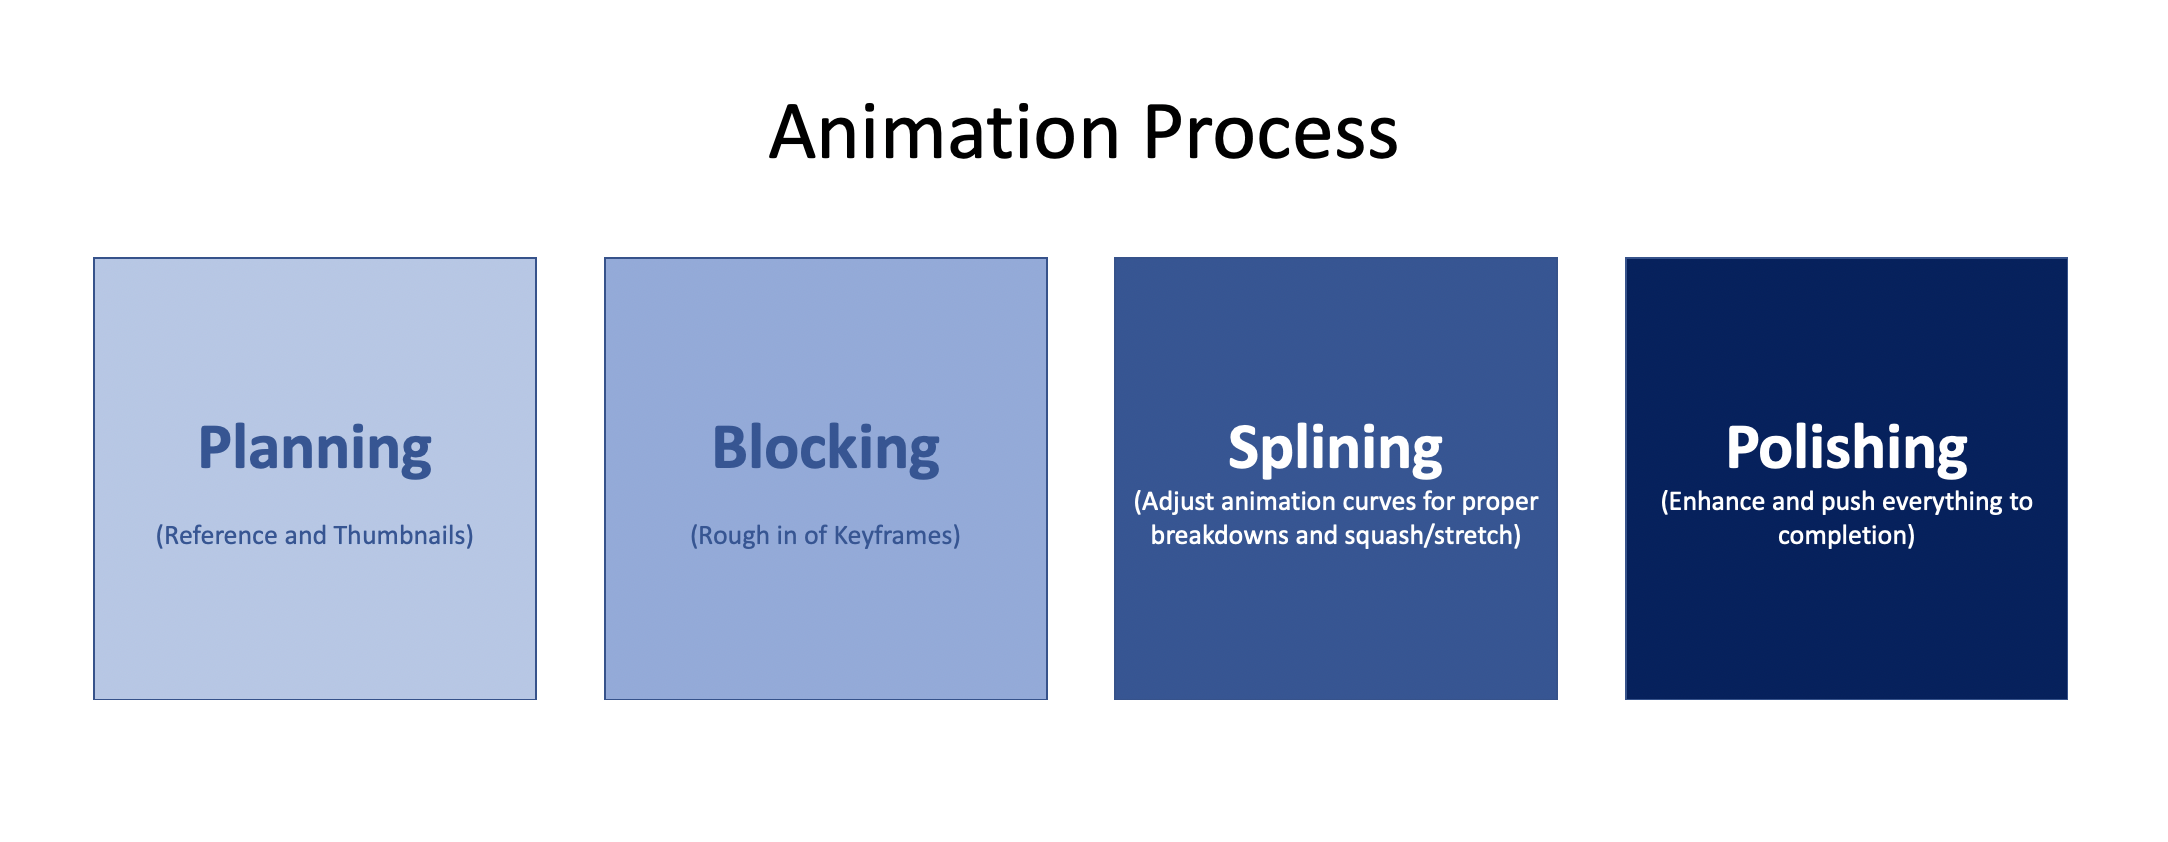
Once you have finished your Video Reference, and Thumbnails, and you have a very clear idea of what you want to achieve in the shot, you will move into the Blocking phase inside of Maya.
BUT WAIT!!! Before you get into the process of blocking you need to know what we are animating and how that works in Maya. This first video will walk you through the initial overview of how to get the rig and how to use the rig! Don't skip this video
Okay, now that you know what to do to get started, NOW you are ready to get rolling with the Blocking part of our process. At this point I want to mention that these videos are going to be MUCH MORE detailed and step by step than many of the ones going forward because it is your first one. You need to see the process work out in real-time, but most of that process is going to be very repetitive after we get to week 3 so by then things will be much shorter video wise.
Okay, lets get started with Blocking
Within this process make sure that each Keyframe is placed with accuracy and that it matches your thumbnails that came from your video reference. You went through the trouble to do that work so utilize it! Don't haphazardly key the ball all over the place. You should have a good idea of where each key should be placed, and the frame number it should be placed on. Once you have finished, it should move similar to how your sheet of Thumbnails describes the motion.
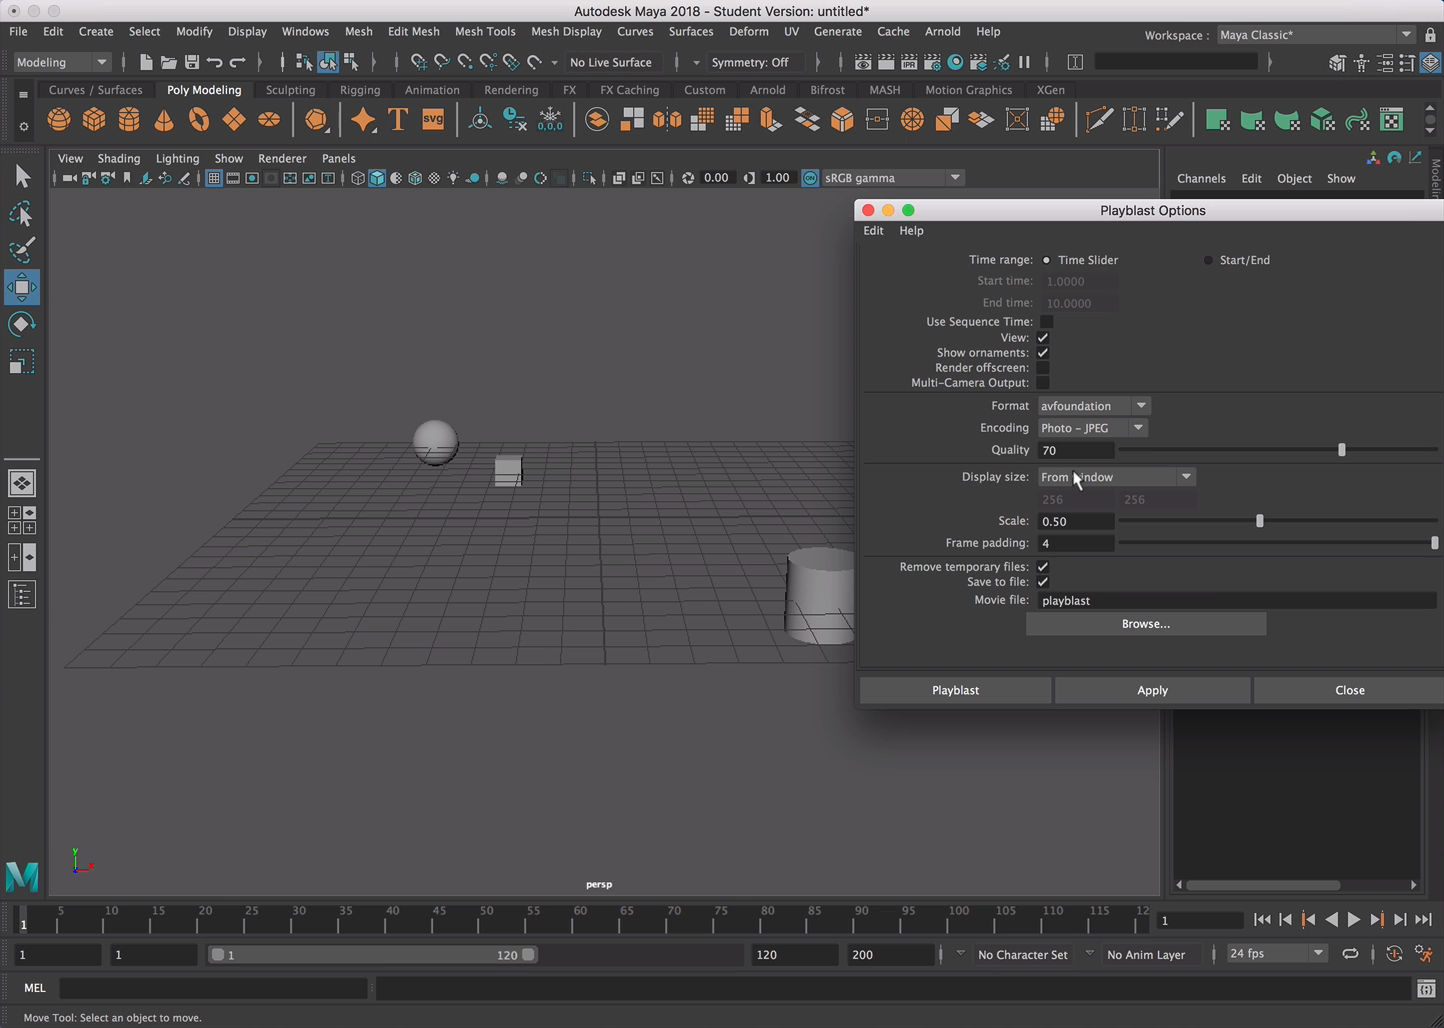
Once your keys are all placed, you should be able to playblast your animation and get an good idea of what is happeneing with the ball. If you need a refresher on playblast there is a quick screencast in the right sidebar on this page on how to do that. This will just be for your reference if you need it.
You should have a great idea of what the ball is doing, and the path it is traveling. The timing should also be very accurate. At this point, if something looks slightly out of place, another animator will probably be able to help you troubleshoot the problems. So get feedback!
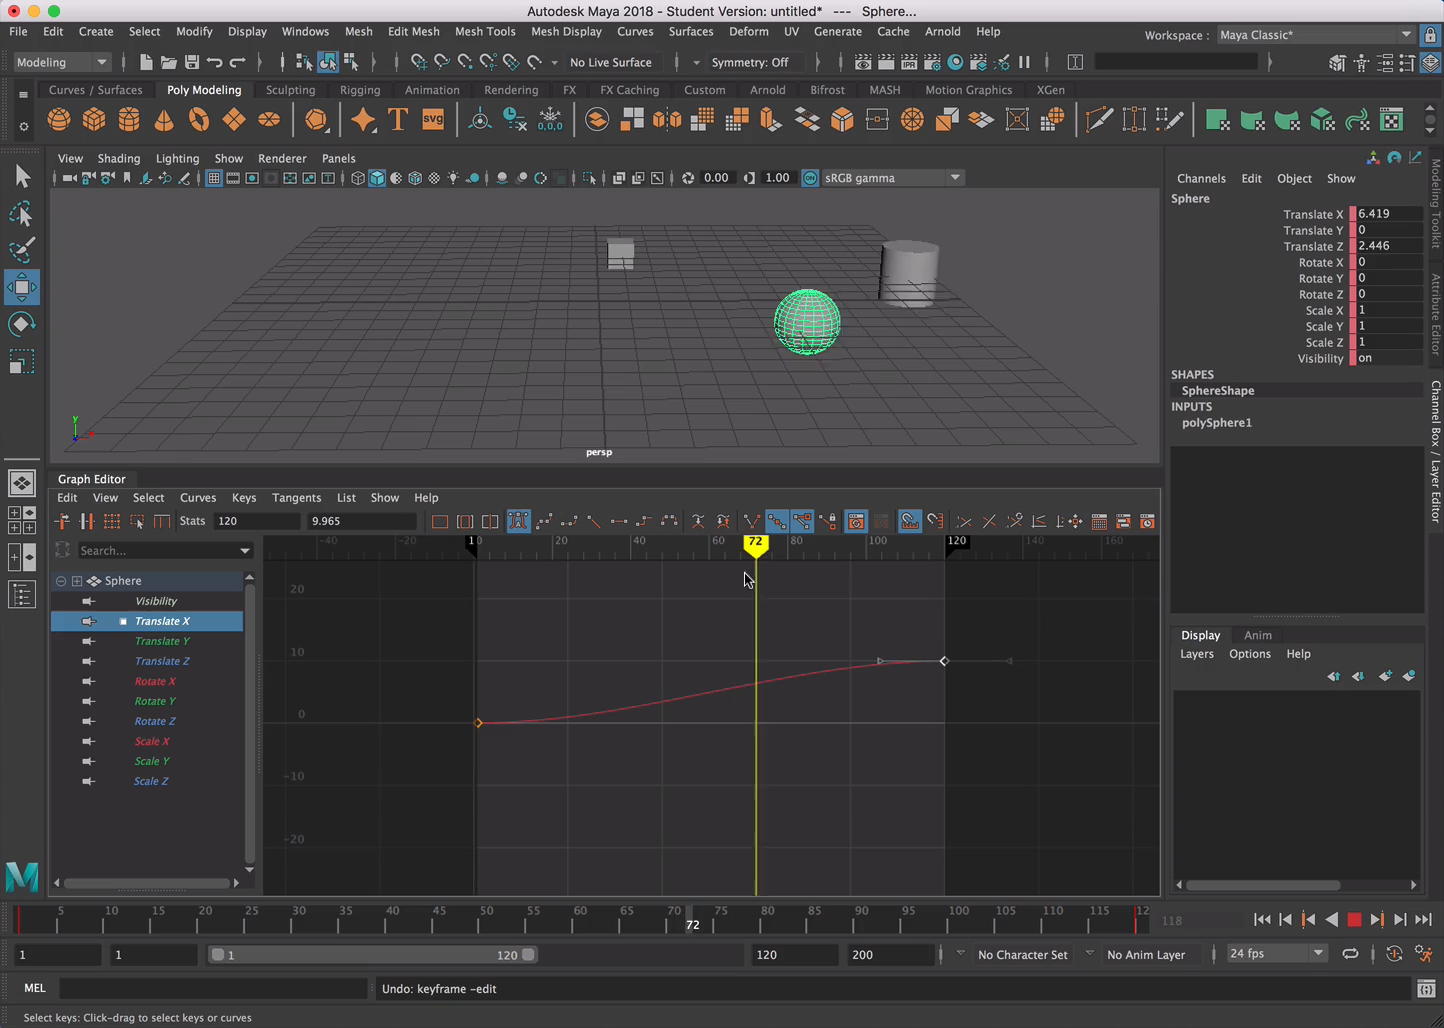
Below is what the stepped Blocking Curves should look like in the Graph Editor in Maya:
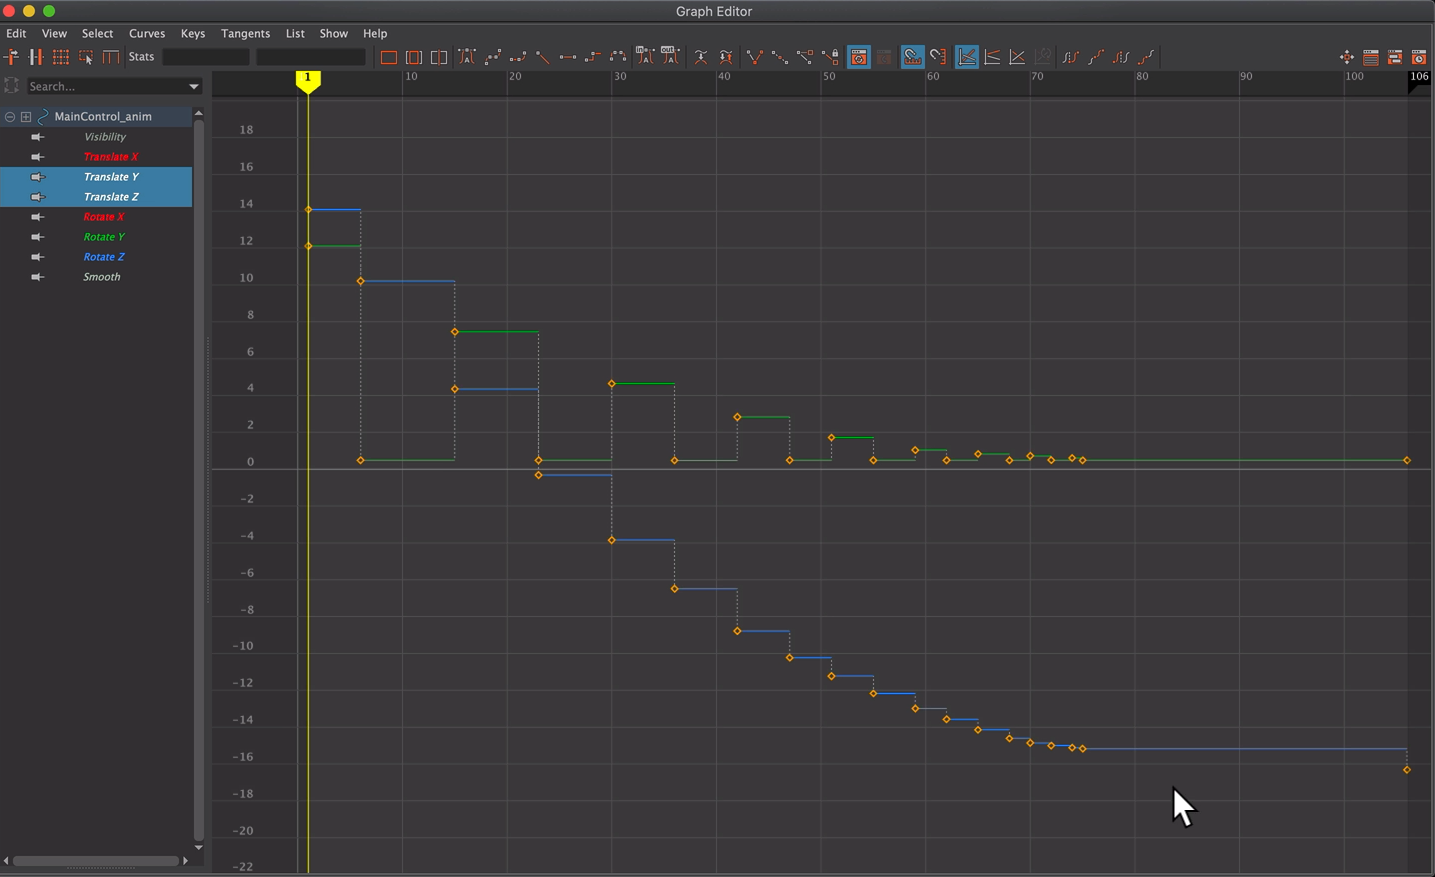 Click on the image to view full screen
Splining
Once you are confident that your blocking is complete, and your Keys are describing the motion you have in your Video Reference and your Thumbnails, you will move to the splining phase.
Within this process your goal is to manipulate and manage the animation curves in the graph editor to procude much more convincing animation without having to add tons more keyframes to do so. The animation curves are your way of controlling the ways Maya procues the inbetweens of your keyframes. These tools are your friend and can help make things very good and relatively easily too. If your blocking was done accurately, your splining phase will be made easier. You will spend most of your time adjusting the spacing from one Key to the next, using your Breakdowns as a guide.
Show a Peer
Once you are about 80%-90% finished, you are ready to take in a bit of input from your peers. You should have another animator take a look at your work. While working on your animation you will get very used to seeing it over and over again, so having a fresh pair of eyes helps to find small problems you might be overlooking.
In some cases, you may not be able to get another animator to give you notes. If that is the case, you should ask ANYONE to look at it. Someone who isn't learning animation may not be able to help you fix the problem, but in many cases, just seeing the problem can be very beneficial for you. For instance if they say something like "The second bounce looks funny," you can hone in on the second bounce and start to deduce what might be making the second bounce stick out.
This is a very critical step in the process. Sometimes it is hard to show your work to people, but keep in mind, it is the ultimate end goal of animation is to show and entertain others. So be strong! The first few times might be hard, but once you get in the hang of it, you'll be showing everyone and taking in notes like a sponge, ultimately making your work much better.
Polish
At the Polish stage, you should begin to incorporate the notes you got from your peer(s). Use this polish pass to really clean up your work and sharpen all those little areas that might need a bit more love. Oh! And in our case we are finally adding squash and stretch. YAY!
Final!
Now that your assignment has been polished, and is looking beautiful, you are ready to hand it in! Congratulations!
You are ready for notes from your instructor!DO NOT light and/or render your animation!! I will only be reviewing Playblasts. See right sidebar screencast for playblast how to.
I know that the first thing that you want to do once you finish your work is make it as pretty as possible. But it is critical that you do not render it out. I will only give notes (credit) for assignments handed in based on the Assignment Format.
Don't stop here though... keep reading as there is moreEmotion Pose (Blik)
Even though this isn't a body mechanics or traditional "Character Animation" course we still want to start looking at how to evoke emotion with our characters. Throughout the semester we will be doing short emotion pose exercises using the Blick rig provided in the resources section on the top right of this page.
- Download the rig and open it in maya.
- Using the control curves provided pose blik that evokes a strong emotion. Examples could be Sad, Ecstatic, Nervous, Guilty, Afraid, Terrified, Bored, Frustrated.
Really push your poses to leave no question as to the emotion of blick in your still frame
Assignment
Bouncing Ball
- This week, you will use your planning Thumbnails, and Video Reference to complete the Bouncing Ball Assignment in Maya.
- You can download the Bouncing Ball Maya Project file by clicking the button to right in the resourcess well here.
- Your final submission should be a playblast export from Maya in a 640 x 360 compressed .mp4 file. A playblast is a screen recording of your animation sequence that can be exported out of maya as a movie file. If you are on a mac you can export a qt formatted playblast that you can upload as is. If you are on a Windows computer you will likely need to export a .avi format and will need to convert it. If you have .avi file then Please follow these instructions on converting AVI to MP4 before submission.
Emotion Pose
- Using the Blik rig create a single pose that strongly depicts an emotion as outlined above. Do a screen capture of your pose and include it with your assignment submission
- You can download the Blik Rig file by clicking the button to right in the resourcess well here.
Sumbission
- Upload your mp4 playblast video of your animation and image of your Blik pose to Assignment 2 on UNM Canvas
-
Class Lecture
Attend Class Lecture -
Class Instruction
Review Module Written & Video Material