Module 5 - Slow In and Slow Out
Overview
The movement of the human body, and most other objects, needs time to accelerate and slow down. For this reason, animation looks more realistic if it has more drawings near the beginning and end of an action, emphasizing the extreme poses, and fewer in the middle. This principle goes for characters moving between two extreme poses, such as sitting down and standing up, but also for inanimate, moving objects, like the bouncing ball in the above illustration.
Slow In and Slow Out refers to how quickly your object or character moves in and out of a pose.
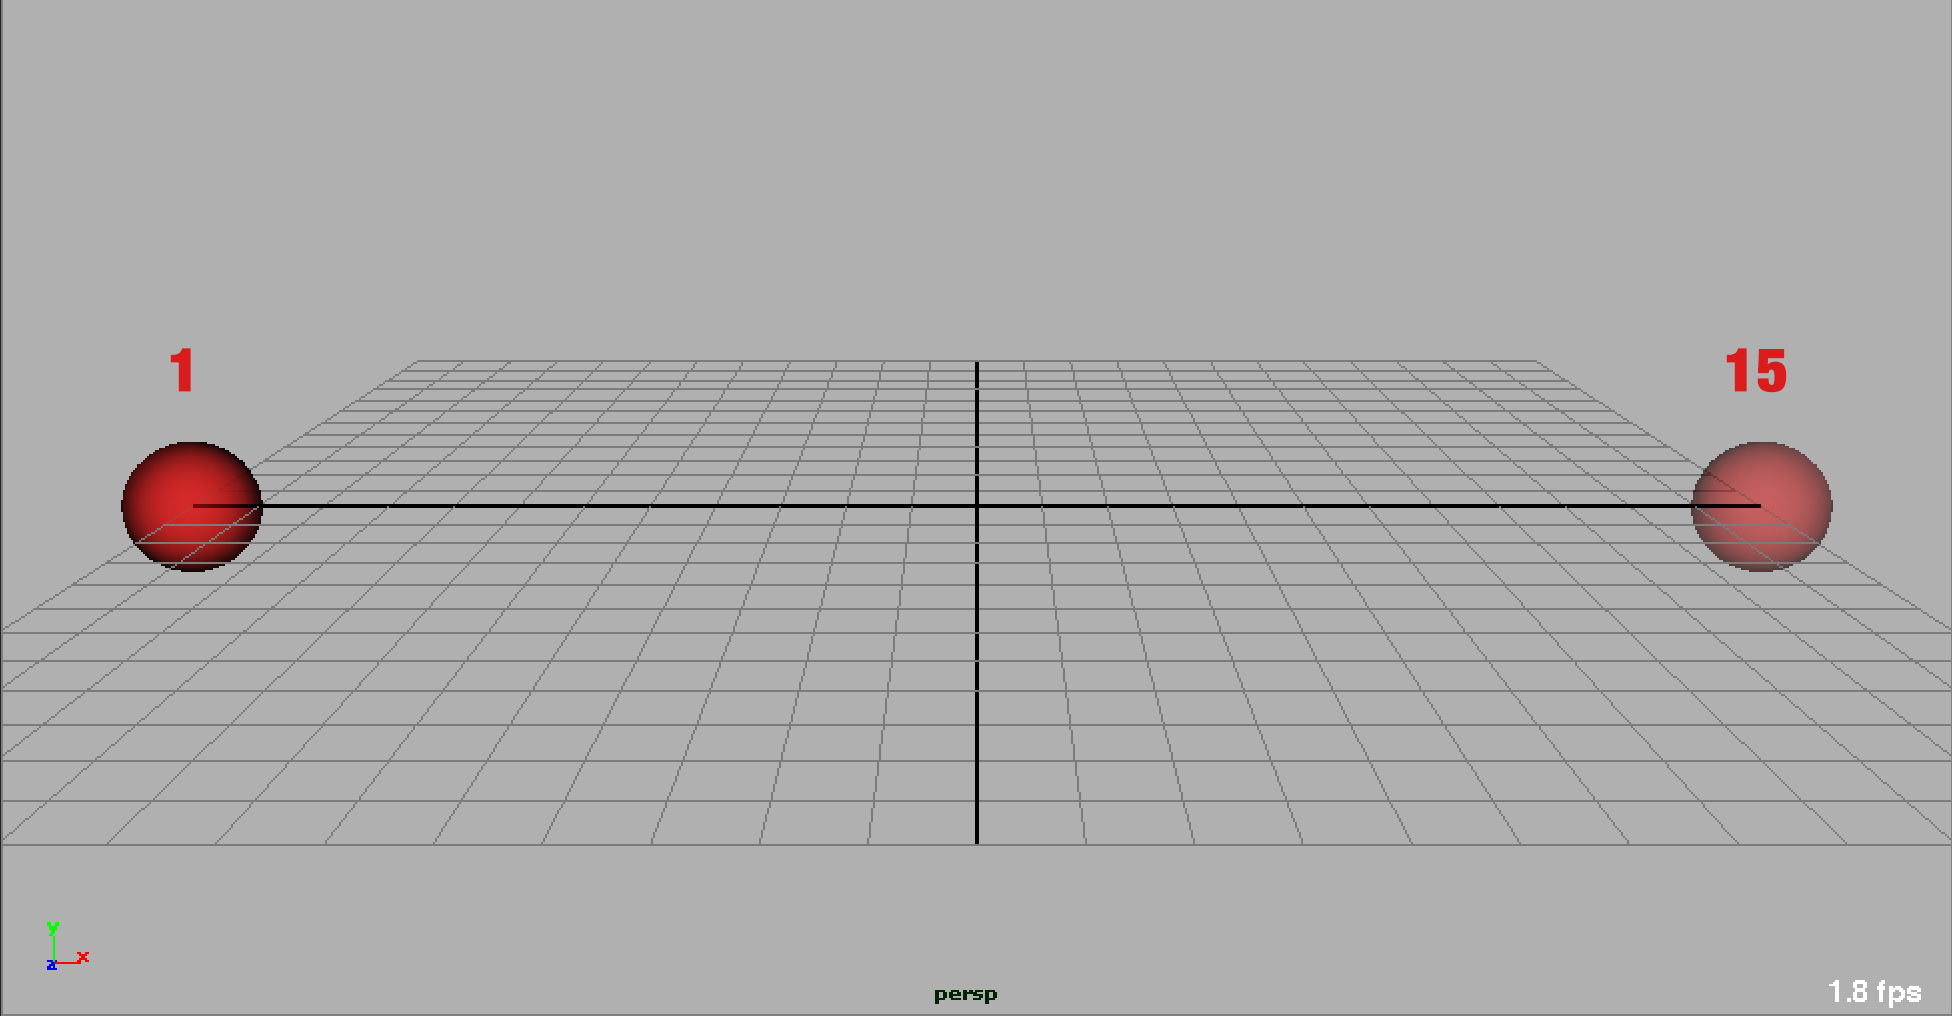
To give an example, let's take a look at a simple ball, with 2 key poses:
 Click on the image to view full screen
In this example we have a ball with 2 key frames. The ball is keyed at frame 1 on the left of the screen and it will move across the frame to the right until it reaches frame 1.
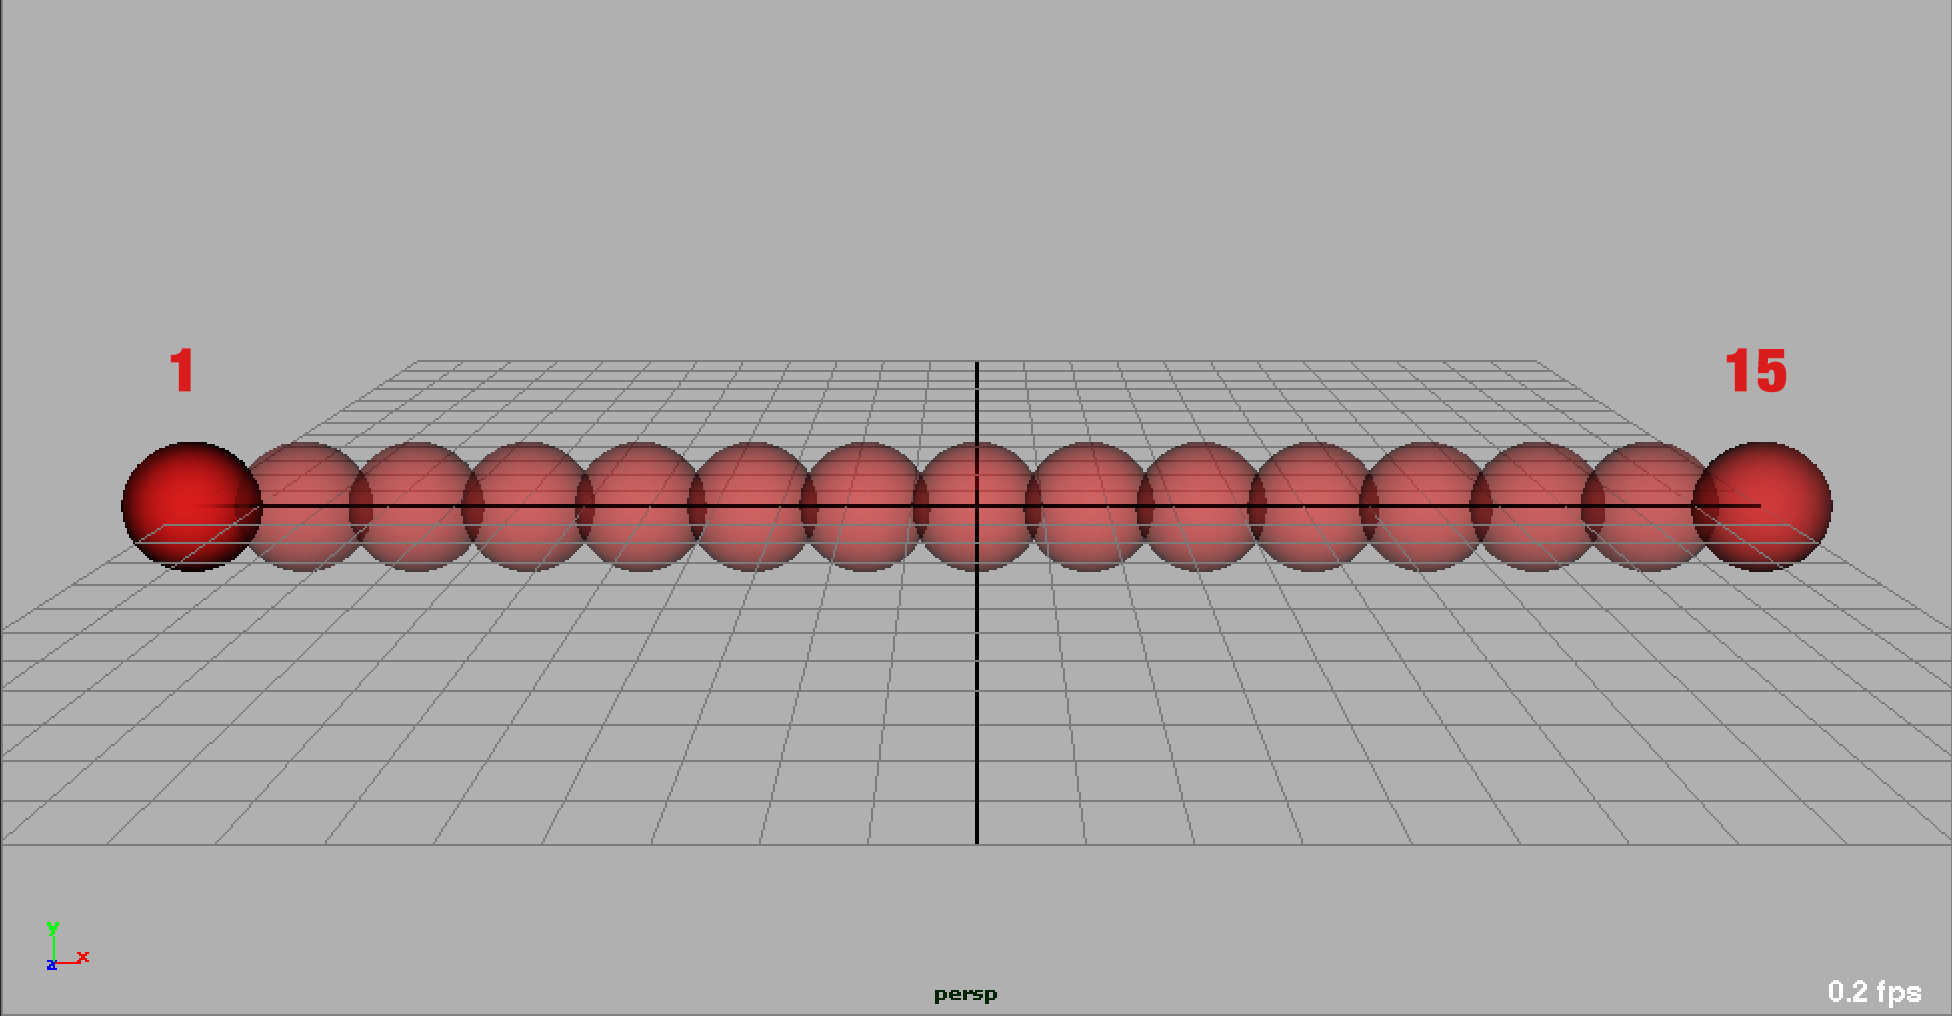
If we let the computer give our ball simple, computer generated, linear key frames...
 Click on the image to view full screen
 Click on the image to view full screen
This motion is predictable and easy, but it is also flat, robotic, and lifeless. Here is a playblast of this linear motion (Note this video below has been extended to 60 frames to help the illustration... Click it if it doesn't automatically play):
Right Click and Save As 'here' to download Quicktime movieThis is where Slow In and Slow Out comes into play.
Do you remember the ball bounce exercise? You might remember how we adjusted the curves at the peak and bounce positions along the path of action to control how different spacing could effect the ball's movement. In this demo, we will use similar spacing ideas to effect the way a ball moves from one pose to another.
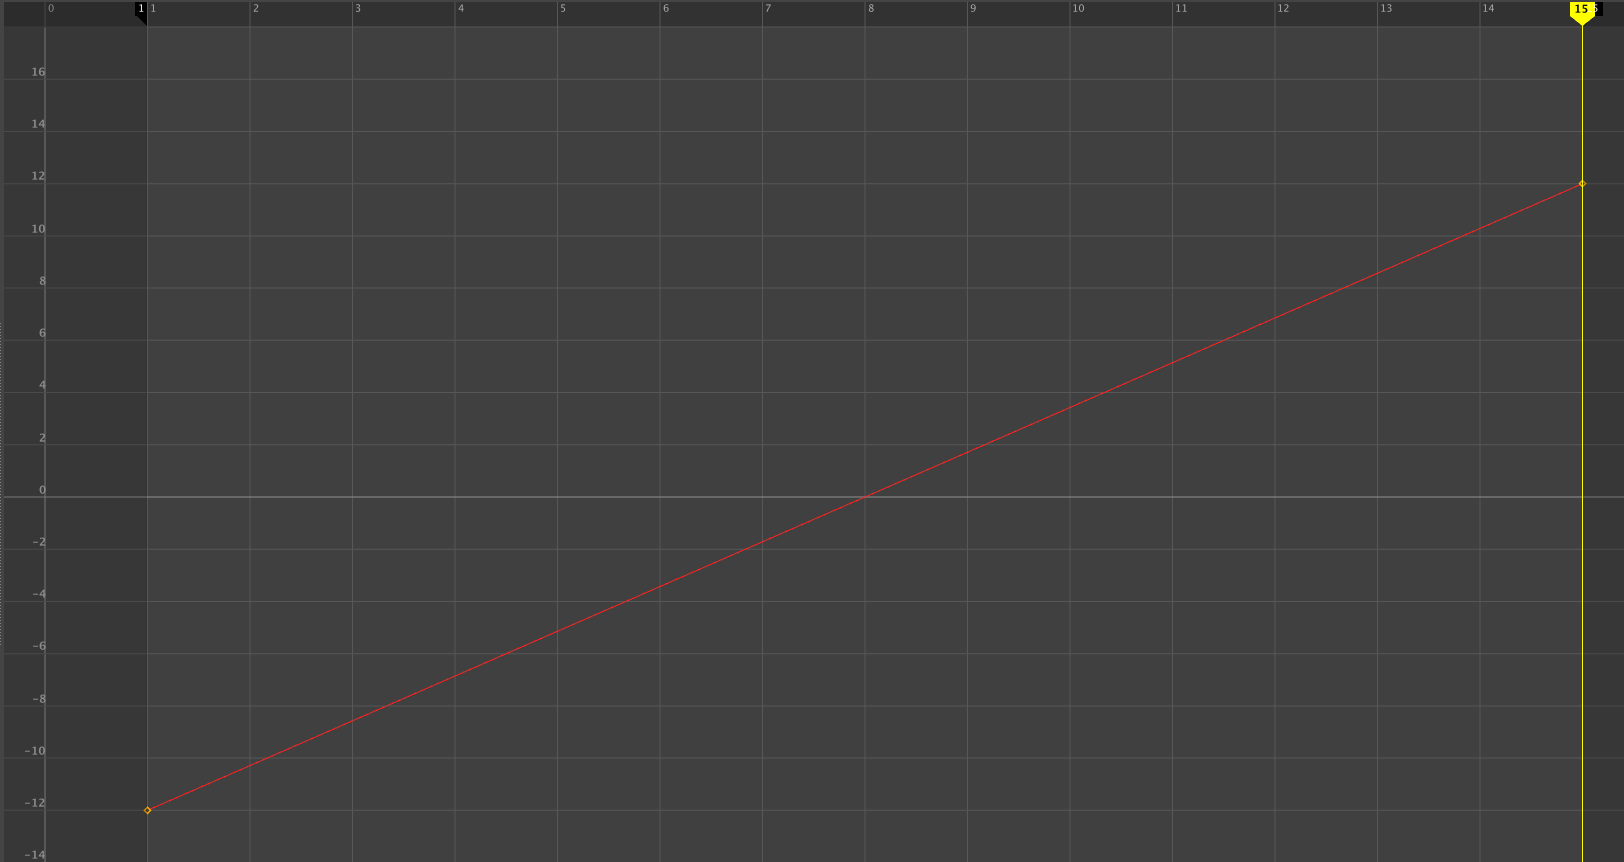
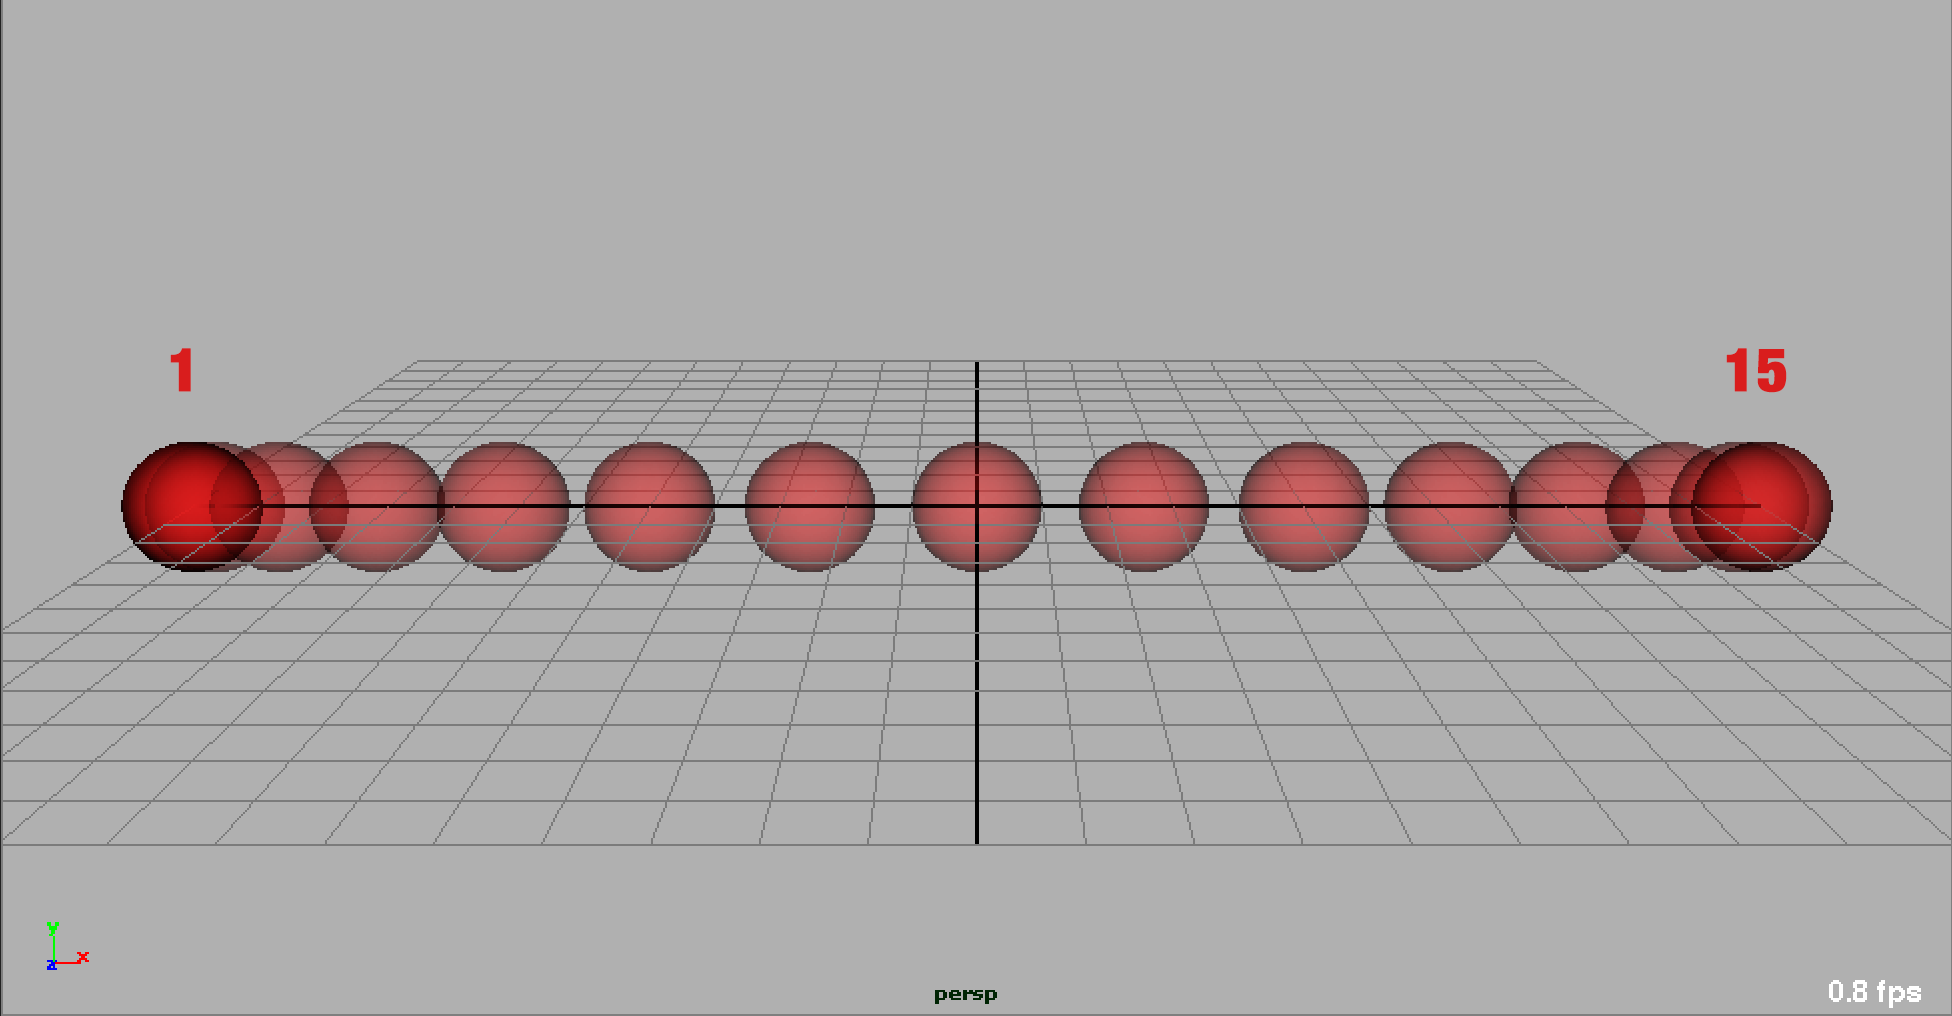
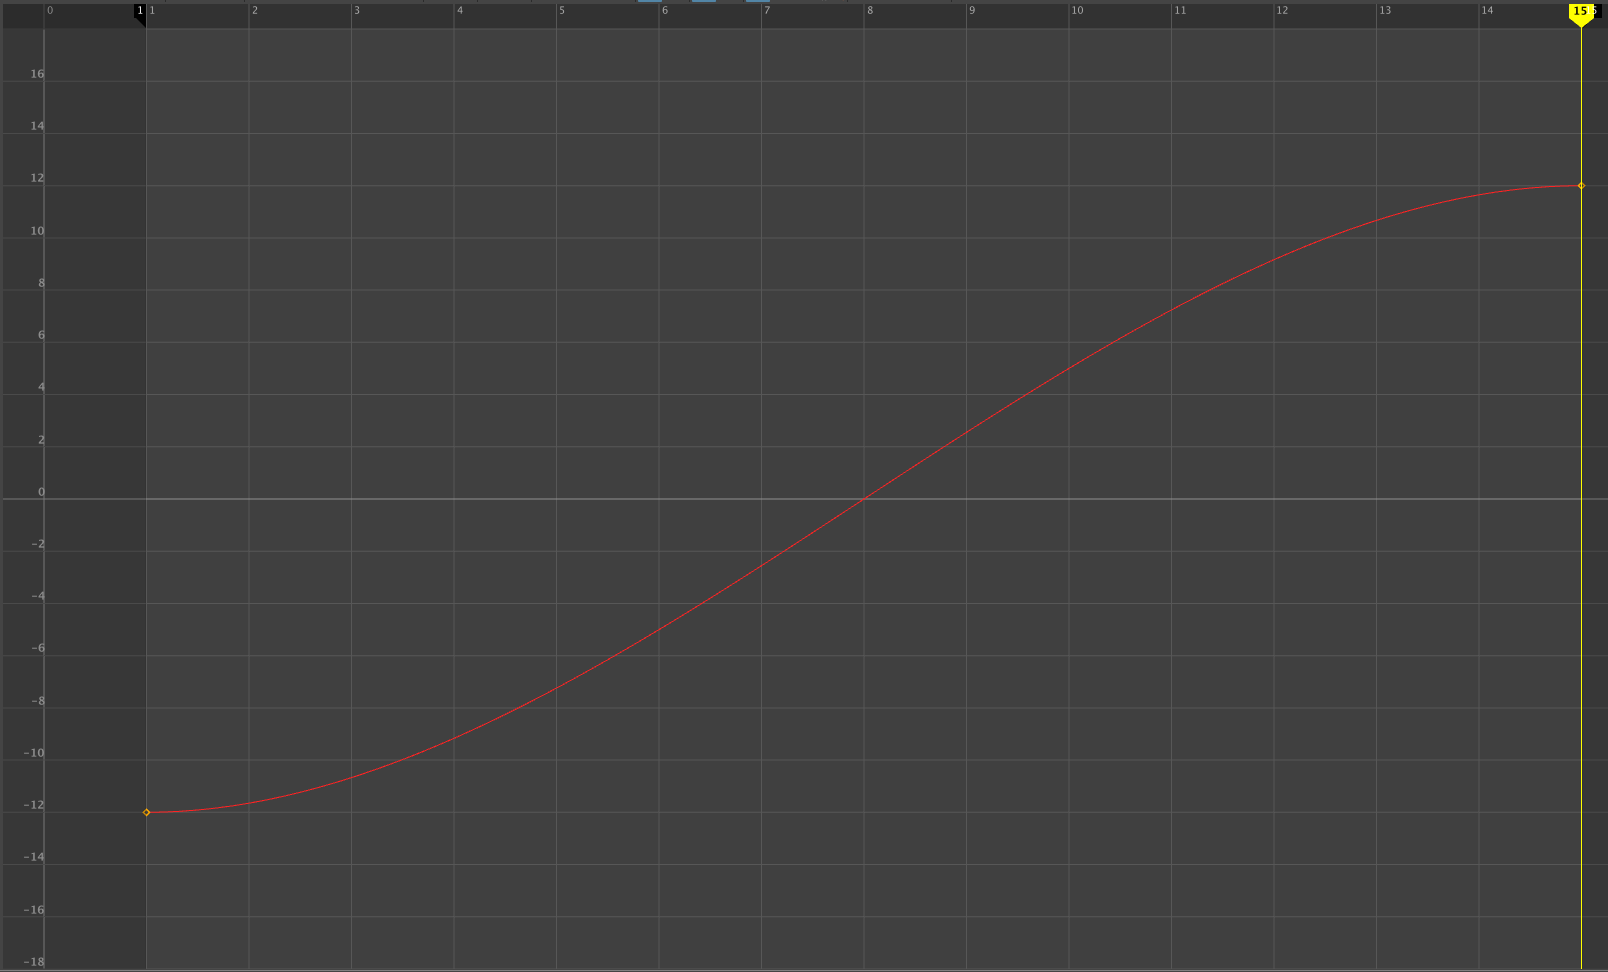
So let's say that the ball is going to start from a stopped position, begin moving slowly, travel across the screen and then come to a slow stop on frame 15. We would construct our spline in the graph editor to flatten out around our keys on frame 1 and frame 15, making the movement of the ball SLOW OUT of the key pose on frame 1, and SLOW IN to the key pose on frame 15.
 Click on the image to view full screen
 Click on the image to view full screen
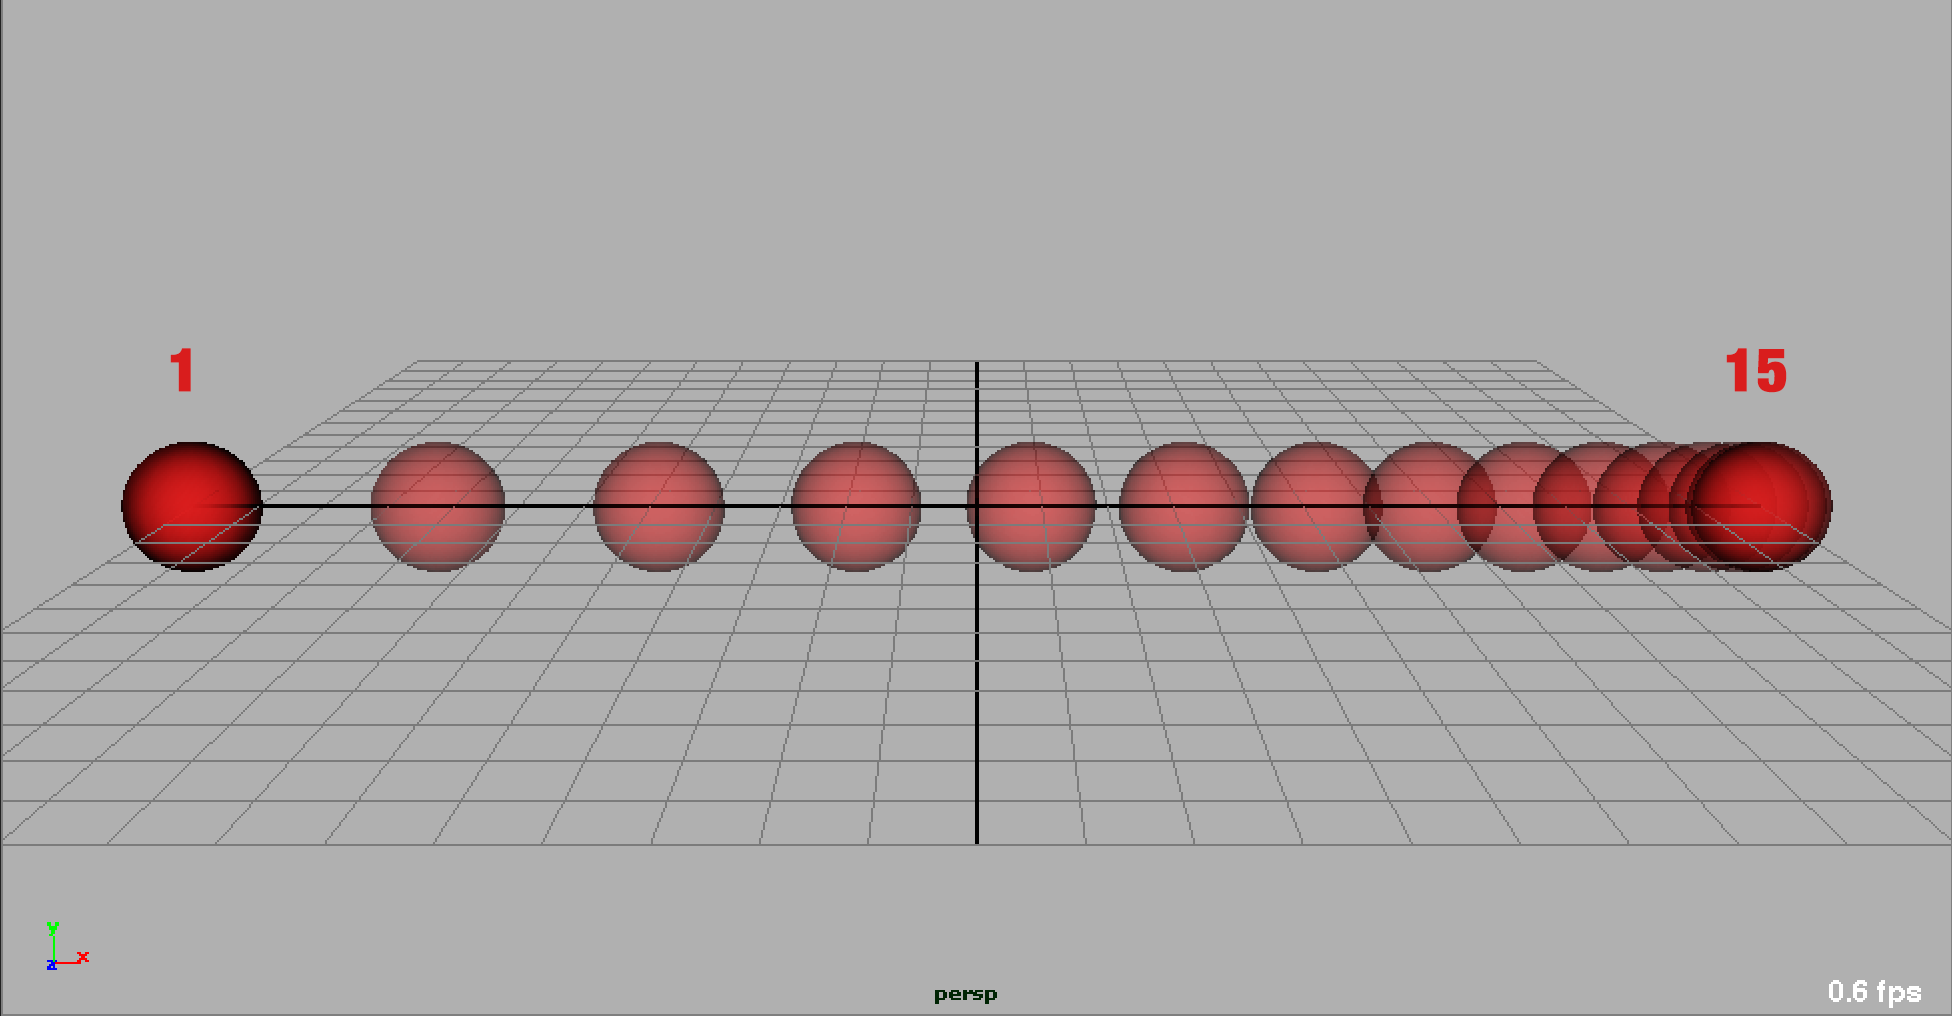
Notice in the images above that the spacing begins very tight from frame to frame. As we want the ball to pick up speed, the spacing grows further and further apart. This creates a SLOW OUT of key pose 1.
As the ball nears screen right, the spacing begins to bunch back up, creating the SLOW IN to our key pose on frame 15.
At this point, we should have an animation that plays like this (Note this has been extended to 60 frames to help the illustration):
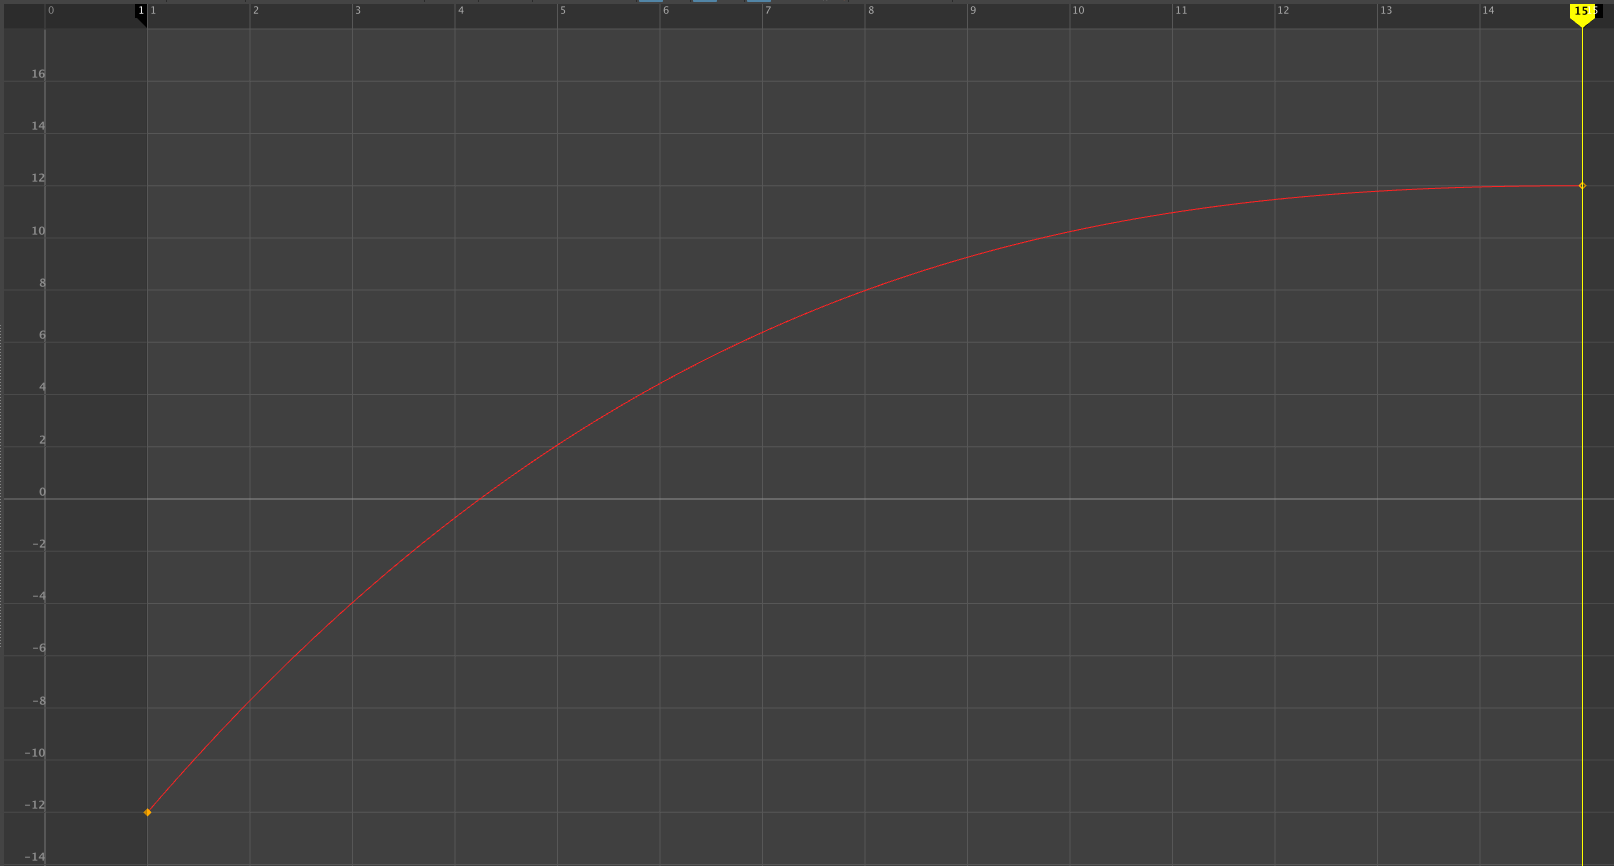
Right Click and Save As 'here' to download quicktime movieThis one particular method of slowing out of one pose and in to another can create a bit too much uniformity sometimes though. So let's change the spacing of the ball, using the same key poses, to reflect the ball already moving at the beginning of the shot, and it will come to a slow halt by the key on frame 15. In other words, the ball will only SLOW IN to the key on 15.
 Click on the image to view full screen
 Click on the image to view full screen
This was a similar curve to many of the Z translation curves in your bouncing ball assignments. The ball was dropped, or rolled in off camera, and as it contacted the ground from bounce to bounce it slowly lost its momentum and came to a slow halt by the end of your shot. It SLOWED IN to it's final pose.
Right Click and Save As 'here' to download quicktime movieWhile these are more simple examples, in almost every shot of animation, things are slowing in and out of poses. This is crucial to build texture in your movement, and how much you will slow in, or slow out of a pose will be dependant upon what you are animating, or the timing of the movement you wish to achieve. But here we have made a good example of how this principle works on its most basic level.
Assignment
More directly related to this weeks assignment, you will be animating another ball, but this time it will be attached to a platform and hanging down. This is the animation of a pendulum that will be reacting to the movement of a secondary object and will swing back and forth and eventually coming to a rest.
Once you have determined your key poses of your platform and pendulum and begin to spline your work, you will need to determine just the right amount of SLOW IN and SLOW OUT of those keys. This can be tricky because slowing in and out too quickly can make the pendulum feel weightless. While slowing in and out too slowly can lead the viewer to believe that your pendulum is running in slow motion, or under water.
 Click on the image to view full screen
So take the time to really analyze the spacing as you slow in and out of those key poses in order to insure that your pendulum feels like it is free weight being controlled by the force of gravity. Also remember from the grass blade assignment that the force should begin at the base, and work its way down to the weight at the bottom. If your pendulum swings with a straight arm, our audience could think that we have animated a metronome.
To learn this technique, we will build on the overlapping assignment we did last week. This week, we will be animating a pendulum!
The base of the pendulum should make a move, come to a stop, and the actual pendulum, below the base, should act accordingly.
Planning is huge here!
Once complete submit your final playblast MP4 video to Assignment 5 on UNM Canvas
Here is a great example from a previous student (Luke Shipers) for you to reference:
-
Class Lecture
Attend Class Lecture -
Class Instruction
Participate in class discussions and lab exercises -
Discussion
Slow-in and Slow-out -
Lab & Exercises