Module 8 - Solid Drawing
Overview
The principle of solid drawing means taking into account forms in three-dimensional space, giving them volume and weight. The animator needs to be a skilled draftsman and has to understand the basics of three-dimensional shapes, anatomy, weight, balance, light and shadow, etc. For the classical animator, this involved taking art classes and doing sketches from life. One thing in particular that Johnston and Thomas warned against was creating "twins": characters whose left and right sides mirrored each other, and looked lifeless. Modern-day computer animators draw less because of the facilities computers give them, yet their work benefits greatly from a basic understanding of animation principles, and their additions to basic computer animation.
Volume
There are a few aspects to the concept of solid drawing one of which has to do with volume retention.
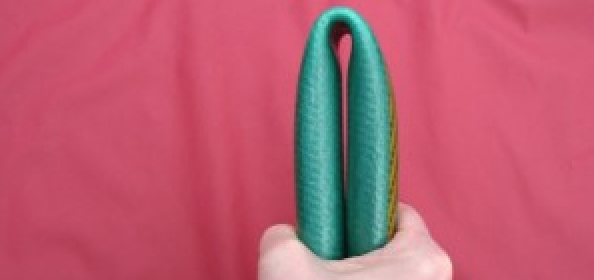
One of our other principles is squash and stretch and has to do with squishing down and stretching out our characters to emphasize motion over physical flexibility. However, there is a time when squash and stretch can actually take away from our emphasis if it isn't executed with some solid grounding in the physical world.
Let's look at a real world example of something that is actually squashy and stretchy. Play Doh! Channeling your inner pre-schooler think back to when you used to play with the gooey awesomeness. Grab a lump of clay in your mind, set it on the table and press your hand on it to squish it down. What happens to it? As it squishes down it flattens and spreads out. The shape changes, but the amount of play doh doesn't go away. It doesn't get compressed into a smaller shape. It retains it's volume as it squashes down to flatten like a pancake.
What happens when you take that play doh ball and grab both ends and begin to stretch it out? As it stretches the center elongates and simultaneously thins out until it gets so thin it breaks. This thinning out is the same physical volume retention as the squashing just in the other direction.
When you create a drawing on paper or model in the computer you are not limited by physical properties and as such can do whatever you want. This can be a great thing, but can also lead to confusion in your audience minds. Therefore it is always your job to retain volume in your characters and objects as you animate them. If you squash something down make sure it stretches out to the sides a bit. If you stretch something out vertically make sure that it thins out in the center a bit.
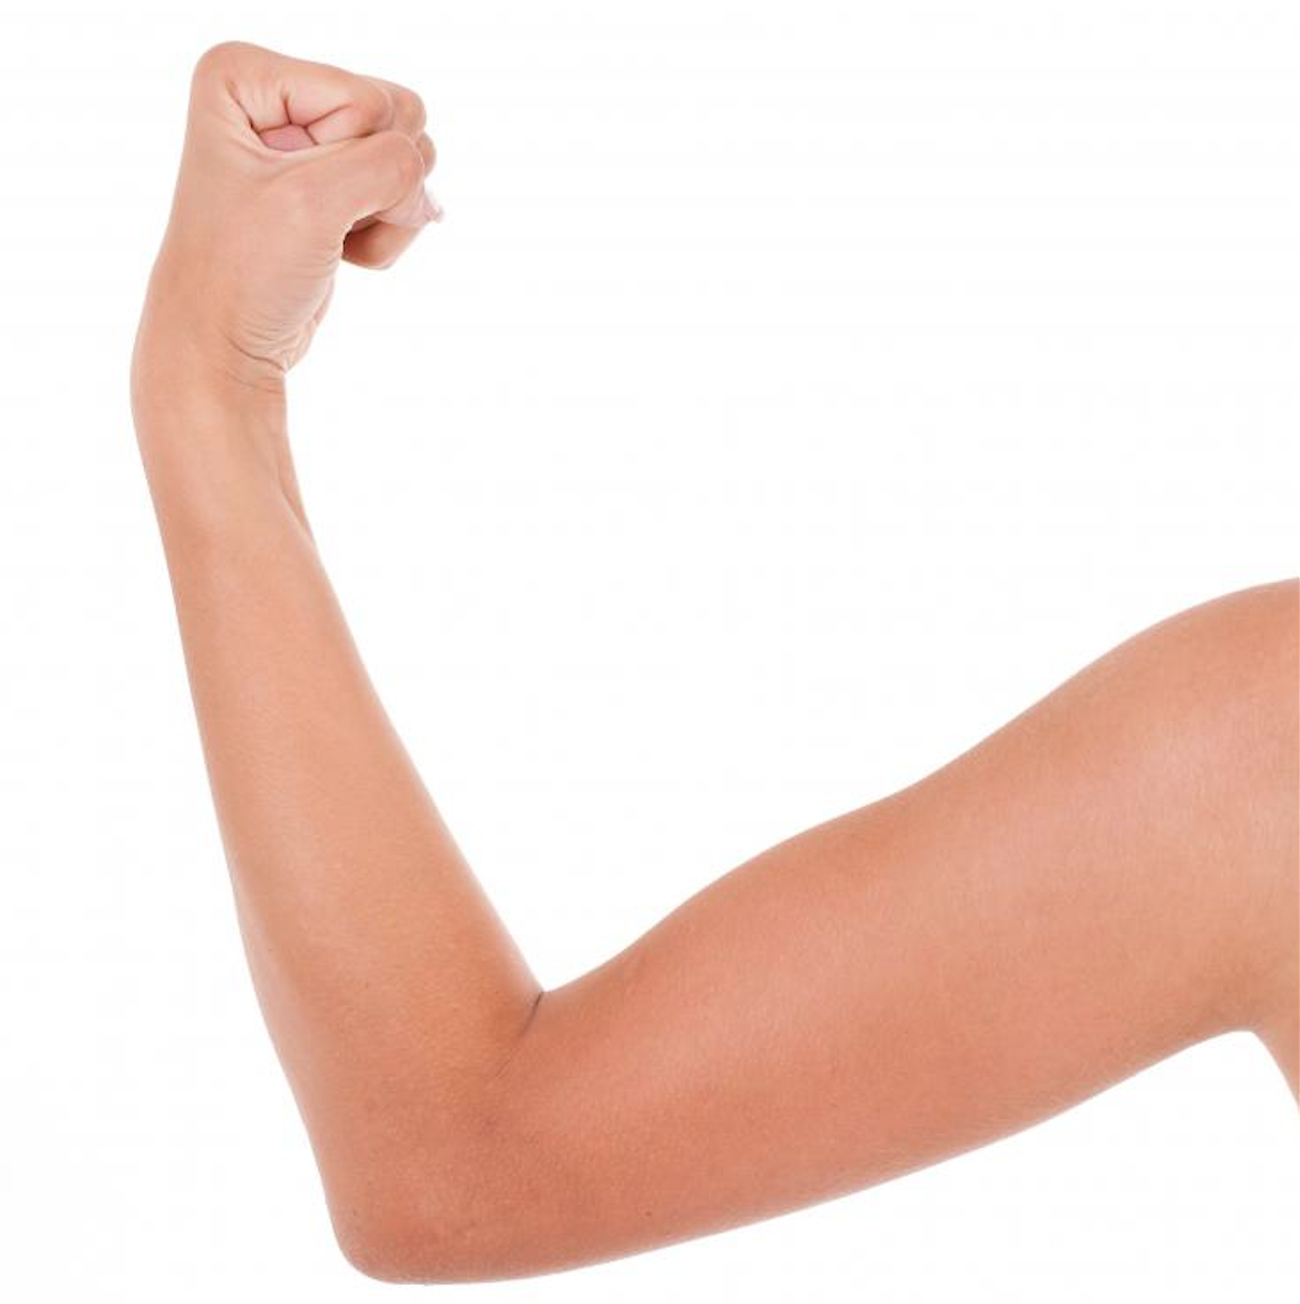
In addition to the attention we should pay to volume during squash and stretch we should also keep it in mind when dealing with things like weight and deformation. Bend your elbow and look at the deformation. Does it bend like a drinking straw or a garden hose with a kink? No, there is stuff (ie Muscles, Bones, Tendons) inside your arm that prevents that kind of deformation from happening.
 Click on the image to view full screen
 Click on the image to view full screen
If your character is fat and heavy then the way he/she moves should support that weight. Also that weight should take on a life of its own in terms of overlapping action and follow through. If the giant stomach remains rigid then it can appear to be either a solid mass or just not lifelike. Always ensure that you think about the makeup of your objects as you pose and animate deformations. Failing to do so can cause your audiences attention to be ripped out of the story. This is a bad thing remember. Even if your animated timing is solid it won't fix bad deformations.
I should note here that with 3D computer animation deformations like this are generally not the job of the animator to solve. This is usually the job of the character setup or rigging artist. However, ultimately the final performance of your character is your job as an animator so own it and give your comments as they make sense to support your mission.
As with all principles this is a guideline and not a rule and can be broken if done so for specific reason and execution. However, this is one where you likely wont be breaking it much unless you have a very stylized animation style and even then it should be wholely considered even if it is more subtle than usual.
Twins
The problem of twinning in drawing/art has nothing to do actual twins in real life. It has to do with a character being drawn perfectly symmetrical. Nothing in reality is perfectly symmetrical (and even so it sure isn't as visually interesting as asymmetry).
Some of this work comes in the modeling/texturing stage when characters are designed and created, however the most obvious place this is scene is in posing. Look at the drawing below for an example from the Illusion of Life.
 Click on the image to view full screen
As the notes on the image describe it is much better to pose your character with each part on the left and right given its own attention to support the pose. Beyond that individual fingers on a single hand shouldn't be perfectly symmetrical either. This can be as simple as having one of a dogs ears being slightly bent at the end and its head cocked slightly to one side with one eye slightly larger than the other and one front leg being slightly larger and smaller than the other.
This is where working on the computer can be a lot harder than with hand drawing. Computers like perfection and order and as such don't deviate into realistic imperfection without significant effort from you. This includes character everything in the pipeline including animation. When you pose your character ensure avoid twinning like the plague.
 Click on the image to view full screen
Of course it should go without saying that if twinning supports the style of your character or shot than you can break this rule without fear of imprisonment. Just do it on purpose and not because you were being too lazy to give it consideration!
 Click on the image to view full screen
Assignment
Flour Sack Jump II
Special Note!
This assignment you will also have 2-weeks to complete. However, we will be having a new module next week to cover a new principle. Do not miss next weeks module!
This is the second 2 week assignment where you will be again doing a flour sack jump, but this time you are going to add a bit of emotion shift during the shot. Your flour sack should start off excited or encouraged about a super high jump. However, mid flight things go wrong and he ends up landing flat on his front or face. When the sack stands back up he then looks sad or disappointed.
We are still focusing on the quality of the shot as a whole. The timing and posing of the character before the jump, throughout the jump, and after the jump all must work together to make the shot read for our audience.
- Think about the shot you are going to be animating. Close your eyes and think about what actions you are going to be performing.
- Get up out of your chair and act it out. Do a few jumps to feel the motion in your body. Then stop yourself at different points in the jump and analyze your pose. Where are your arms? How is your body positioned? Where is your head? I don't recommend landing on your face, but video reference of you jumping onto a couch or bed could be fantastic!
- Do some sketches of your bodies position at those different maximum poses throughout the jump
- Get a camera and shoot some video reference of your jump.
- Analyze your jump frame by frame to see how that compares to your impressions of the poses you sketched out earlier
- Create your official key frame thumbnails for the jump as well as the path of action your characters center of gravity will be following.
- Now you can get working in Maya. Download the flour sack character rig file from this page
- Open the character rig and familiarize yourself with all of the controls. Pose the character and play with it to see what works and what doesn't
- Move your shot_cam to an angle that allows for us to see the action throughout yet emphasizes the emotion of the shot. A nice side angled wide shot would be a good choice
- Begin your official animation by working through the blocking of the animation using your thumbnails and video reference as guides
- Spline your keys and begin refining the curve tangents and adjusting timing and spacing as needed until your jump has all of the anticipation and motion solidly displayed.
- Get some feedback about your animation and continue polishing until you can't do anything more
- Get some more feedback and keep polishing
Your assignment is not due this week. But don't wait to begin.
-
Class Lecture
Attend Class Lecture -
Class Instruction
Participate in class discussions and lab exercises -
Discussion
Solid Drawing -
Lab & Exercises
-
Assignment 8
Begin Assignment 8 (2 week project)