Module 6 - Arcs
Overview
Most natural action tends to follow an arched trajectory, and animation should adhere to this principle by following implied "arcs" for greater realism. This can apply to a limb moving by rotating a joint, or a thrown object moving along a parabolic trajectory. The exception is mechanical movement, which typically moves in straight lines.
As an object's speed or momentum increases, arcs tend to flatten out in moving ahead and broaden in turns. In baseball, a fastball would tend to move in a straighter line than other pitches; while a figure skater moving at top speed would be unable to turn as sharply as a slower skater, and would need to cover more ground to complete the turn.
An object in motion that moves out of its natural arc for no apparent reason will appear erratic rather than fluid. Therefore when animating (for example) a pointing finger, the animator should be certain that in all drawings in between the two extreme poses, the fingertip follows a logical arc from one extreme to the next. Traditional animators tend to draw the arc in lightly on the paper for reference, to be erased later.
Arcs in Motion
Arcs are everywhere when it comes to motion. Most of this is due to the way the forces of nature work. Newtons first law sets our framework here nicely.
Wait?!?! Didn't we just learn from the slow in and out principle that things don't ever move at a constant velocity very much in nature?
The answer is yes and these two statements are not contradictory.
The root of this is that objects themselves wish to remain constant unless forces are exerted on them. The reason the motion isn't constant is because the forces themselves are not constant. The gravity from one object (lets say the Earth) is always pulling on another object (lets say a tennis ball). The ball sitting on the floor is being pulled towards the center of the earth constantly. The ground is pushing up on the ball to keep it from moving toward the center so the ball appears to remain still. However, if I apply a force on the ball (pick it up), raise it to a height and release it the ball still has the force of gravity trying to move it and now nothing (except wind resistance) is in the way from gravity moving the ball. Gravity accelerates objects it affects so those objects speed up the longer they are under that force. The equation for that happens to be F=Ma^2 for those interested. Basically it is a parabolic curve and not a constant one. Therefore if I throw a ball it will be pulled toward the center of the Earth at a gradually higher velocity (speed) until another force changes its motion like a wall or the floor or tennis racket.
There is a lot more science that goes into this which I find fascinating, but this is a visual art class so we won't go much more into that here. The important take away here is that objects naturally move in arcs all around us as forces are exerted on them. We of course can move things around on our own in very erratic patterns that do not represent arcs, but that requires more energy. Energy exertion has a cost and we are inherently lazy so when we don't think about (or want to be really efficient) it we will definitely move in smooth arcs and work with the natural forces around us and not against them.
Let's see some visual examples
 Click on the image to view full screen
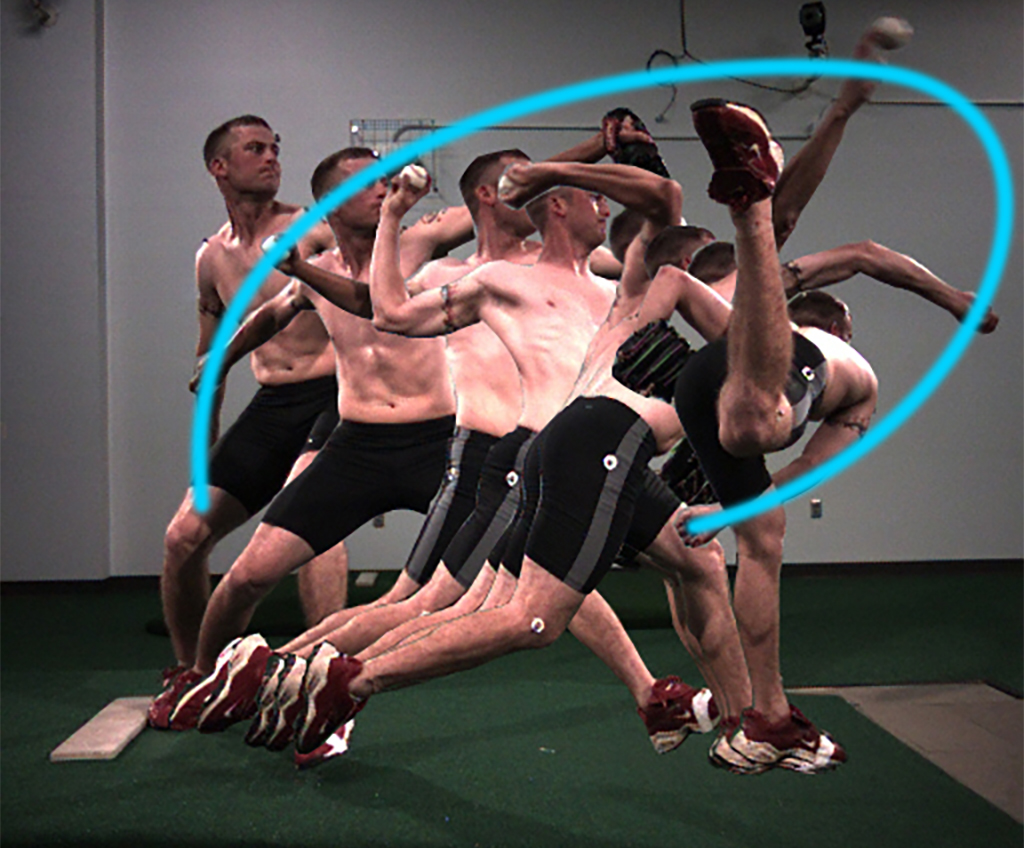
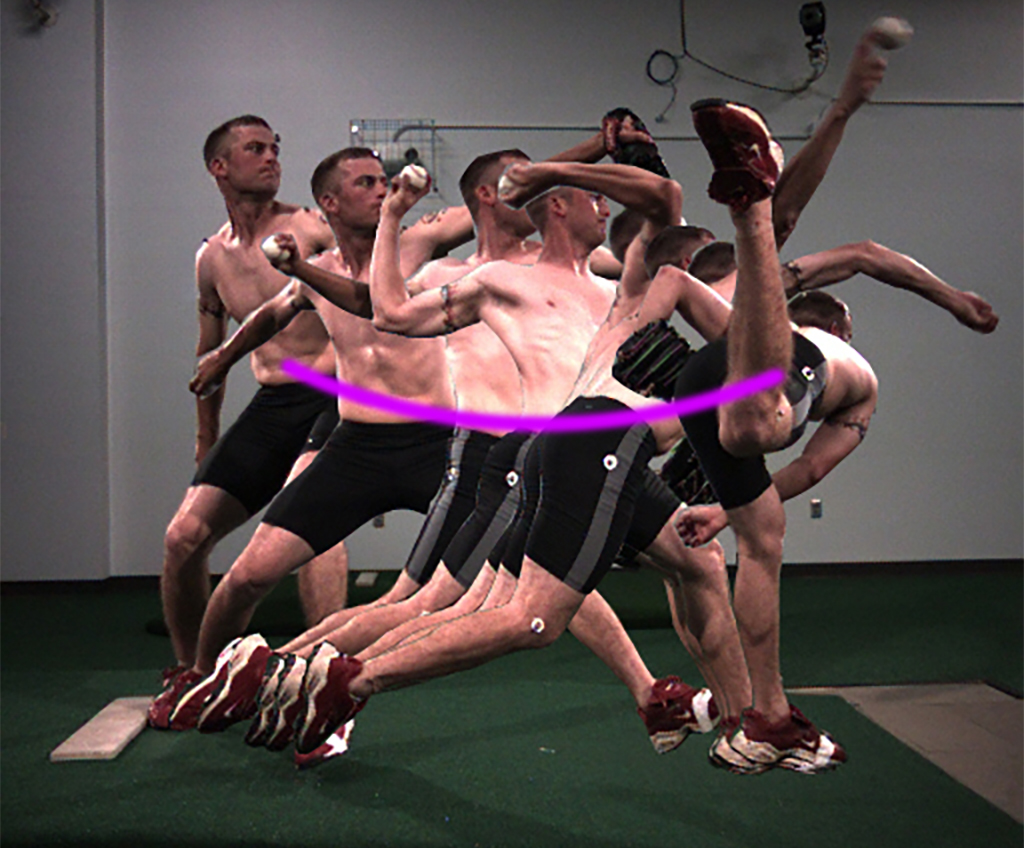
This is an image of a baseball pitcher with various frames of the pitch over layed on top of each other. We will be analyzing this image for all of the natural arcs found throughout the evolution of the action.
 Click on the image to view full screen
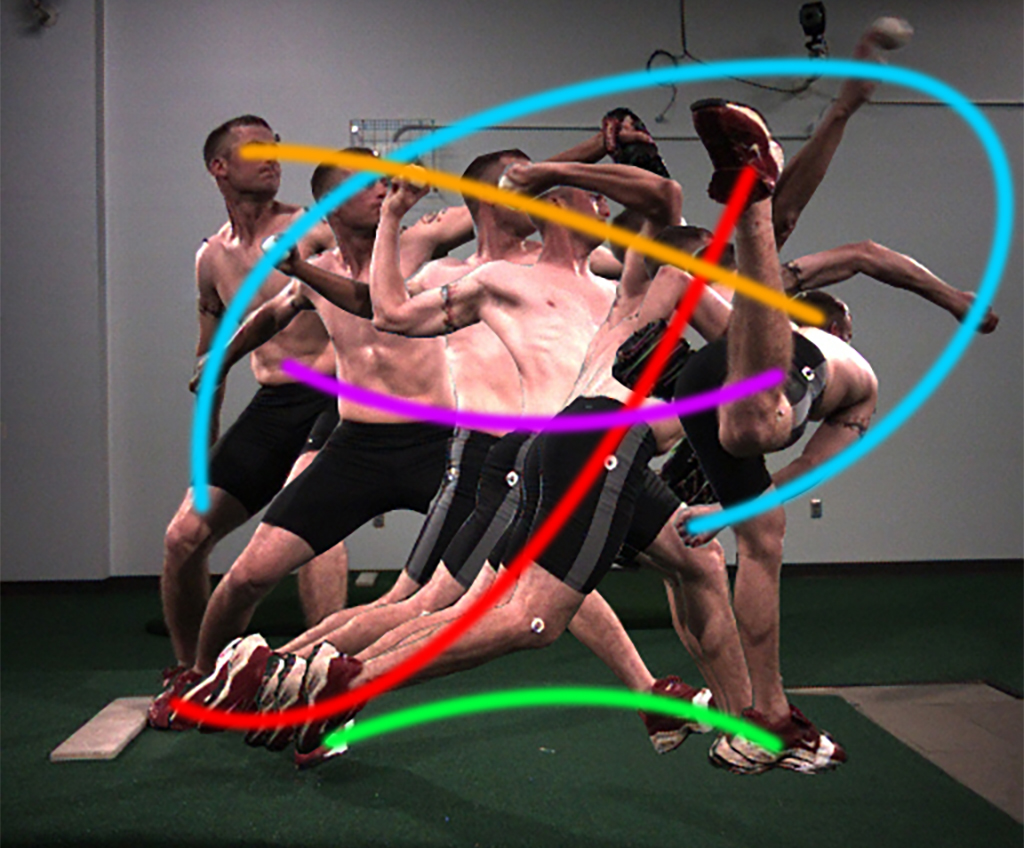
Looking at the blue curve we can see the path that the pitching hand follows through the action. Here the pitcher is attempting to exert as much force on the ball as he can in order to release the ball at the fastest velocity he can muster. Since we are inherently lazy people we will naturally move in a way that works with gravity rather than against it. This allows for our energy to focus more making the ball move faster rather. Bet you didn't know your body was doing that did yah? Clever 'ol body. :)
The most astute among you should have noticed that this isn't the only arc happening in the shot.
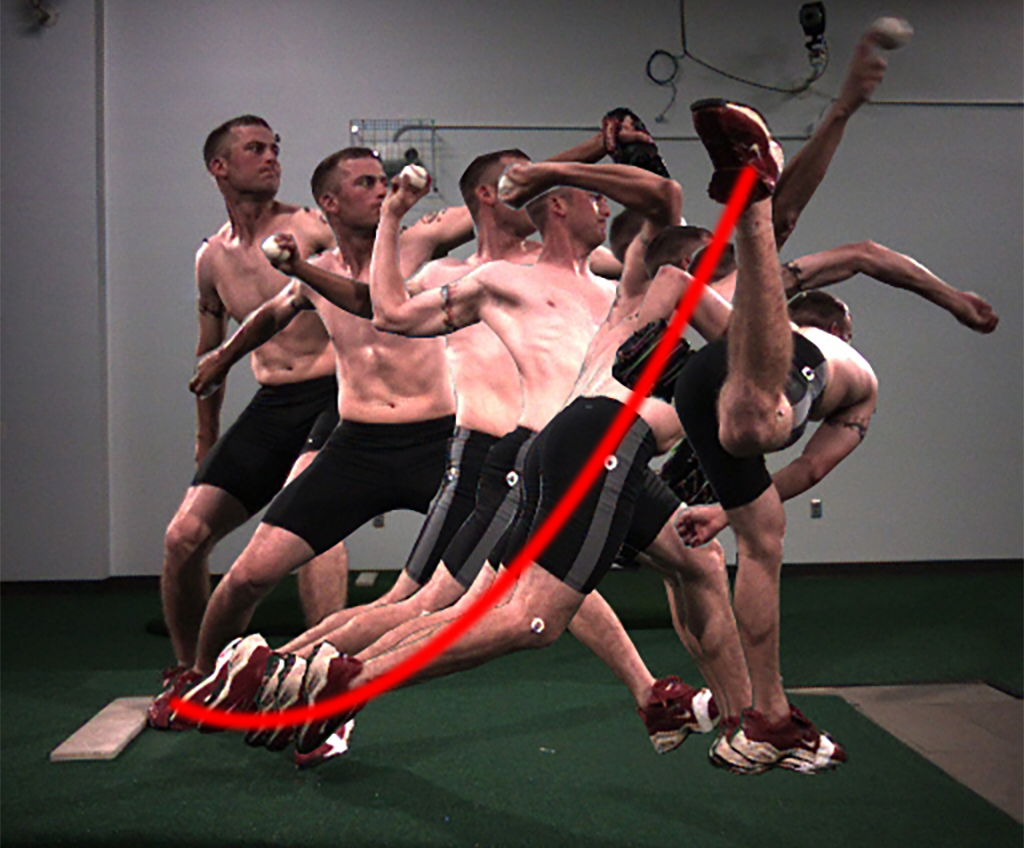
Here we can see the right foot's arc
 Click on the image to view full screen
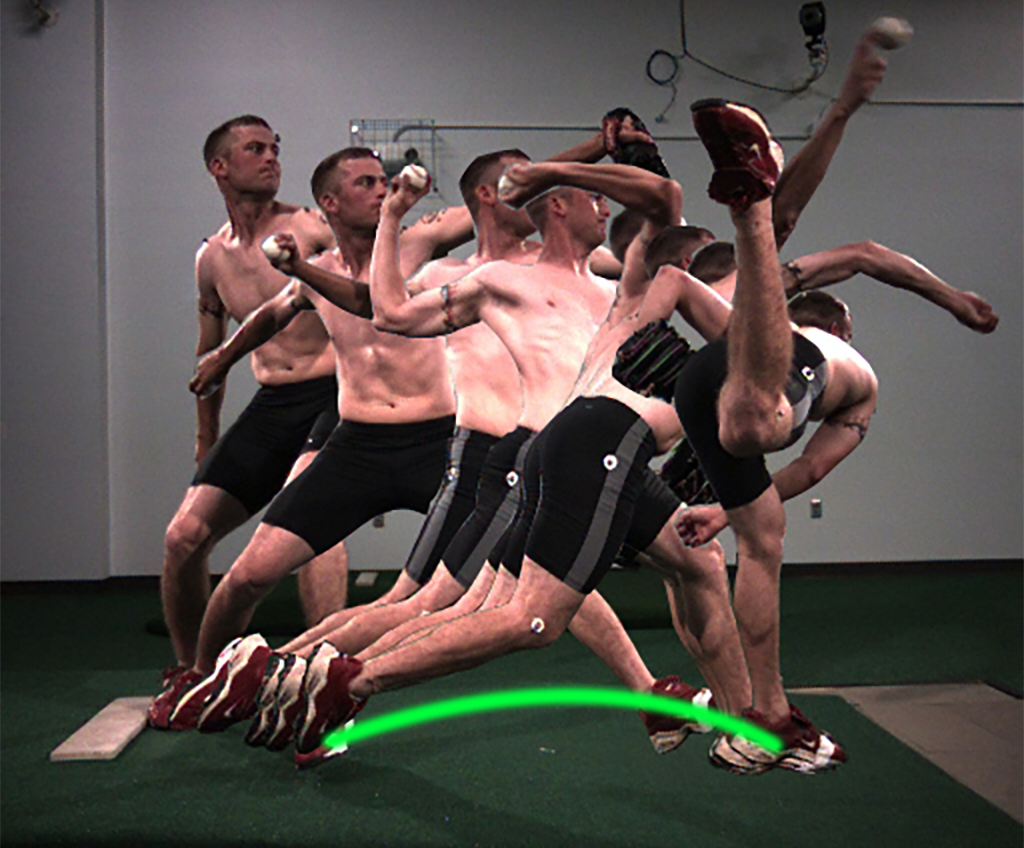
And the left foot's arc
 Click on the image to view full screen
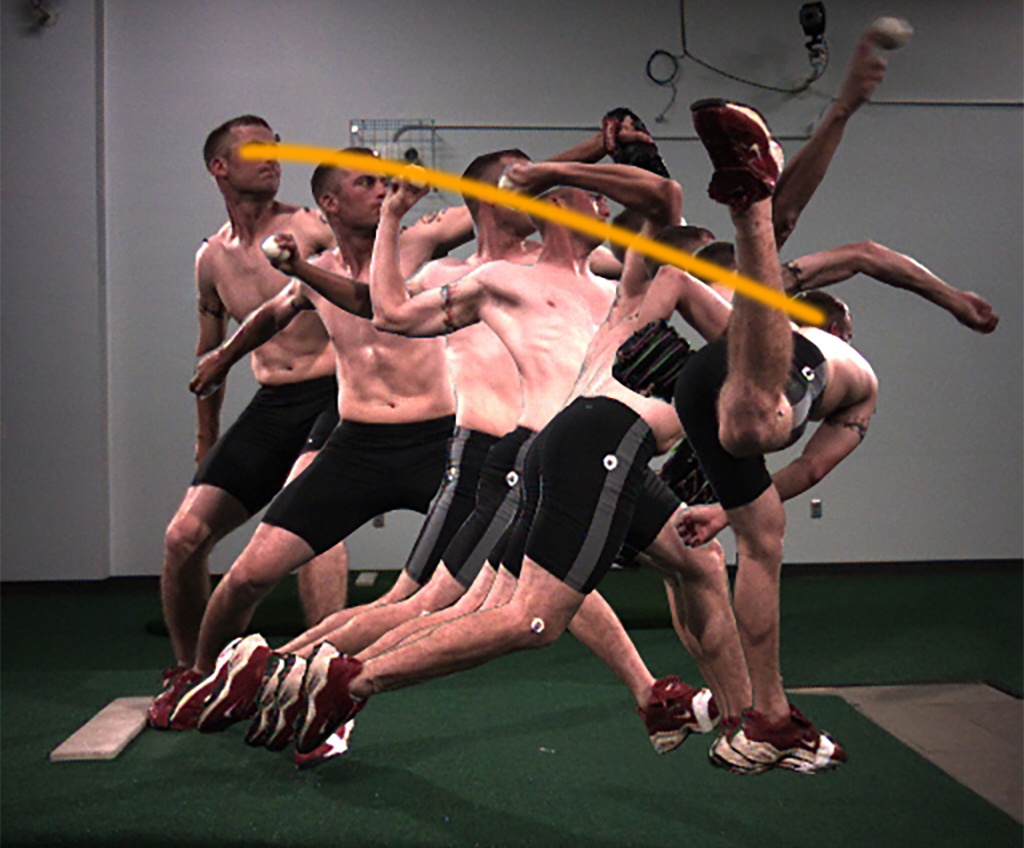
And the head's arc
 Click on the image to view full screen
And the torsos's arc
 Click on the image to view full screen
And the all of the identified arcs all together because we can
 Click on the image to view full screen
These curves don't necessarily completely match up with the objects we are tracking, but we aren't being that legalistic here. The point is to recognize that objects in motion like this are inherently biased toward curved or arched motion. This analysis is huge as we move into more complex animated interactions to ensure that our motion remains smooth and predictable. This allows for our animation to move away from trying to sell the idea that it is fake into the arena of allowing the viewer to focus on the quality, story, appeal and other sneaky things we do when producing an animation.
Here are some other illustrations of animation frame breakdowns for some other common arcs found in motion
 Click on the image to view full screen
 Click on the image to view full screen
And of course this familiar path though somehow viewed anew with our fresh knowledge of arcs
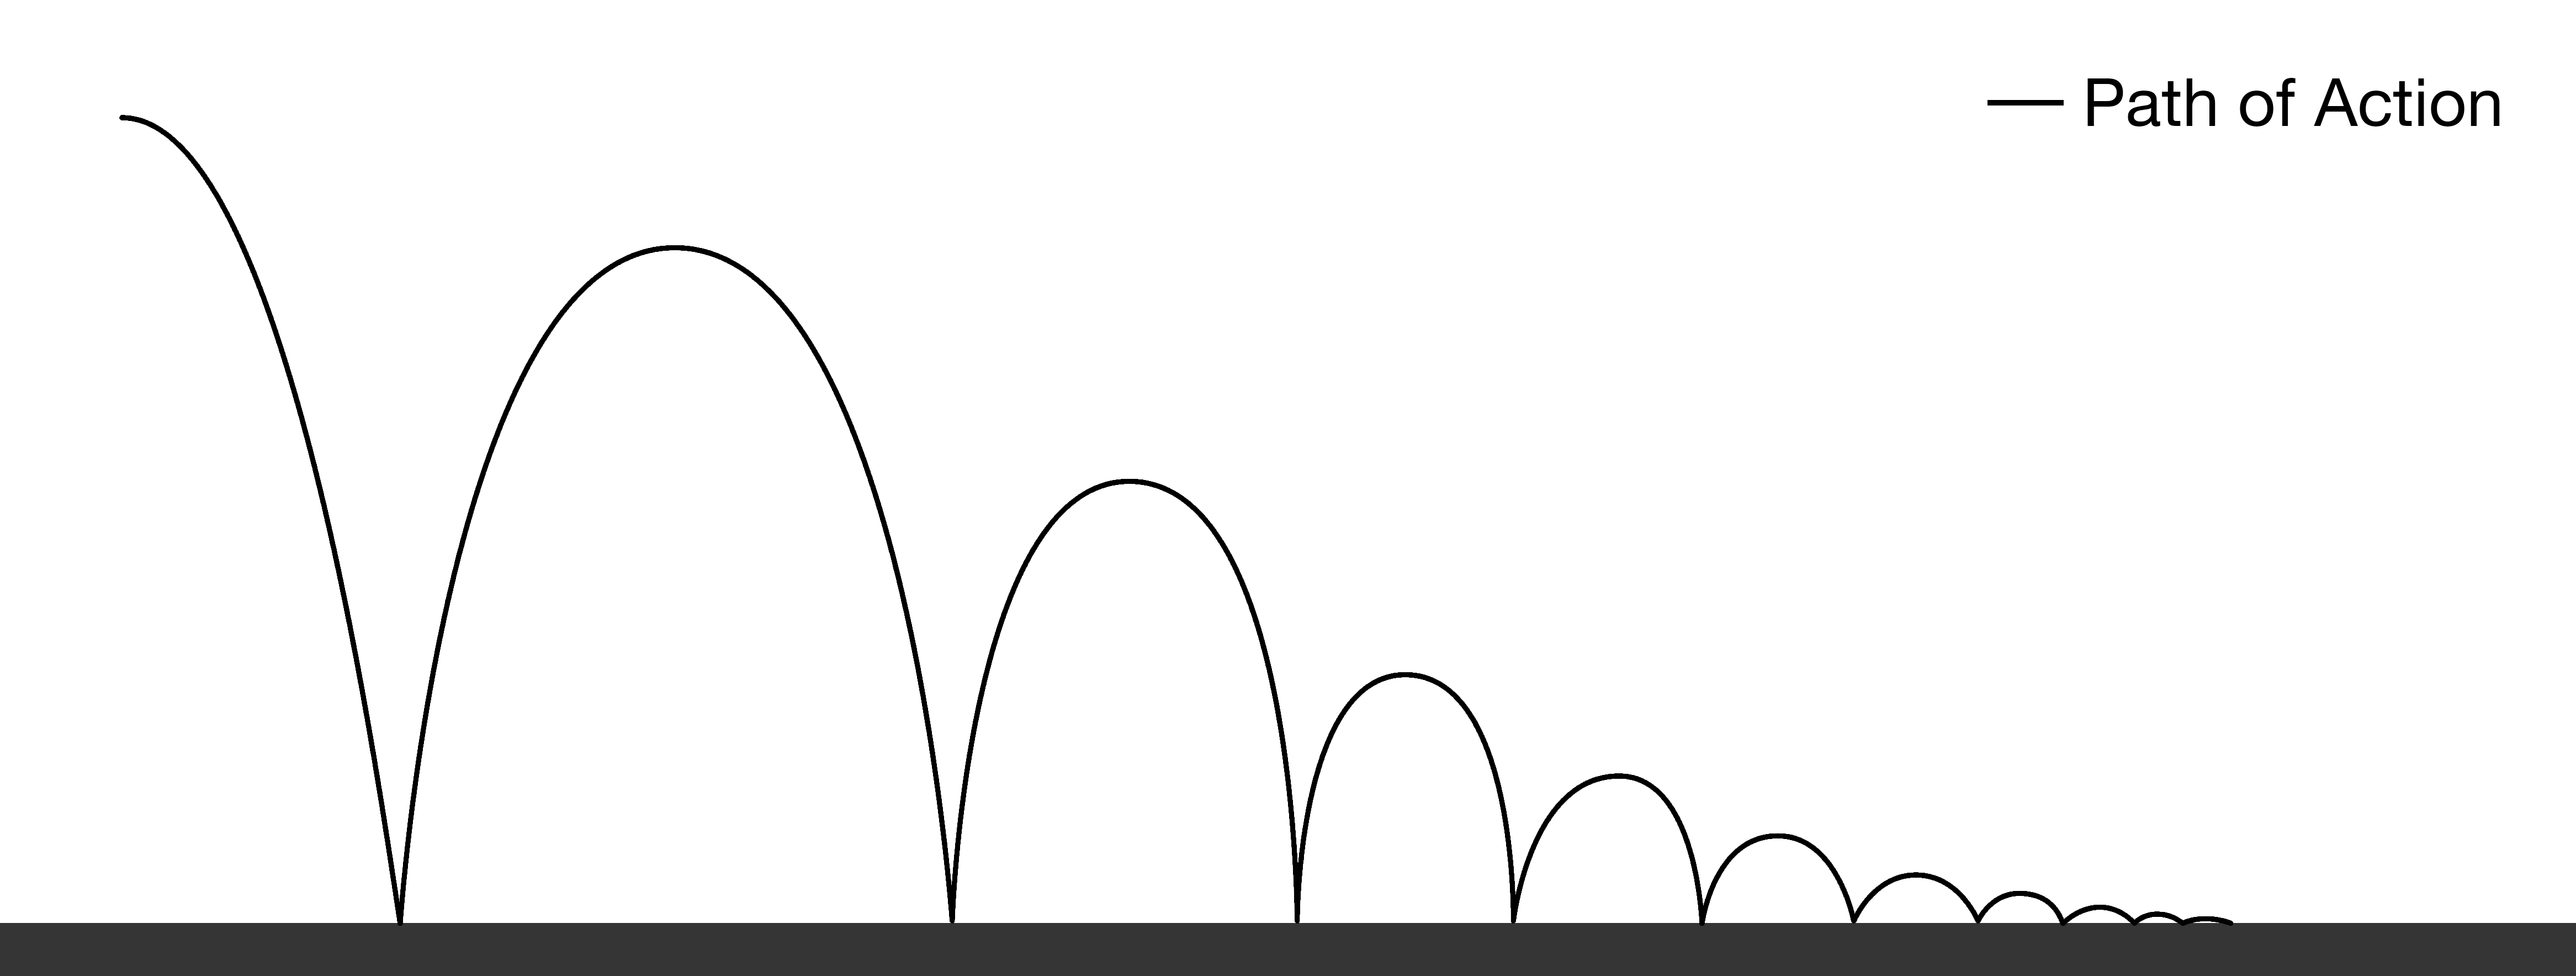 Click on the image to view full screen
Assignment
Obstacle Course!
1. Download the Obstacle Course file from this page and make any adjustments you would like to build the course to your liking (Adjustments are optional).
2. Draw out your course on a sheet of paper, and plot the route of your ball. Be sure to thumbnail in all your extremes and breakdowns.
3. The weight of your ball should be that of a tennis ball or pinball.
4. Your total animation should not exceed 200 frames.
A couple of helpful tips:
- Keep it simple! Don't try to plot a path that will keep the ball moving through the course forever. Creativity is encouraged, but the goal is to have a ball enter the course, interact with a few of the set pieces, and come to a stop before you hit your frame limit.
- While polishing your assignment, be sure to go over the ball's arcs very closely.
- Think about how the ball will interact with the environment and make it move instead of just the ball moving. This can add a lot of life to the shot.
- Think about how bouncy your ball is in this environment and stick to that throughout your sequence. Different bounciness at different times will be confusing.
- Planning is HUGE! You will do yourself about a million favors if you avoid jumping directly into animation and you do a lot of planning first.
Planning is huge here!
Once complete submit your final playblast MP4 video to Assignment 6 on UNM Canvas
Here is a great example from a previous student (Eric Geusz) for you to reference:
-
Class Lecture
Attend Class Lecture -
Class Instruction
Review Module Written & Video Material -
Discussion
Arcs -
Lab & Exercises