Module 5 - Shading & Texturing
Overview
This week we are going to cover the process commonly called surfacing or shading & texturing. Surfacing is all about how we change the way or models or objects look when producing the final render.
A good initial exercise to wrap your mind around surfacing how you would in detail describe a common household item to someone who cannot see it. Let's take a vase of flowers as example.
The starting point of the description would obviously focus on the objects size and shape. The vase is round and large at the bottom but tapers toward the top leaving an opening that renders the object hallow inside. This description of the vase is very detailed, but only of its shape (modeling). At this point the person who cannot see the vase still doesn't fully know what it looks like. I would then describe the surface of the vase as being made of clear glass that allows me to see through the object but not perfectly as the image on the other side of the vase is distorted (refraction). I can also see that light and my own face shines back at me (reflection) pretty evenly and the vase feels very smooth to the touch. These latter descriptions are about the surface properties of the object rather than its shape. The description of the surfaces of the flowers inside the vase would include other properties like color variation, roughness, translucence (light transporting through an object), and others. The more observant you are about the subtle variations among the objects will allow for better descriptions yielding much better communication about what those objects actually look like to you
The process of surfacing is creating materials (shaders) that have the right blend of all of the attributes needed to communicate the desired resulting surface look for your models whether it is rough, brown, patterned, smooth, reflective, bright, hot, etc.
Material & Shaders
At this point you haver already had a basic introduction to material and shaders in the solar system assignment. While by no means was that comprehensive our introduction should have at least given you some sense as to their use and purpose within the 3D pipeline.
Materials in Maya, or commonly known as shaders, are the base level nodes that dictate what look our models have on a sub-polygonal level. For the objects upon which a material is applied it will dictate among many things the objects color, transparency, reflectivity, etc. A material can be applied to many objects.
A potentially helpful analogy of materials could be buckets of paint. The same paint in the same bucket will give whatever you paint with it the same look whether it is doors, ceilings walls or otherwise. If you want 2 walls to be white and 2 more to be blue you use the white paint from the white bucket to paint the white walls and you use the blue paint from the blue bucket to paint the blue walls. Each wall doesn't need its own specific color unless they are supposed to look different. Furthermore different paints can be more glossy or flat yielding more or less reflectivity.
Okay, enough analogies. Let's look at how this actually plays out in Maya. The image to the right shows the common base materials (shaders) available to you in Maya. Some have been crossed out not because they are bad or not-available, but because their benefits and features go beyond the scope of our lesson. We will be focusing on Surface Shader, Lambert, Blinn, and Phong in this lesson.
Each of these shaders have different base level properties that help you decide which shader to use for the surface you are trying to create. Let these questions guide you to that selection.
- Is the surface affected by light? Does the object self-illuminate like a lit light bulb or a television screen? Or is it perhaps a sky or background image being used? If so then Surface Shader is the likely selection.
- Does the surface reflect light or is it fairly dull and flat when illuminated? More like carpeting or tree bark? If so then Lambert is a likely starting point.
- Is the surface really shiny and reflective like a chrome bumper, glass christmas ball or metal cup? If so then Blinn or Phong are what you want to start with.

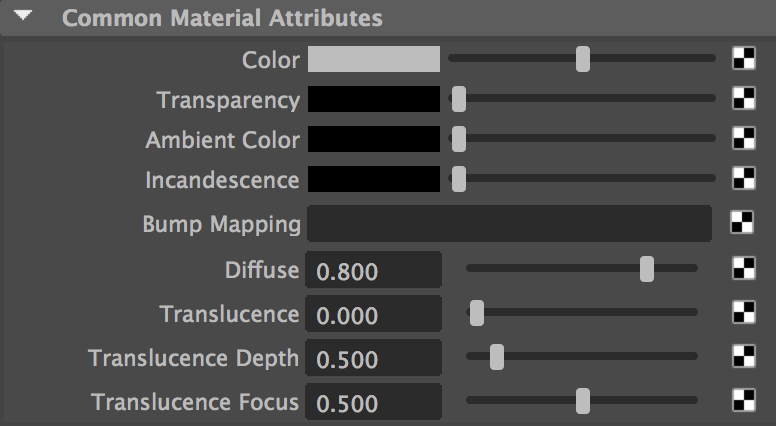
Each of the listed shaders with the exception of surface shader share some common material properties that include:
Color, Transparency, Ambient Color, Incandescence, Bump Mapping, Diffuse, and Translucence
In-fact Lambert has only these attributes. Moreover these attributes describe the basic base material properties of all objects (at least those in 3D simulated scenes) that describe how light is absorbed and appears when illuminated. Lambert shaders do not have any reflectivity to them at all.
Blinn has some additional attributes that describe how light is reflected from these objects called Specular Shading
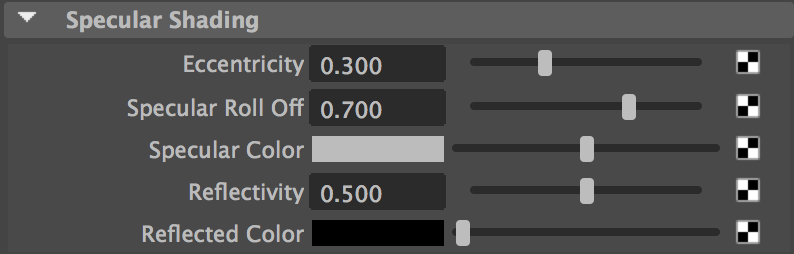
Similar to Blinn - Phong also has some Specular Shading properties but they are different and create a different look when adjusted.

The bottom line is before you begin thinking about color, or smoothness or patterns you have to decide:
- Able to be illuminated or not?
- Shiny or not?
Watch the following videos for overviews and examples of materials/shaders and how to adjust the attributes to change the base look of your models for both standard maya materials with Maya Software and Arnold materials with Arnold renderer.
2D Textures
Texture in the real world is often the description of how a surface feels to the touch. The texture of silk vs. the texture of burlap. The texture of calloused hands vs. the texture of a babies foot. While the way something feels is very connected to the way it looks in the real world textures in Maya also can describe how objects look in more detail than just the simple attributes listed above.
Let's start with a question. Can you create a shader for a bed sheet with just a single color? You can get close by choosing just the right color presuming the bed sheet is a solid color sheet. What about if that bed sheet has a pattern on it like stripes or balloons? To create this effect without having to resort to modeling the details comes from the use of textures.
Wait! but we don't have a stripes attribute for our shader or even a more general pattern attribute. What do we do? I am glad you asked.
In the attribute editor next to most of the attributes for the selected shader is a small black and white checkered button. Clicking on this button allows us to connect a texture to that attribute to further describe it using texture rather than just color or value.
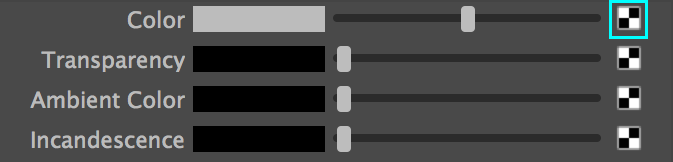
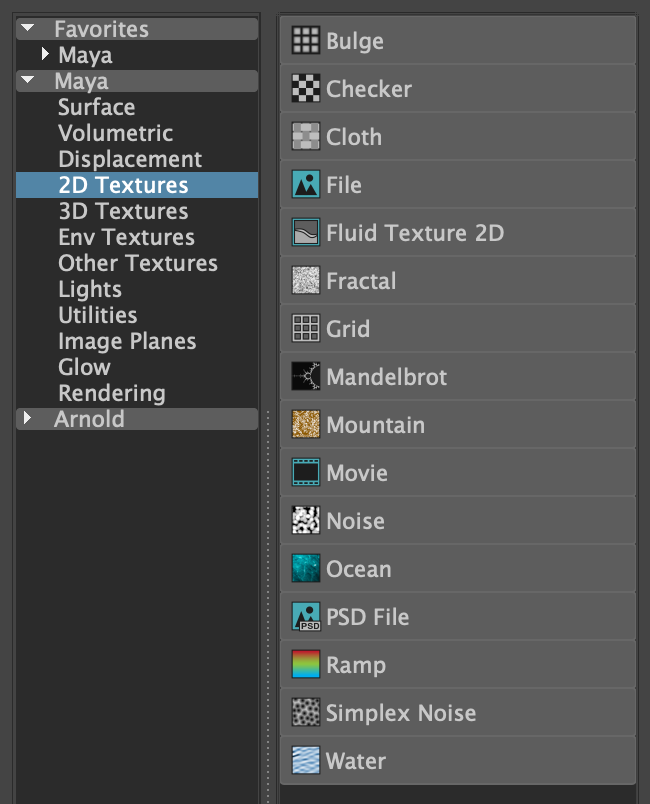
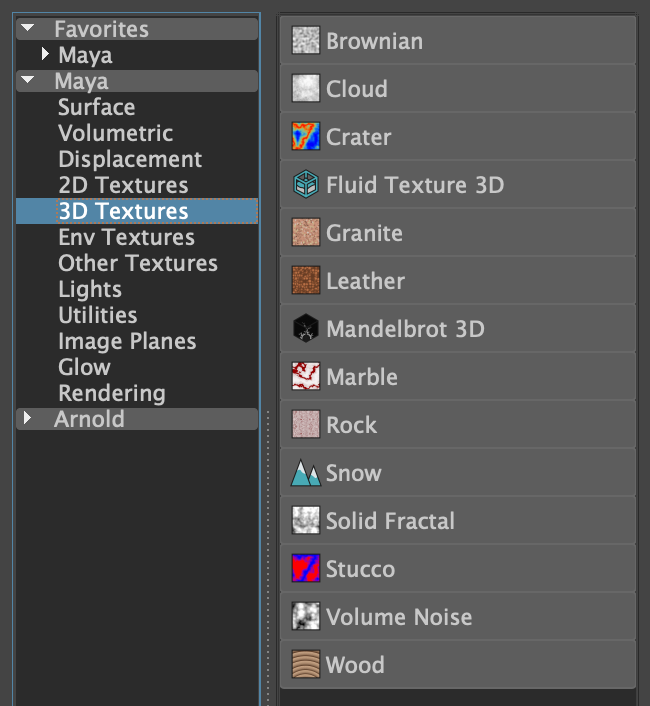
Once you select the checkered button you will see a popup to choose from a selection of different textures to apply to attribute that the button was next to. In this popup you can filter to just 2D or 3D, or others. For this section we are only focusing on 2D.
Think of 2D textures like wall paper or wrapping paper. The look of the texture will apply to our surfaces as if it were wrapped around it or stuck to it. If we select the Cloth texture from this list then the cloth texture will be applied to the color attribute of our shader and will subsequently be applied to all of the objects that have this shader applied to it.
Let's take a look at what that would look like by default.
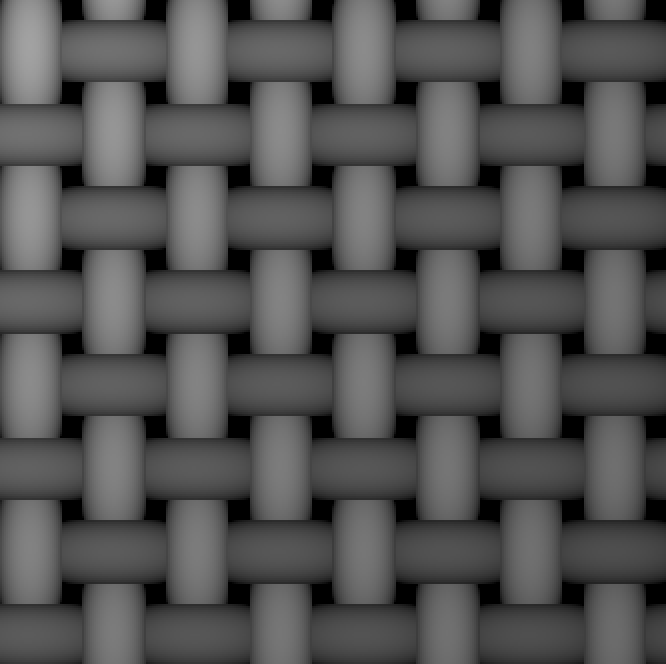
First lets see what the 2D cloth texture tile looks like. The look of this texture including the width and heighth of each section, their colors, the gaps in-between are all editable in the attribute editor when the texture is selected. This texture is created using math inside of Maya and is thus called a procedural texture, because a mathematical procedure is used to generate it. Either way this is a 2D texture that can be thought of like wrapping paper.
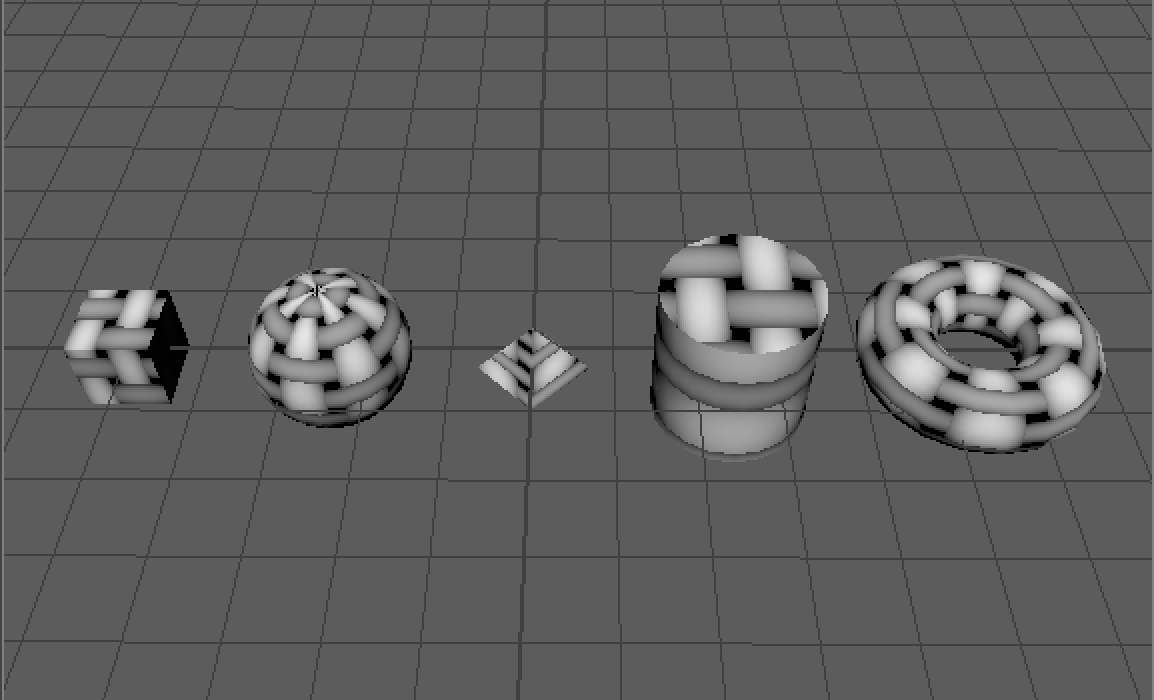
This same shader that contains the default cloth texture on the color attribute applied to different primitive objects will look very different.
How and why they are different has to do with how each of the objects UV's are laid out. We will talk about this more later, but suffice it to say the texture is wrapped around each of these objects and has a more or less stretched or patched result.
Watch the following video for some further examples of 2D textures and how to adjust and layer them to create different and more interesting effects.
3D Textures
3D Textures are applied to attributes in the exact same way as 2D textures. The difference between them is how the texture shows up on the model.
Using the analogy of 2D textures behaving like wrapping paper wrapped around our models surface a good analogy for 3D textures would be a cup full of egg dye and the immersion of our egg within it. Where that dye exists in 3D space applies to the egg at that location. 3D textures are also procedural in that their look is generated mathematically.
3D Textures have an additional node attached to them that can be edited in the viewport that describes the virtual container in which the "texture" resides. In reality the object can be outside of the container and still have texture but its scale, rotation and position do change how the texture is applied.
This all probably seems needlessly complicated, but 3D textures provide a key advantage over 2D. Stretching and seems are non-existent with them. There are however a few additional things to look out for in relation to how objects with these shaders will be animated in the future.
Check out the following videos for some examples.

UV's and UV Mapping
Before we get into what UV's are and how they work lets focus on what they do and the benefits they provide. UV's allow us to control exactly how our 2D textures are wrapped (or applied) to our models.
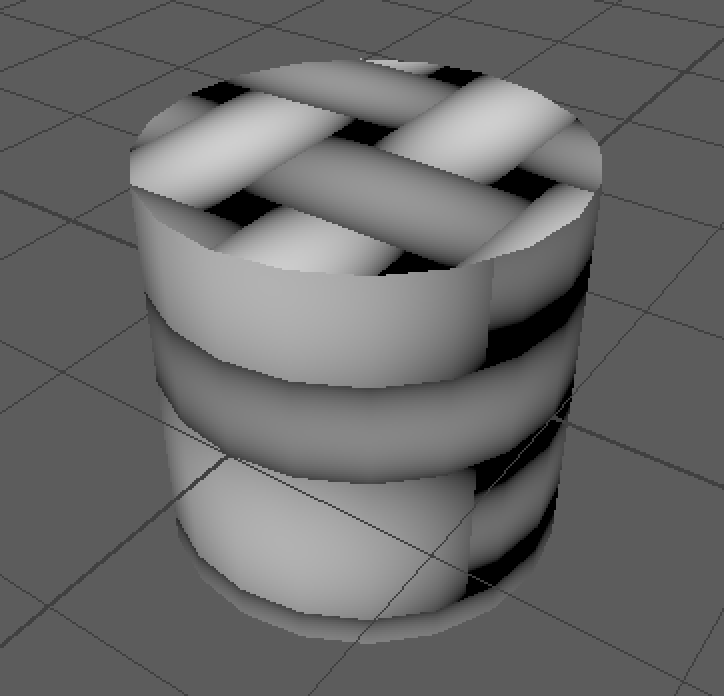
Let's take another look at that cloth texture we explored earlier and how it is applied by default to a cylinder. The top looks pretty good, but it doesn't seemlessly blend to the sides and in-fact the sides look very distorted and stretched and nothing at all like cloth. Doesn't seem very useful does it?
Usefullness of 2D textures is where UV's come in. UV's are actually a component of polygons that resemble vertices that are not moveable in 3D space and actually every vertex has at least 1 UV component attached to it. UV components map vertices into a 2-Dimensional plane and allow us to tell Maya how 2D textures are applied to those vertices.

In the image above you can see the UV Editor on the left with the Persp camera on the right. Both have UV Component mode active (Right Click -> UV).
Notice the circle on top of the 2D grid on the left side and how the cloth texture underneath it looks. Compare that to the top of the cylinder on the right in the 3D view. They match! This isn't a coincidence this is how that texture is applied to the top of the cylinder. If you were to move the camera to the bottom of the cylinder in the persp view it would look the same as the the bottom circle in the UV Editor.
What about the rectangular section in the middle? It seems kind of small and sqished. What part of the cylinder is that? That is the entire outer ring of the cylinder. If you think about how much texture (about 2 threads) of our cloth texture fits within its boundaries you can see that they are stretched around the entire outer ring.
Without yet going into how let's see what different it will make if we stretch out the boundaries of that section of UV's in the UV Editor.

Stretching out the UV's for that section of the model informs Maya to give more of the 2D texture area to those faces in our model.
The position of every one of our UV's in this 2D area of our UV Editor will change how 2D textures are applied to our models. UV's can also overlap if it makes sense for them to do so.
Watch this video to learn how to manipulate, layout and stitch UV's in the UV Editor to control how 2D textures apply to our models.
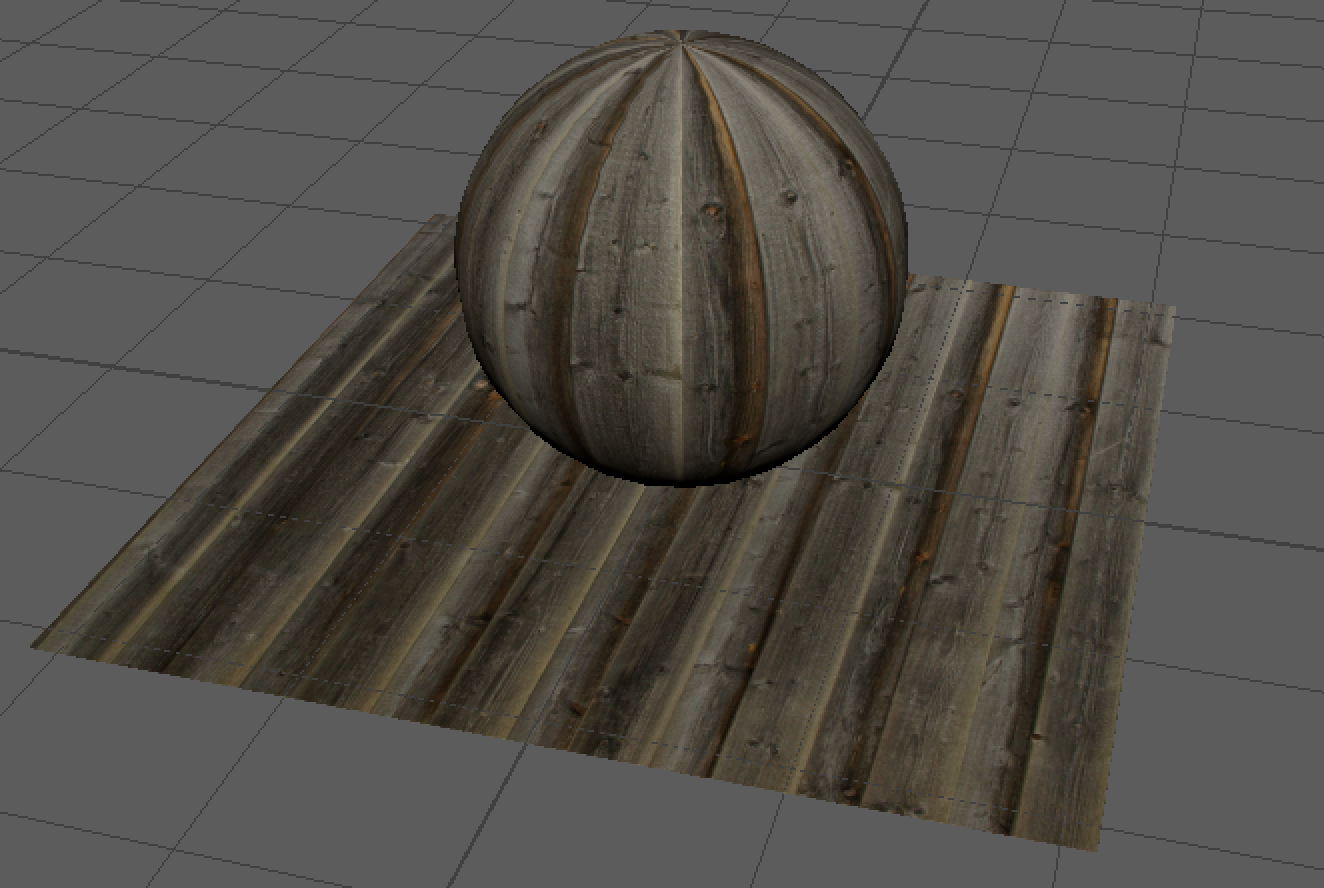
Beyond the use of procedural textures in Maya we can take advantage of a technique that allows for very specific and non-mathematical application of texture to our models that leads to more realistic or specific results and that is the use of file textures.
The file texture is a 2D texture that allows us to use an image file as the source of our texture. This file texture can be anything from a logo to a photo of rusty metal or wood slats. ANYTHING
Watch this video to learn more about file textures and their use.
If you have never used Photoshop before I encourage you to watch this short primer to get acquainted with the interface and some of its workflows.
Wouldn't it be cool if we could just paint on the surface of our model to place the texture we want where we want it in 3D space? The truth is there are tools that can do this like Substance Designer/Painter and ZBrush, but it is outside of the scope of the maya tool set to do this. However, you can export your UV map for your model -- bring it into Photoshop to paint -- save as image from Photoshop -- apply the new image from Photoshop as a file texture to achieve the same result.
Watch the following video to see how this is done.
Finally I want to introduce you to some additional utilities you have access to as you build out your shading networks. These nodes provide you methods to combine values, colors, and other inputs that can drive changes to how textures and material properties get rendered. These are utility nodes and while we are only scratching the surface here, this introduction will point you to their existence and consideration.
Using all of the techniques covered in our overview of Materials, 2D and 3D Textures, UV Mapping and File textures you can create incredibly complex and effective shaders for your models no matter what look you are going for. Through practice and creative problem-solving you can literally re-create any surface you desire for your models. This is not an easy skill to master, but being that this is just an introduction I encourage you to dig further.
We aren't done yet though. Let's move on to using these skills to create some different materials for our Alien and Saucer models shall we?
Assignment
1 Alien - UV Mapping
2 Alien - Maya Software
3 Alien - Arnold
4 Saucer - UV Mapping
5 Saucer - Maya Software
6 Saucer - Arnold
5 Your final deliverable will once again be 2-6 different rendered still images of your fully shaded and textured alien and suacer models. Submit these files on UNM Canvas to Assignment 4.
-
Module Instruction
Review Module Written & Video Material -
Lab & Exercises
Work on material in lab -
Quiz
Complete Quiz 4 on UNM Canvas -
Assignment
Complete the Alien and Saucer Shading & Texturing Assignment #4 and submit on UNM Canvas