Module 9 - Rendering
Rendering Overview
Definition From Wikipedia
Rendering is the final process of creating the actual 2D image or animation from the prepared scene. This can be compared to taking a photo or filming the scene after the setup is finished in real life. Several different, and often specialized, rendering methods have been developed. These range from the distinctly non-realistic wireframe rendering through polygon-based rendering, to more advanced techniques such as: scanline rendering, ray tracing, or radiosity. Rendering may take from fractions of a second to days for a single image/frame. In general, different methods are better suited for either photo-realistic rendering, or real-time rendering.
Rendering is the last stage of the 3D pipeline where your final images are created and then passed into the "Post-Production" pipeline. Sometimes it may just be a single still image you are creating or a sequence of images from an animation or even collections of render layers for an animation.
Renderers
In Maya we have a number of different renderers available to us. You can find these listed in the dropdown of your render settings window. In Maya 2023 that includes:
- Maya Software
- Maya Hardware 2.0 (aka: Viewport 2.0)
- Arnold Renderer
If you do not have arnold in your list of optional renderers you must:
- Check if it is installed and just not loaded. Go to Windows > Settings/Preferences > Plug-in Manager. Look in the list for mtoa. If you see it ensure that the Loaded and
- Auto load check boxes are checked and skip the rest of these steps. If you don't see it make sure you are using Maya 2018+
- Maya has a legacy hardware renderer that has really low quality, but it is very fast (Good enough for working in the scene, but almost never good enough for a final output).
- As of Maya 2014 there is an upgraded hardware renderer that is much better and offers some really nice features including screen space occlusion, anti-aliasing, motion blur and better shading quality. Hardware 2.0 is very fast and can possibly be good enough for final output, but it will depend on your needs
 1024x1024 (<1 sec)
 1024x1024 (<1 sec)
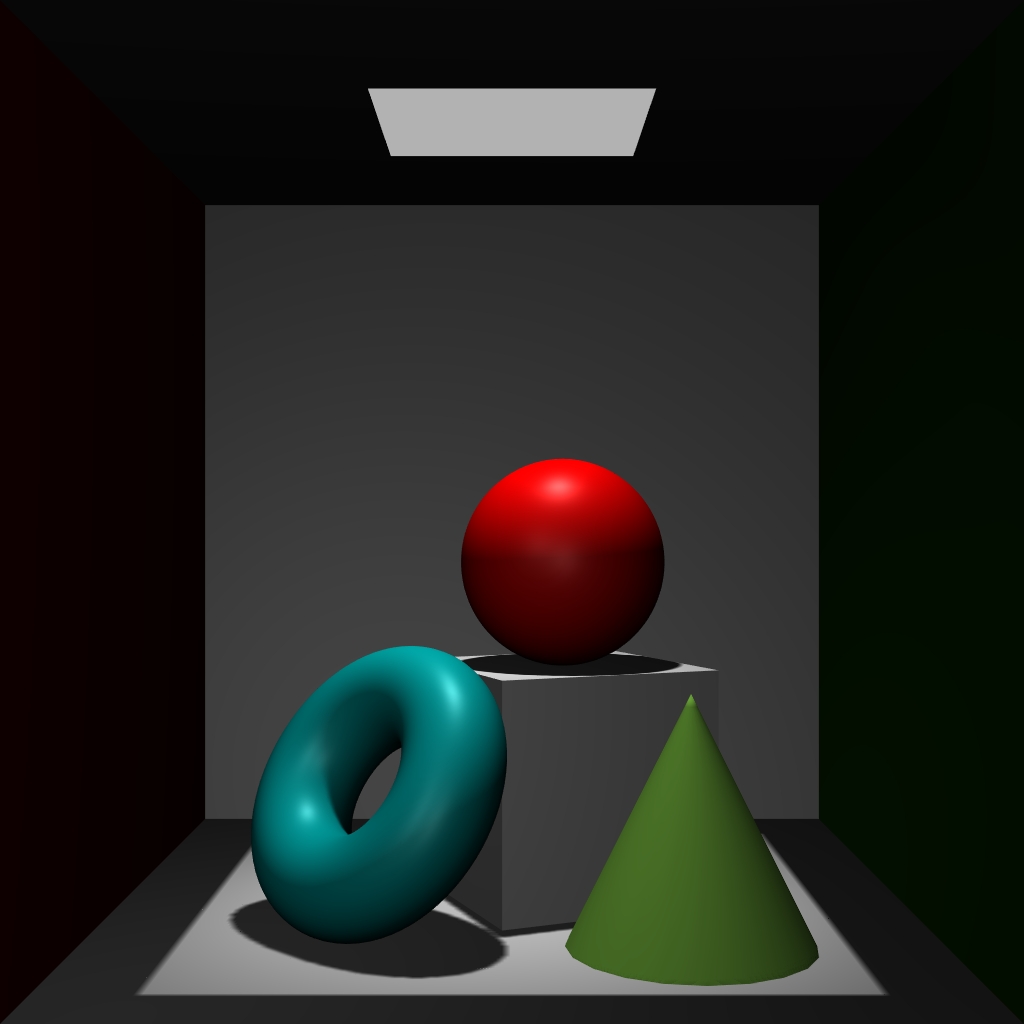
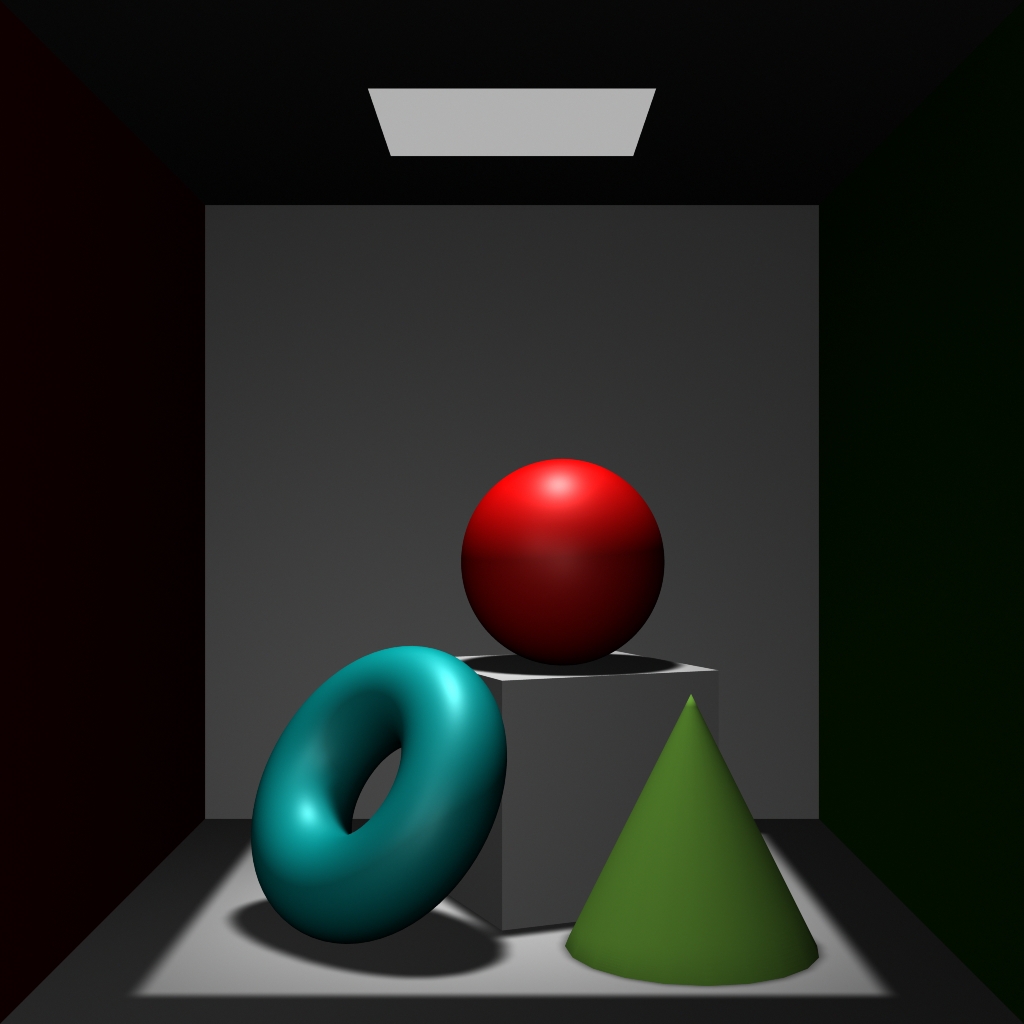 1024x1024 (6 sec)
As you can see from these 3 images the renders are actually fairly close to one another in perception. Look closely at the gradation of the back wall of the cornell box between each image. The blocking and banding in legacy and hardware are pretty noticeable and would be problematic for most outputs. Maya software doesn't have it at all. Also note the shadow quality between each render. Maya Software once again has a better more smooth quality. However, the Maya Software render took 6 seconds to complete while both hardware options took less than 1 second.
Let's take a quick time-out to discuss render times. Our little tests above might not be a great sampling of why render times are so important because really what is the big difference between 1 second and 6 seconds! This may be true for a single still image, but what about when we are doing animation. A bit of simple math should help us explore this.
Let's start with a single shot that is 20 seconds long. At 24 frames per second we will have a total of 480 frames to render.
seconds * fps = total frames
20 * 24 = 480
To calculate the total time our rendered sequence will take we multiply the time it takes for a single frame to render by the total amount of frames we have to render
total frames * render time per frame = total render time
For each of our hardware renders it is ~1sec per frame so:
480 * 1s = 480s or 8 minutes
Now let's look at that difference for the software render:
480 * 6s = 2880s or 48 minutes
Our render time for our entire sequence jumped from 8 minutes, which is enough time to grab a coffee and hit the loo, to 48 minutes which now means lunch or more time waiting for progress bars.
Again this doesn't seem like that big of a deal. Let's translate this to even a small but realistic project such as a 10 minute marketing promo.
600sec * 24 = 14400
14400 * 6s = 86400s or 1440 minutes or 24 hours
This is with a very simple scene with very simple render settings and all of this presumes that everything goes right the first time and nothing has to be redone. It isn't atypical for a production render to take 2 minutes per-frame easy. This now takes 20 times longer to render. Doing the math you'll see just how crazy this process can be and why huge farms of servers are required in a render farm to handle these jobs.
At this point you might be thinking that I am saying that better quality is not worth the time to render. This is absolutely not the case! Your final rendered images need to showcase the best quality you can achieve. I simply want you to be aware of the realistic cost of render quality and how to manage it. We will talk more about controlling this later.
Optimization
Rendering is an essential part of the CG production pipeline. Even if you are working on games rendering is just handled in the game engine and becomes frankly all the more important. Optimization of renders is the practice of squeezing the most quality into your frames while paying as little for it in render time. Even if you have a massive bank of high performance servers at your beckoning call (which you won't most of the time) you still have to be efficient. Rendering seems like a simple process. Just set a few settings and click "Go" and let the computer do the work. Unfortunately your renders will crash or end up with errors in them requiring a redo. Your directors will make changes (Including yourself) that will require re-renders. This is all the more reason to make sure you optimize. So let's talk about how we do that with the Maya Software Render.
There are many things that play into an increase in render time including:
- Number of polygons
- Shading features (reflection, refraction, etc.)
- Textures
- Use of and resolution of file textures
- Lighting
- Shadow type and settings
- Depth of Field
- Image resolution (# of pixels of final image)
- Anti-aliasing settings
- Shading samples
- Use of ray tracing and number of rays
- Combination of ray tracing with reflection and/or refraction
- Motion blur
The blue items above are found in the render settings while the others are controlled at the object, light, camera, shader level.
There are others but these are the most obvious and the best places to ensure you are being optimal.
We aren't going to look at all of these but let's do a basic comparison using ray tracing since it is a commonly used render method for quality and introduces some of the more obvious places for optimization.
 1024x1024 (6 sec)
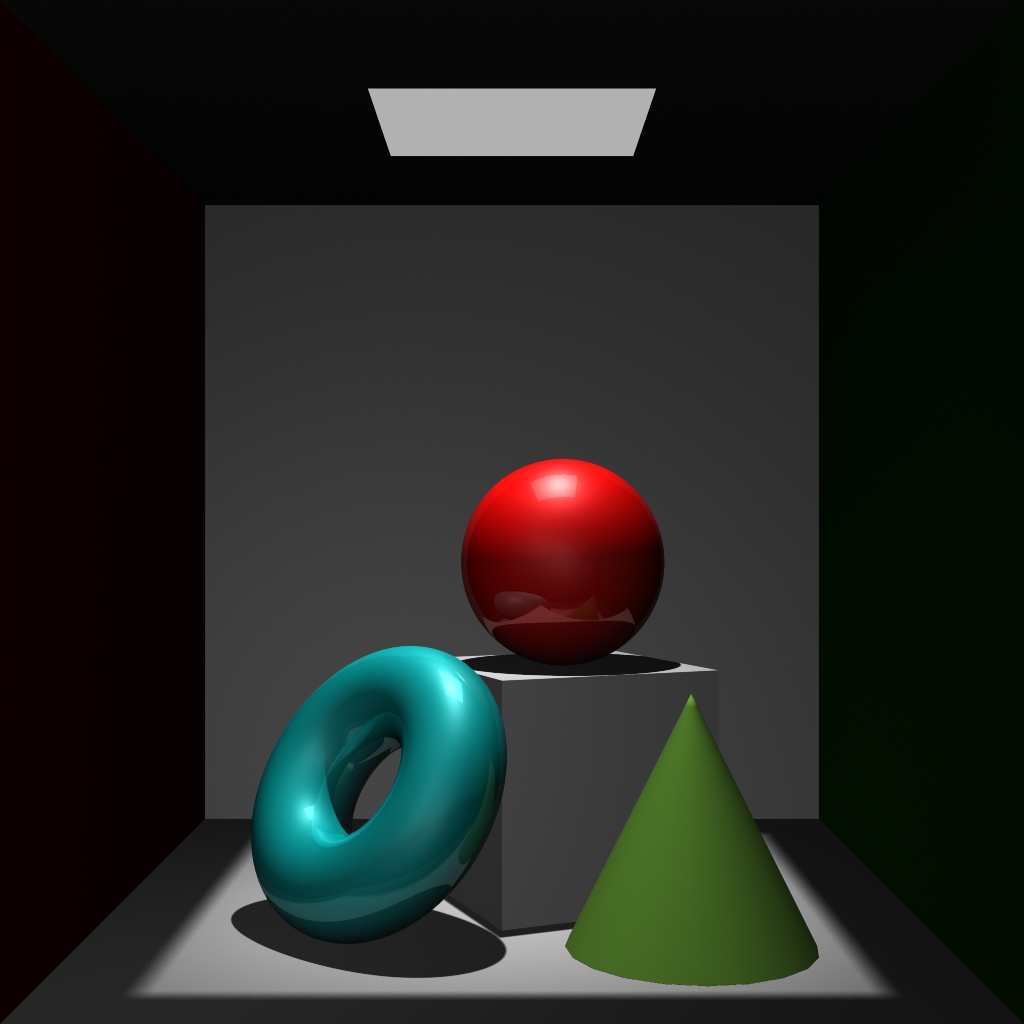 1024x1024 (20 sec)
The addition of the reflections and more realistic shadows is a nice touch, but by itself increases render times by over 3 times.
Now let's look at a live scene rendering with Maya Software to see what we can tweak to play with optimizing this scene.
And again using Arnold
Indirect Illumination
We talked very briefly about indirect illumination in the lighting module. Now let's look at what this is and how do we control it.
The only way to get indirect illumination using the Maya Software renderer is to simulate it using direct illumination. A lot of fill lights can accomplish some of the effect, but it quickly becomes difficult to manage and still doesn't achieve a very realistic result. Arnold on the other hand has some options for us to achieve indirect illumination. All of them require the use of ray tracing and it definitely increases render times, but not as much as it used to with mental ray
Here are some helpful links to get you going
- Overview of Maya/Arnold Lights There are other helpful docs in that area about arnold as well.
- Render Sampling
Assignment
For your assignment this week you will be optimizing your animated alien scene in either Maya Software or Arnold render that includes indirect illumination based on what you have been planning to do. For your final submission please follow the image sequence -> compressed h264 mp4 movie conversion process outlined in the solar system assignment. Your final submission will be the compressed movie file of your rendered image sequence and uploaded to the UNM Canvas Assignment 8.
-
Module Instruction
Review Module Written & Video Material -
Discussions
Provide post to Discussion 8 on UNM Canvas -
Lab & Exercises
Work on material in lab -
Quiz
Complete Quiz 8 on UNM Canvas -
Assignment
Complete the Alien Scene Rendering Assignment #8 and submit on UNM Canvas